Kit – Using It, Fighting Order
Fighting Order (aka Second Line).
.
The previous two articles in this series speaking of the general over-arching concepts (seen HERE) and our Third Line, or Marching Order (seen HERE). Now, let us continue the saga to discuss the Second Line or Fighting/Patrol Order.
.
As has been covered in earlier articles:
.
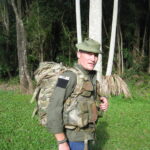
We have previously examined the large pack, which provides our daily living equipment (seen HERE). Now we can delve into equipment that is needed to fight or achieve the mission.
As previously mentioned in the overview article (seen HERE), there is a fair bit of overlap between each level.
.
The Second Line equipment could have relevance to other end-users and industries. Off the top of my head, I can envision such end-users as hunters, photographers, and other outdoor professionals that require mission essential equipment without the large pack.
.
It should be noted, that I am speaking from the perspective of an Australian light infantryman who spent significant time with non-traditional roles in a mounted capacity.
It should also be noted that the ADF use the term “webbing” for our second or fighting order as a catch-all phrase for any Load Bearing Harness/Equipment (LBH or LBE) for fighting load.
Traditional belt mounted webbing consisting of a series of pouches hanging off a belt with some form of shoulder harness is the staple form of fighting order. In essence, it has not progressed that far from the original format from the Napoleonic era. It has taken a very long time for us in the ADF to adopt other forms of LBE for our fighting order due to a couple of factors:
Institutional inertia, and our environment of hot, arid or humid conditions. Belt webbing is often the optimal solution for many of our operational requirements.
.
I have very little time using combat body armour, so my perspective is going to be somewhat dated nowadays. The modern requirements for that Personal Protective Equipment (PPE) is going to present its own difficulties and planning factors, but the principles I suggest should be capable of being applied universally.
.
Alright then, let us move onto fighting order itself.
Traditionally and doctrinally, one’s webbing (or fighting order) is required to carry some essential kit.
Webbing needs to carry the following:
.
Obviously, this is entirely dependent upon mission, climate and terrain.
There are some issues with this requirement for 24 hours of sustainment away from the patrol pack. Principal amongst them is the classic tendency to over pack for the situation.
.
There are several real-world considerations that need to be considered. Fighting order LBE needs to be minimalist in bulk, whilst maximising accessibility and carrying capacity. It needs to be comfortable, without retaining heat. It needs to be light, without sacrificing durability.
The wearer needs to be able to run, crawl, climb and fit through narrow openings or close terrain with minimal snags.
In short, one’s webbing often becomes like a very intimate second skin carrying all our mission essential equipment.
.
With many things in life, it can also be observed that experience and training levels have a direct impact upon loads carried and their size.
.
For the Australian Army, our doctrinal webbing loadout for a rifleman in training is:
5x magazines, F88 (Steyr AUG)
Cleaning kit, F88
Bayonet
Toggle rope
2x 1-quart canteens
1x cup, canteen (cup with folding handle that slips over the canteen)
1x 24-hour Combat Ration Pack (CRP)
Raincoat and/or jumper (the old Howard Green)
Knife, fork, and spoon set
Fold-up hexamine stove and fuel blocks
Millbank filter
Spare radio batteries (AN/PRC-77)
Shell dressing (Israeli bandage)
.
This is a load that can be somewhat bulky and heavy.
I found that some items would be pared down and reduced as much as possible, to allow others to be increased or have equipment added.
My load as a rifleman in a Land Command unit, outside of Training Command was outlined below:
5-7x magazines, F88 (Dependent upon unit and role. In a reconnaissance role, our SOP’s dictated up to 10-14x magazines.)
1x 200rd belt of 5.56mm link ammunition for the Section’s Light Support Weapons (LSW)
2x F1 Fragmentation Hand Grenades
1x smoke grenade
Cleaning kit, F88
Bayonet
Toggle rope
2x 1-quart canteens
2x cups, canteen (one for eating/drinking, the other for shaving/washing)
Millbank filter
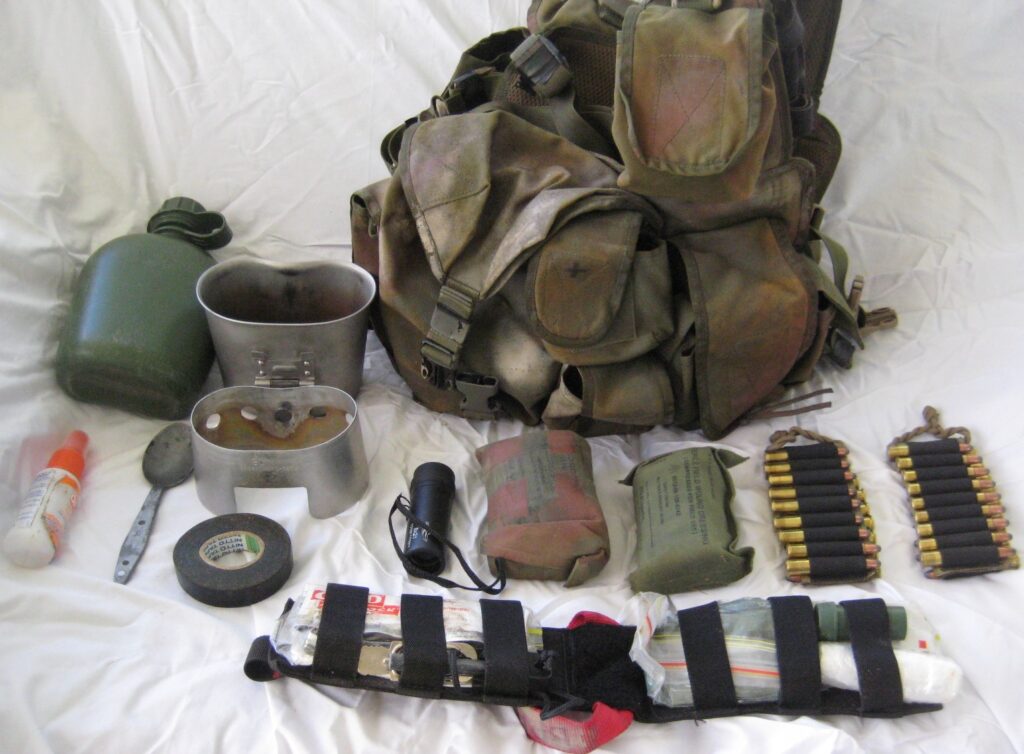
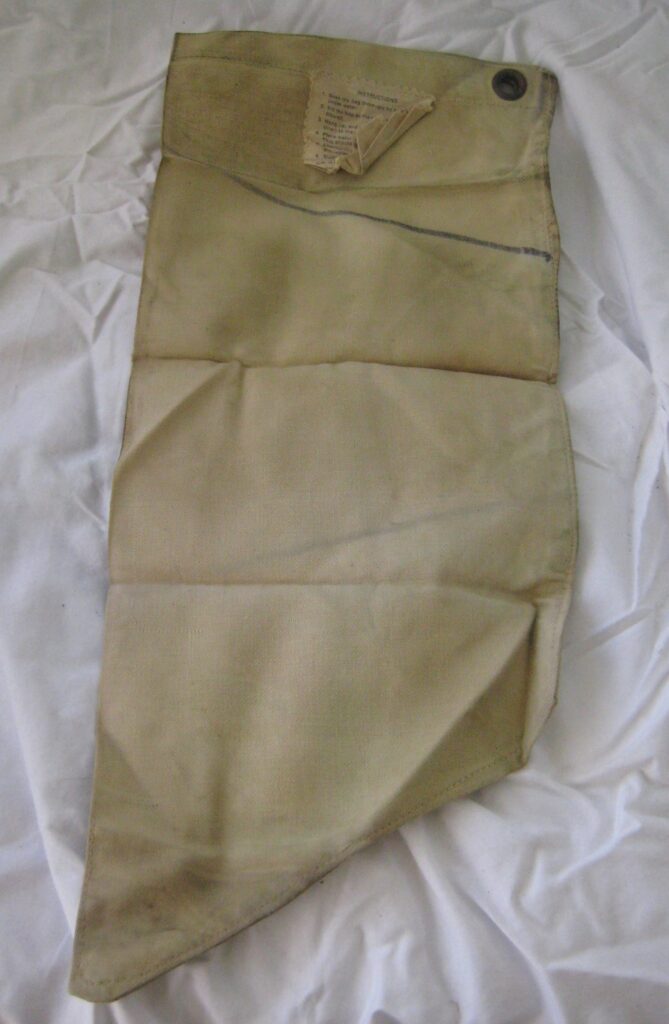
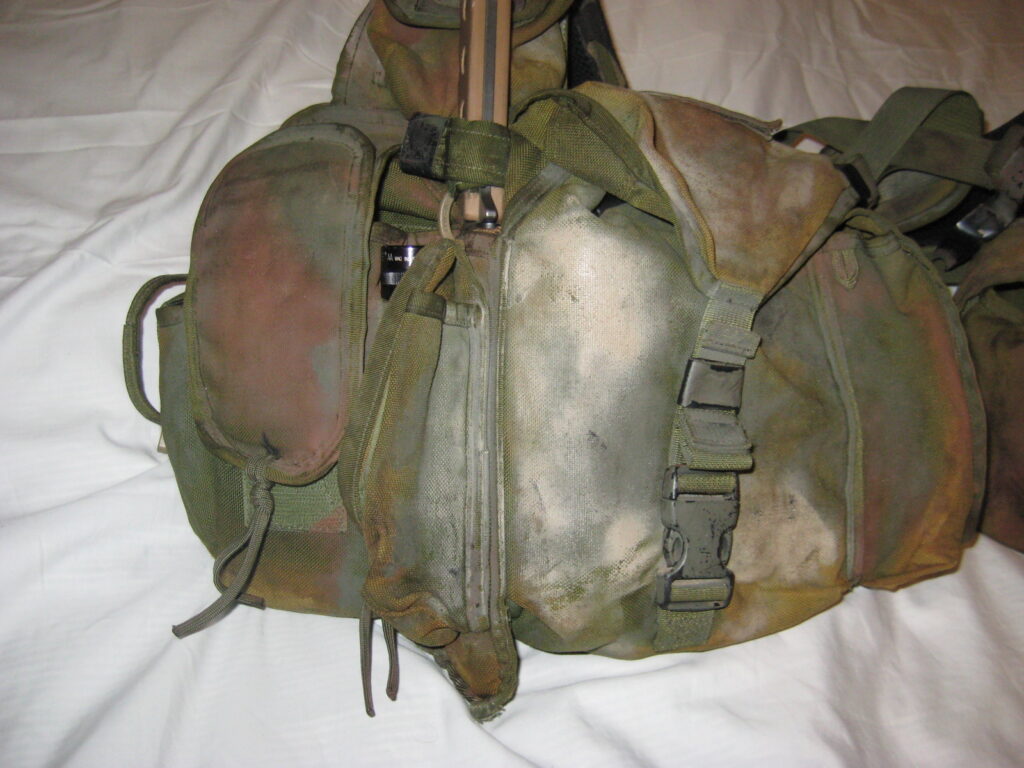
Hexamine stove, slip over (a picture of which can be seen below) and blocks of fuel.
1x meal (tin or bag of food)
Brew kit (teabags, sugar, cordial sachets)
Snacks (often high energy items such as beef jerky)
Night vision tube (Ninox) and head harness
2x shell dressings (Israeli bandages)
Nowadays, the fighting load will also have personal communications such as MBITR and PRR radio sets.
.
Let’s talk then about how to carry all that gear for patrol and battle then.
There are several types of platforms available to carry all this fighting load.
We have already briefly discussed belt webbing.
Belt webbing is a traditional setup of a belt around the hips supported by a suspender harness. The basic rig has been in use since Napoleonic times. Often it is a good generic solution to fighting load carriage, it suffers from poor integration with modern hip loading belts as found on quality patrol packs.
 .
.
Chest webbing (or Battle Bra in Australian vernacular) is a one-piece pancake structure with harness straps to keep the load higher on the chest. As seen HERE with my previous review of the ATS chest rig.
Equipment can be more easily accessible than other rigs, but there is often less real estate and carrying capacity. Many in mounted roles or working in built up areas prefer chest rigs.
.
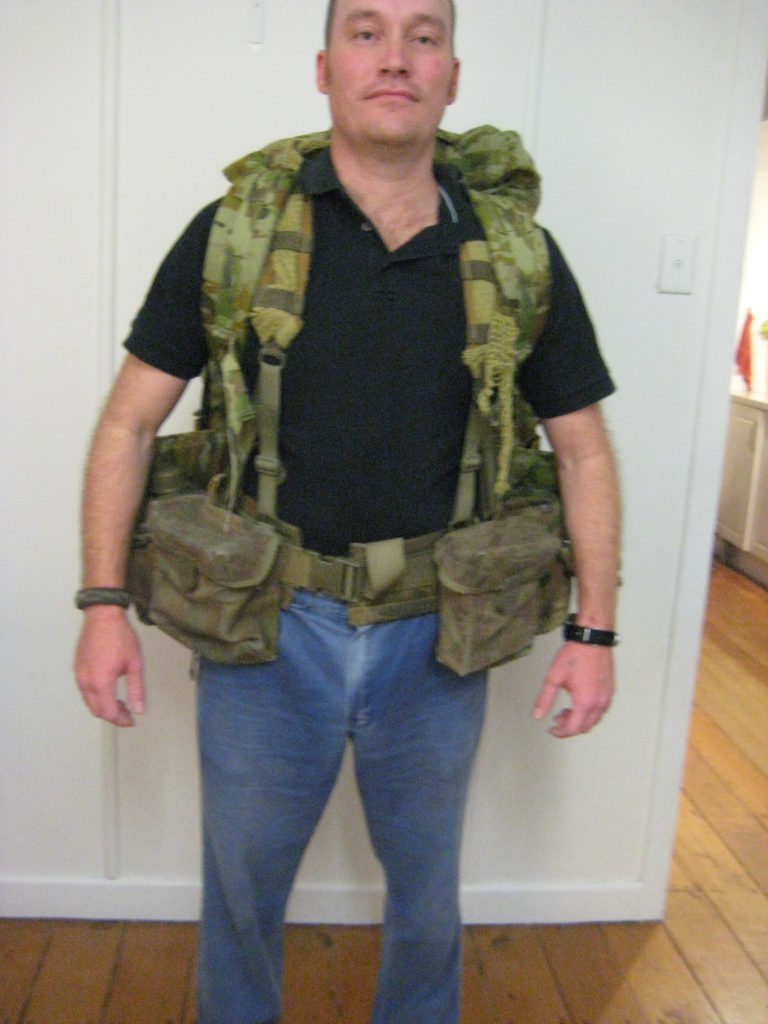
Split-front chest rigs (such as the Smamit rig seen HERE) are my personal favourite for a general-purpose rig. It gives a good combination of accessibility, comfort, and integration with other equipment such as the patrol pack harness.
.
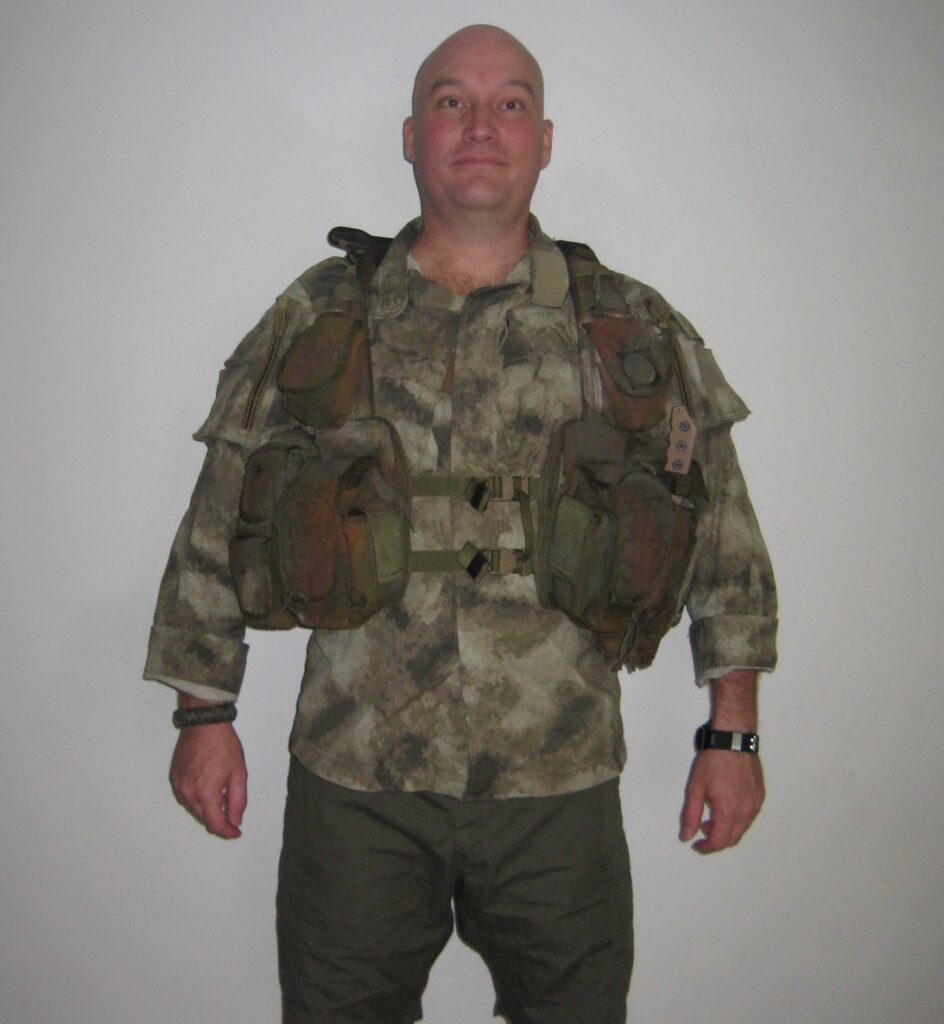
A combat vest, or Fighting Load Carrier as our American allies describe it, is a larger and vest-like garment that offers almost as much carrying capacity as belt webbing, but carried more comfortably closer to the body. The major drawback can be heat retention and integration with patrol packs, depending upon set-up.
.
Alright, now that we’ve spoken of the different platforms, let’s speak of the important stuff.
We will talk more detail of setting up belt webbing in a later article down the track. But for now, basic principles across any platform will be discussed.
.
There are several general principles that need to be applied to the fighting load. These aren’t hard and fast rules, but these are what I consider should be analysed to meet the mission requirements.
.
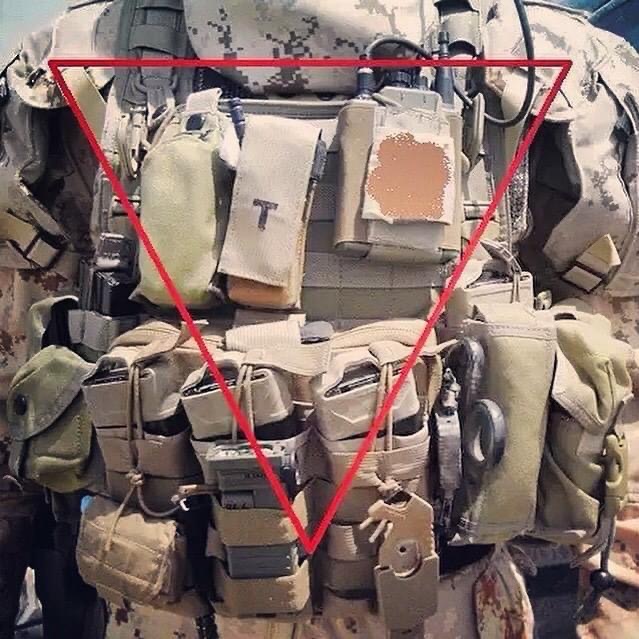
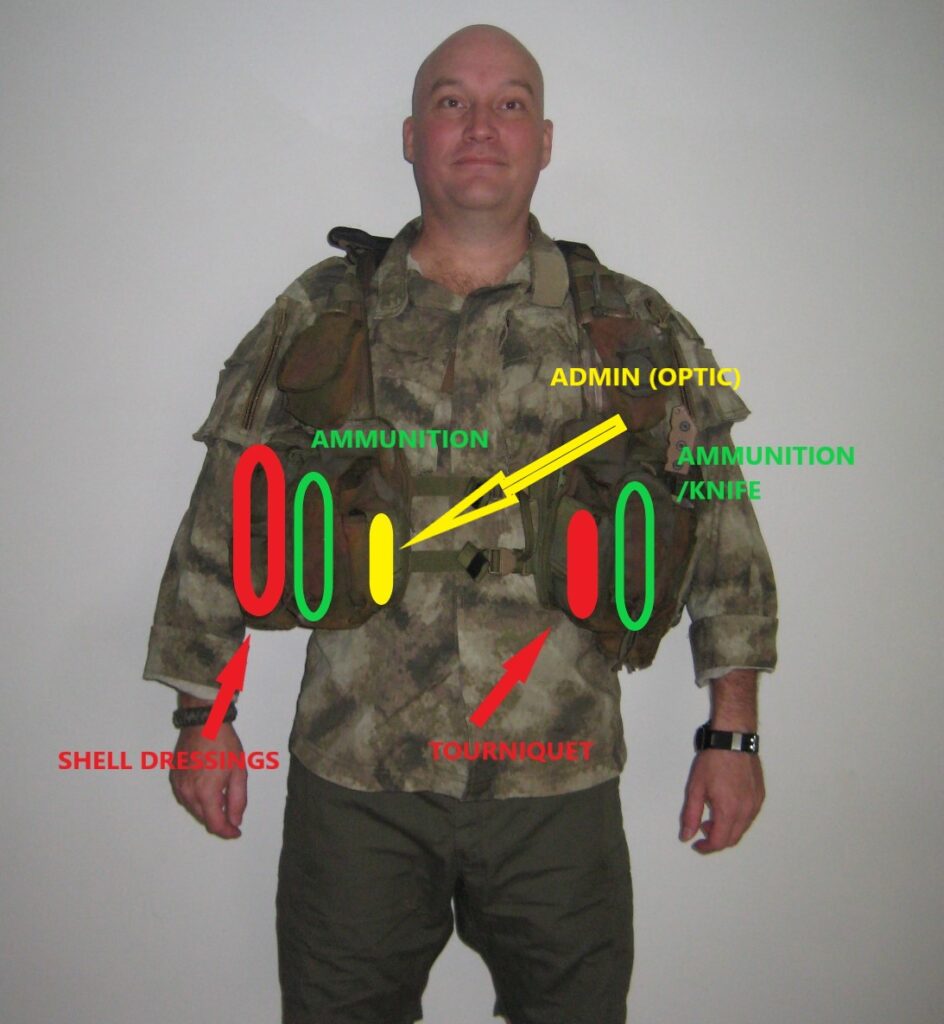
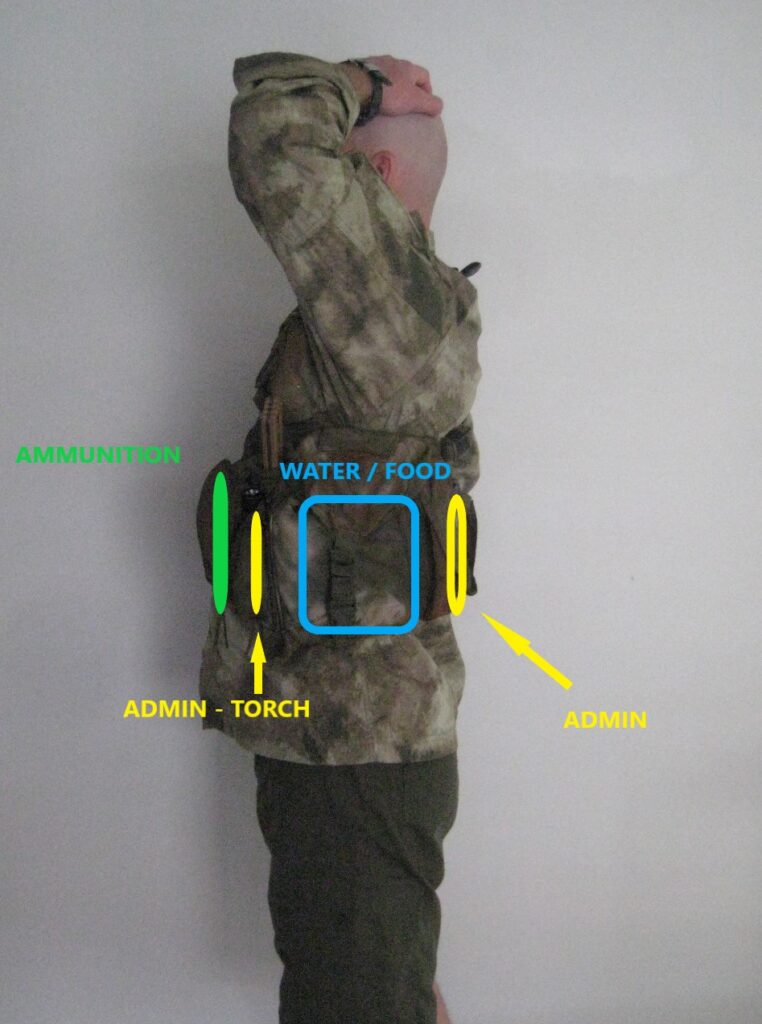
When in doubt about placement of equipment on the load bearing fighting harness, another great concept to consider is the Diver’s Triangle.
The Diver’s Triangle is an inverted triangle from the point of the shoulders down to the umbilicus.
This triangle is where lifesaving equipment (such as tourniquet and shell dressings) should be stored that will allow access by either hand in any position.
Here, we have a picture from our friends Whiskey Delta Gulf (they can be found HERE or HERE) demonstrating the Diver’s Triangle:
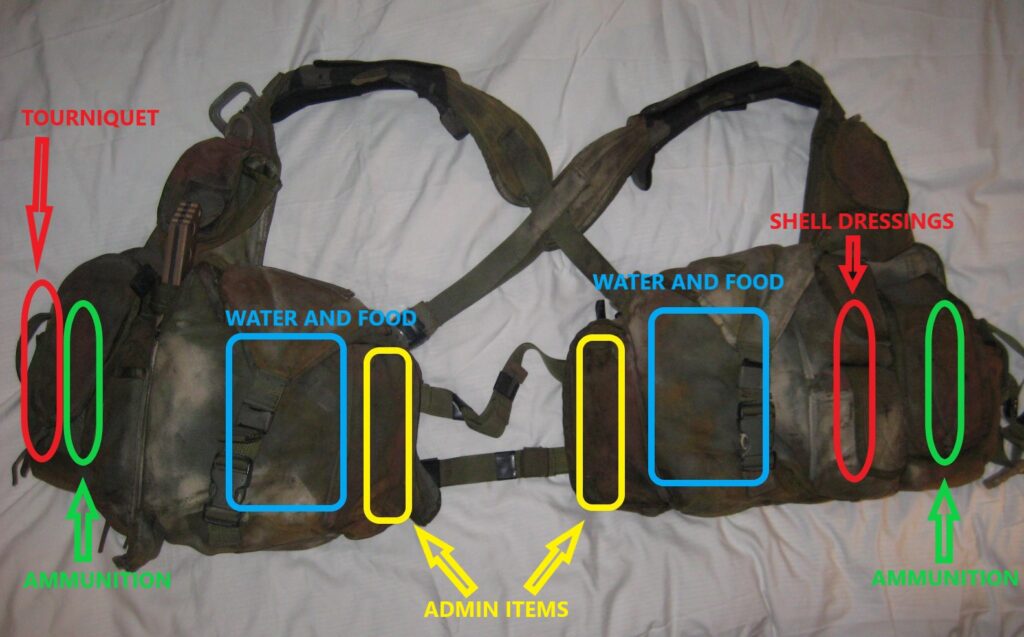
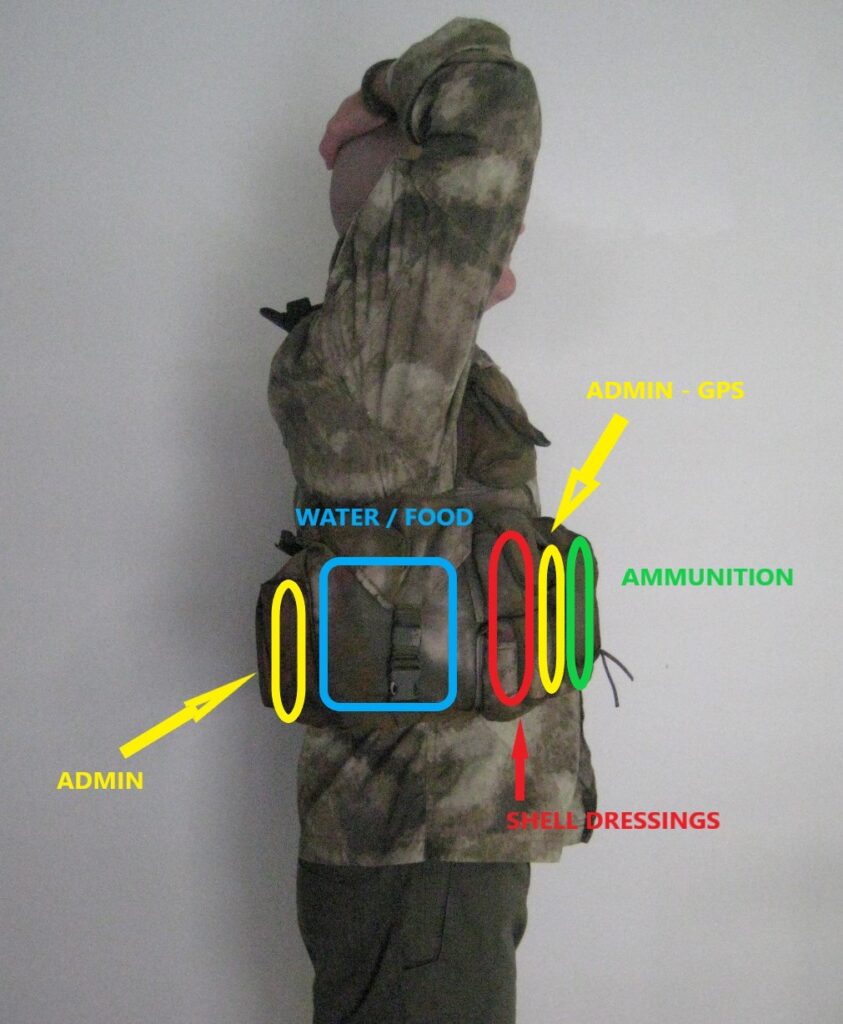
Outlined below is how I have my split-front chest rig set-up and where items are located.
Just like most of my “How-to” articles, this is “A” way to setup your fighting load/webbing. It’s certainly not intended to be “THE” way, but it’s “MY” way…
How it sits on me:
.
Basic layout:
.
.
NOTE: If I was ever to carry fragmentation hand grenades again, then the shell dressings would be moved to the pouches up on the harness.
.
Right Hand Side:
.
Ammunition
2x shell dressings
An 8x21mm monocular
Roll of electrical tape
Mosquito repellent
Spoon
1 quart canteen
Cups, canteen
Canteen cup stove.
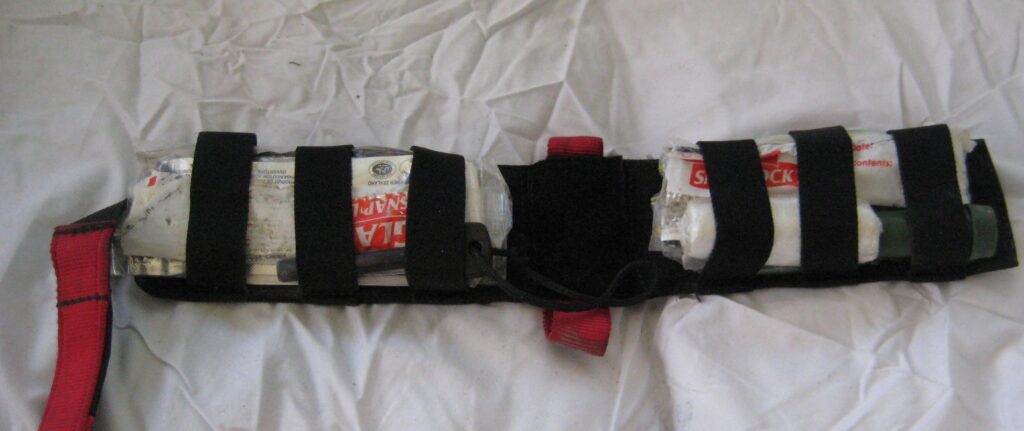
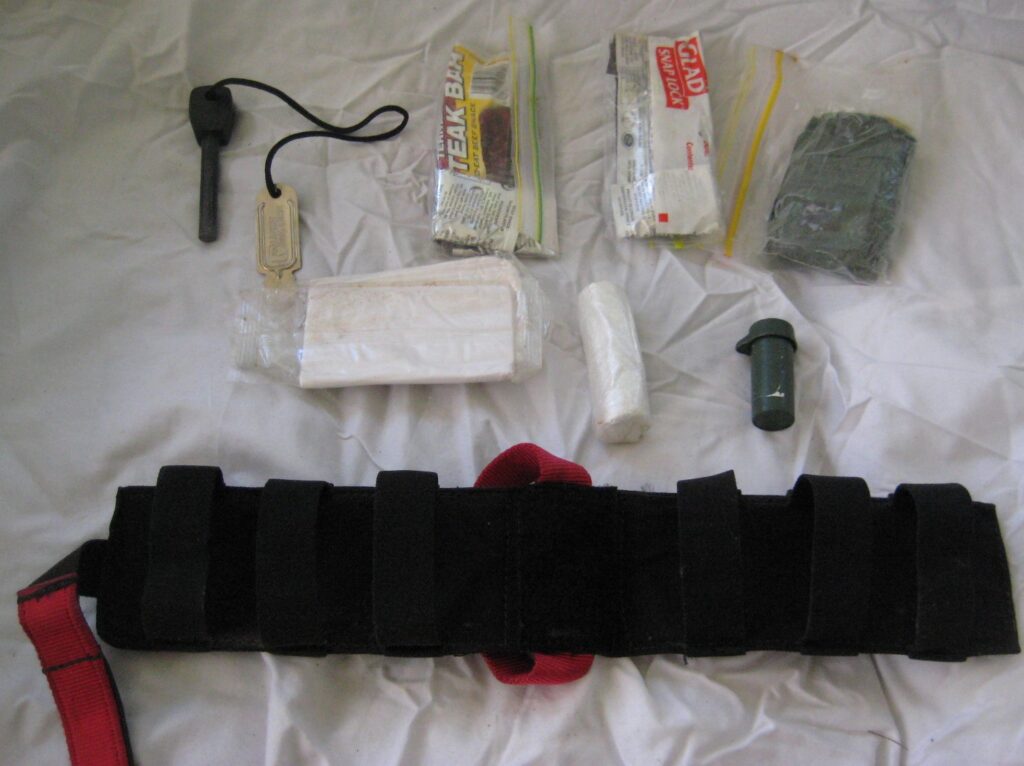
An ATS Low Profile Medical Insert (Review seen HERE) with brew kit (beef jerky, teabags, sugar, fire-starter, matches in a water-proof container, hexamine fuel tablets, toilet paper, can opener, and water sterilisation tablets)
.
.
In my internal stowage is my Millbank filter.
.
Left Hand Side:
.
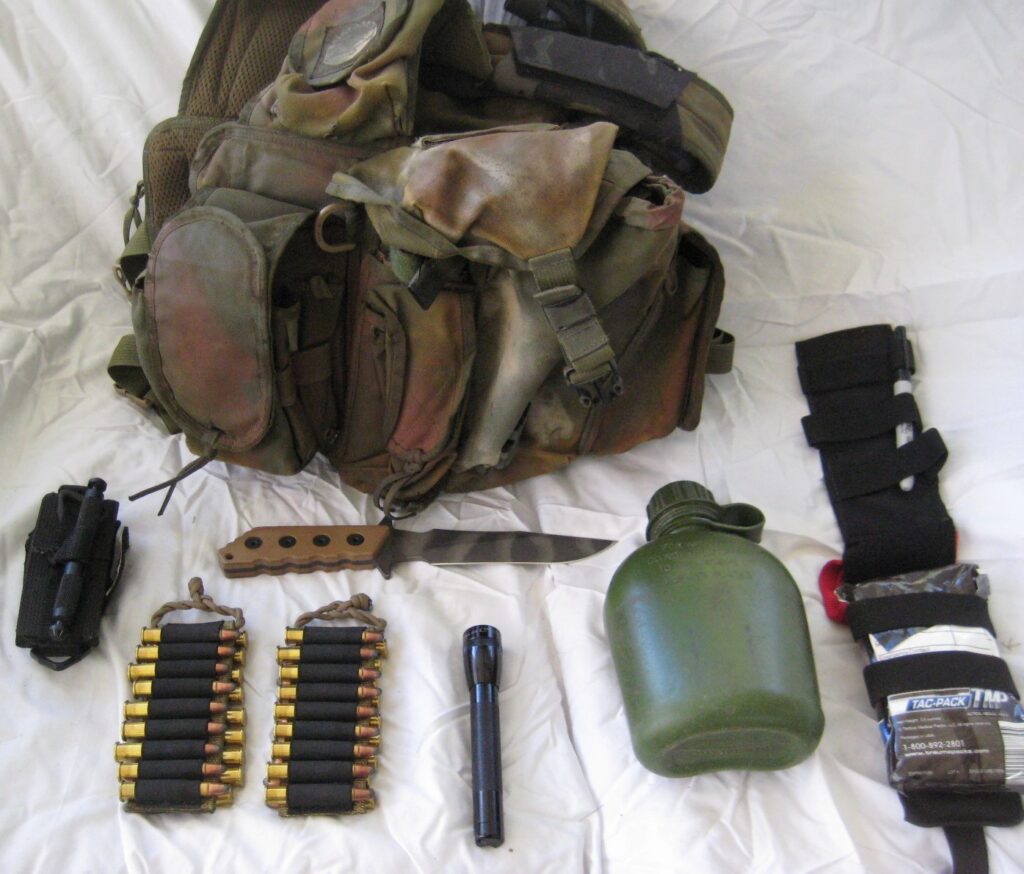
Tourniquet
Ammunition
Fixed blade knife
Small torch
Canteen
Roll of hootchie–cord (not shown)
ATS pouch insert with IFAK
In the future, a small UHF radio will be carried in this area when budget permits.
.
Alright then, we have covered how to set up the fighting load, and conducted some analysis about what should be carried. It’s time now to consider usage.
In general usage, the contents of the webbing – especially food and water – should be consumed after the large pack, or should be replenished from the large pack as soon as possible.
The reason for this is simple: should the large pack have to be dropped, or operating without the large pack for any length of time, one is self-sufficient for as long as possible.
This is also a nice time to mention pouch closures and my recommendations. In this age of modular pouches, it is worth thinking about closure methods and security of stowed equipment.
.
In general terms, I prefer my non-ammunition (ie. General equipment) pouches to have silent closures such as zips and fastex side release buckles. These items tend to be removed on a regular basis. For instance, dtnvs (Dual Tube Night Vision System), food, and weapon cleaning kit tend to be included in this classification.
For items that need to be immediately accessed, then such fastening as Velcro and bungy cord may be suitable. Weapon magazines, hand grenades, shell dressings and tourniquets are such items that spring to mind.
.
Bear in mind though, that the operating environment will also have an impact upon pouch closure selection as well.
Operating in small boats in a surf environment may dictate fastex buckle with flap closure pouches to prevent loss of vital mission equipment. Whereas long term operations in the jungle may preclude Velcro closures due to mud and other organic material preventing Velcro from working.
.
My ammunition pouches have had pull tabs added to the flaps to aid in quick opening and set up in such a way as to not encourage snags on vegetation.
 .
.
Let the mission dictate the gear.
I hope this has been useful. Let me know what you think, I’d be fascinated in hearing any little tricks that you’ve picked up.
Posted in Gear, Military, Packs & Webbing by 22F with 2 comments.
Leave a Reply