REVIEW – Crossfire DG-3
PRODUCT: DG-3
MANUFACTURER: Crossfire Australia
DESCRIPTION:
A modular internal frame Patrol pack. Flexible design that is intended to be used as a general purpose pack/ruck for patrolling for several days fully loaded.
REVIEW NOTES:
This pack has been submitted by Crossfire in order to bid for the latest selection trials conducted by the Australian Army Land125 project, the next generation of load carrying equipment intended to bring the Australian Army into the 21st Century.
Crossfire uses the services of Ian Maley from Wilderness Equipment (WE) to design their rucksacks. Initial inspection shows the DG-3 to have a lot of common design features to the WE pack line-up, with several unique features to cater for specific military applications. The DG-3 shows it’s heritage from both the larger external framed DG-6 and the internal framed civvy hiking packs that Ian Maley is famous for the world over.
Christmas had arrived early when I first received the DG-3 in the mail, in the middle of a power blackout. And what an exciting evening that was!! Should have seen the envy wave wash over my loc when I sent out some photo’s to mates via the shoe phone. Luckily I understand that being called a “chappy” is a term of love and affection. Eh Ganny??
On initial inspection I was surprised at how closely it resembled the Wilderness Equipment Jagungal, which I used to own, but sold off to my baby brother since it didn’t suit my requirements. Ian Maley and the Crossfire team seem to have taken some of the best bits of the Jagungal and modified the whole design for military use.
MATERIALS:
1000D Cordura for the main rucksack. DEI buckles, aluminium staves.
CAPACITY:
About 80L (approx 4881 cubic inches) loaded to the shoulder. Can be greatly expanded by attaching MOLLE compatible pouches.
LAYOUT:
An internal framed, MOLLE lined, top loading general purpose field pack.
Harness:
Is a similar iteration to the harness used on the DG-6 with a 3D design that includes different layers of foam, but lacking the structural plastic in the shoulder area. Fabric loops are fitted to allow securing of hydration bladder hoses, steel loops are fitted to allow radio handsets to be secured.
Unlike the DG-6, the shoulder straps do not have the non-slip grip on them. Back length adjustment is easily accessed and adjusted. The whole back is covered with a mesh back to allow moisture wicking. Secondary use is a storage area for hard plates from CBA.
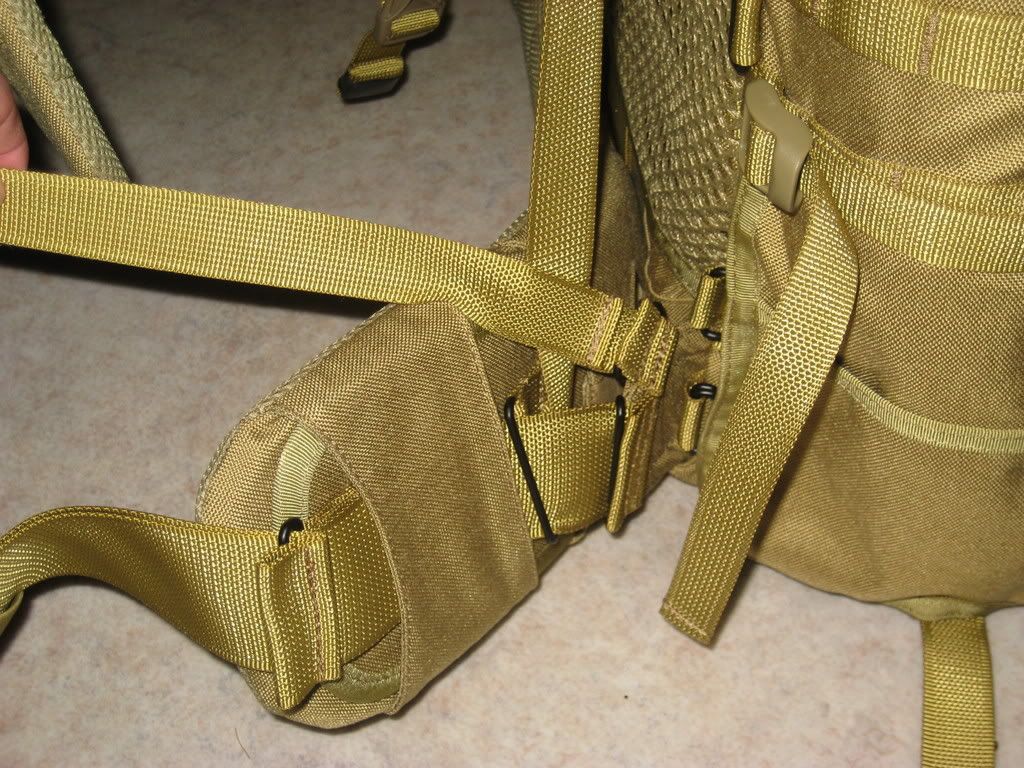
A load bearing hip belt is also fitted. Interesting design feature of this hip belt is that it is comprised of two hinged swinging arms which are also seen on many WE hiking packs (such as the Jagungal and Freycinet). These swing arms allow for different body shapes, extreme body movement when moving through the scrub and can be folded up out of the way during transport. Peter Marshall of Crossfire revealed to me there were some major headaches trying to get these swing arms to work properly since the whole Load Bearing System is supposed to be fully integrated with the chest webbing and Combat Body Armour component of the Land125 project. Whispers are currently going around the traps that this CBA has been found to be less than satisfactory on many levels. Chief amongst these is integration with other components of the LBE ensemble. To better accommodate CBA usage whilst also being able to wear the pack at the same time, the hip belt padding is secured with velcro can be removed.
The hip belt swing arms can be secured via straps running through a tri-glide up near the shoulder straps. With this setup, one has the choice of leaving the hip belt “semi-anchored” which works quite well for wearing the pack with chest webbing or clean skin. Alternatively, these straps can be removed from the tri-glides and secured on steel loops lower down on the pack which allows the hip belt to rotate somewhat more freely around their swivel point. This would be useful if wearing Combat Body Armour with the pack, and permits the user to find the best method making the hip belt work for their particular build and circumstances.
Frame:
An internal, X-frame of what appears to be aluminium staves comprises the frame assembly.
Rucksack:
Top loading, molle compatible layout. Pouches can be added to the external surface to customise the load out of the wearer.
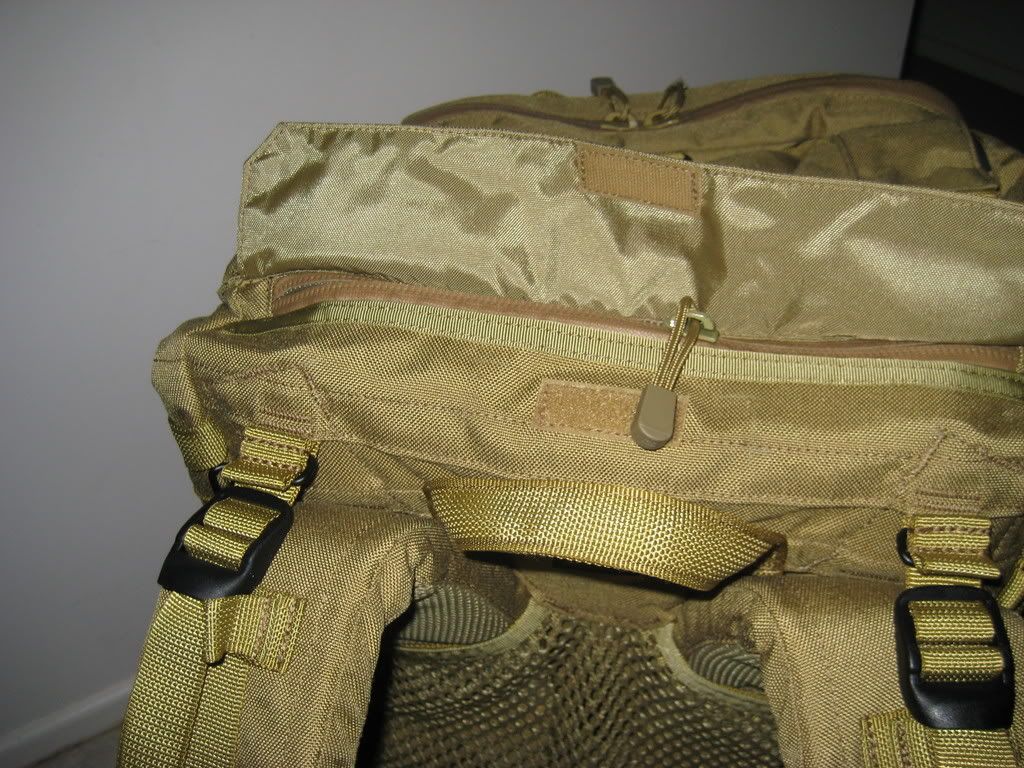
The main rucksack compartment is sealed with a roll-top closure, like a dry bag. Internally are several mesh pockets (Crossfire standard) in the main rucksack useful for organising personal kit. There is a zipped shelf above the sleeping bag tunnel if compartments within the pack are required. Even while zipped up, the shelf has gaps for long objects like radio antennae, aiming stakes, and other long awkward objects.
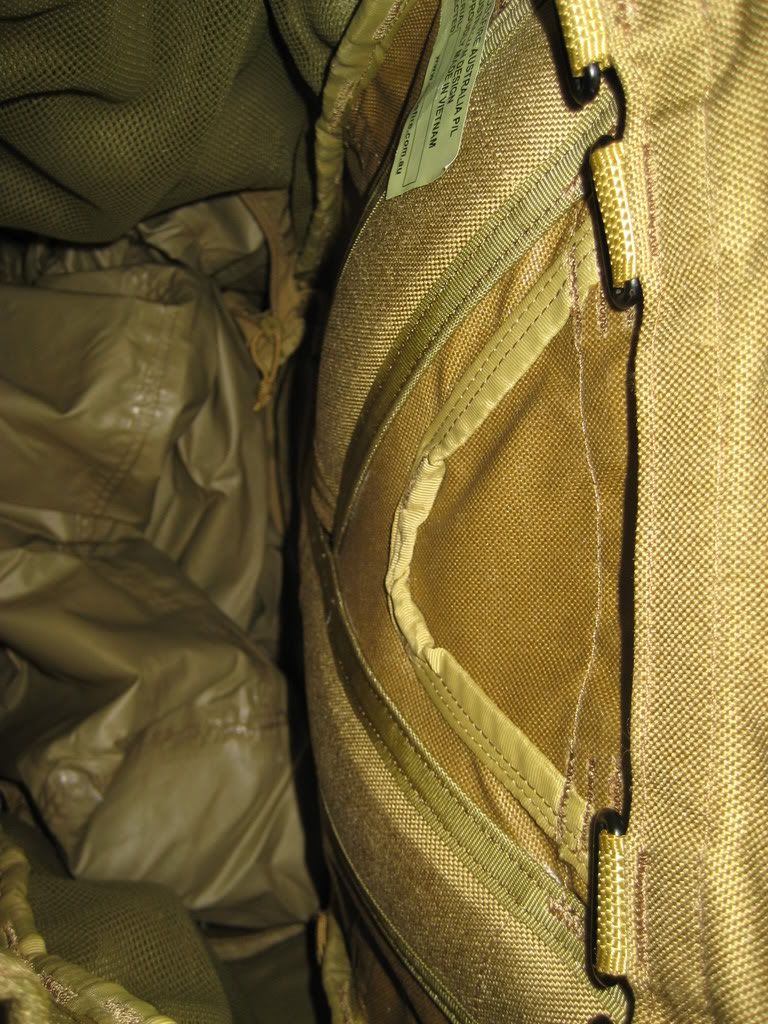
On the bottom left hand side of the main rucksack is a sleeping bag tunnel that can be accessed without having to open the main ruck. The lid has further molle loops, where the Crossfire Claymore pouch is currently located on mine. Under the lid is a zip access pocket, fitted with a mesh pocket to further organise small items. On the top of the lid are several ports for radio antennae to be stuck through, and a zip to access the radio control panel. Each side of the main rucksack also has water resistant ports for hydration hoses or radio handsets. One could conceivably have hydration bladder hose out of one side, and radio handset from the other.
The outside of the pack also has small steel loops as part of the Crossfire “Lost Arrow” system in addition to the MOLLE system for lashing equipment to. There are also compression straps to bring the load closer to the back if the rucksack is not fully loaded. The compression straps also allow long items like M72 LAAW’s to be attached to the pack for ease of access and storage.
Accessories:
The pack comes standard with a couple of replacement fastex buckles, elastic strap keepers and load bearing straps. There is also several accessories that can be stored in the main compartment that can be use to tailor the load and packing of the DG-3. A water bladder carrier, manpack radio harness and dry bag were included. The first two accessories can be locked into the steel cargo rings at the top of the main compartment to better organise and distribute the load. The dry bag can be attached to points at the bottom of the pack to secure it from falling out.
PERSONAL ASSESSMENT:
I’ve found the DG-3 is a surprisingly interesting pack. It is envisaged that the DG-3 will suffice for vehicle mounted and dismounted infantry operations in a variety of environments.
Compared to its bigger brother, the DG-6, it would be an ideal pack for line infantry in current deployment scenarios.
Comfort wise the DG-3 actually feels more comfortable than the DG-6. Although this is a subjective assessment, and affected by other factors that I haven’t loaded it up as much as I do as a DG-6 (approx 12-15kg’s in my DG-3 compared to 25kg’s in the DG-6). Having said that, it is interesting to note that a top of the line flexible external frame is giving very similar comfort levels to a good internal frame anyway. This even more noticeable with a top of the line internal frame such as the DG-3.
Although it must be noted that comparing an external frame pack to an internal frame is like comparing apples and oranges.
When using the DG-3, I had to go and dig out all my old diagrams for load carriage and packing for internal frames. It’s slightly different to account for differing balance points. Remember when using a load bearing hip belt on hiking packs that 50% to 75% of the load should be taken up by the hip belt. The remaining load should be taken up by the shoulder harness. Rigged and packed properly, with a 15kg load (sufficient for me for about a week’s bushwalking), I barely felt the pack on me, and had to remind myself not to run with it.
Pros –
The DG-3 has proven to be a very comfortable and flexible design. I have attached SORD pouches to make my DG-3 match the layout of my DG-6 as much as possible. I prefer all my gear to be setup to be as similar as possible so I don’t have too many brain strain moments. I’m getting older, and I like to have a familiar setup, no matter what. I hate fumbling around for gear, preferring instead to have everything in similar locations in all my packs.
Walking with this pack on has proven to be very positive and comfortable. Once more, I’ve been garnering strange looks in the small mining town I live and work in when I strap my pack on and go for wander about the place. With the way that the pack sits on my body, there is sufficient clearance to allow for air flow across the back.
All major load bearing buckles and straps on the pack are field replaceable via the Crossfire “Lost Arrow” system, which is really only a bit of tape folded over and sewn to provide a fabric locking tab. This is bloody great news for those of us who have had some clown step on buckles or close vehicle ramps on your kit destroying them. It’s therefore very easy to replace any broken buckles without losing too much time or load carrying comfort. In fact, I had an incident years ago, where one of my “problem children” cut his pack strap (he was allegedly removing some old electrical tape) about 5 minutes before we had to load up the bus and head out on exercise for two weeks. Imagine if you will, my 2IC and myself running around trying to find one of our armoured crewmen willing to swap his whole pack and then having to cross-deck everything over in an awful hurry. This isn’t a problem with the DG-3.
The size of the pack without external pouches fitted is good for leaving on and manoeuvring in relatively tight spaces. I was able to still sit in a normal dining room chair with chest webbing and loaded pack (sans pouches) on.
Cons –
Ok, the biggest thing I don’t like about the DG-3 is the closure methods for the main compartment and the sleeping bag tunnel. Both of these closures are “roll top” like that found on dry bags for pack liners etc. This involves rolling the storm closure along the seam a couple of times, and flexing it over to fasten the fastex buckle. I’m not a fan of this for the main pack closure. I would have preferred a drawstring closure such as that found on most packs (like the ALICE pack) for its ease of use and simplicity when in a hurry. It’s a great feature for civvy walking packs, when time is available to seal up a pack properly, but I feel it’s a small point that I’ll get used to. Looks like I WILL be dragged into the 21st century kicking and screaming. Although the roll top closure does have the advantage of dust-proofing the pack and making it slightly more water resistant enough to increase its use as a flotation aid during creek crossings.
The sleeping bag tunnel access is another example of this. It has a flap, secured with a single fastex buckle, then another fastex buckle securing a small roll top closure and the cover flap has a single fastex buckle. This results in the sleeping bag tunnel being securely sealed, but leaves the cover flap with a high risk of snagging vegetation or protuberances on vehicles and other blokes when de-bussing. This can be tidied up somewhat by using the fastex buckles to secure the flap.
The only other point I don’t like about this pack is a small detail on the hip belt swing arms. As previously mentioned, these can be secured via a strap to the double steel loops at belt level to secure the swing arm hip belt, as it’s actually designed to do, or attached to the tri-glide up high for transport or extra stability. I find this securing the running end in the high tri-glide adds comfort. It is unfortunate to note that the running end of these straps don’t have any folded material to prevent the running end slipping through the tri-glide. Nor are they long enough to allow the strap to be properly folded over again through the tri-glide to lock it off. Just a little bit more running end would have been nice.
I’ve been playing around with this running end and seeing where it can be attached to various loops and attachment points to investigate where it works best. Since I was given a sample pack, without the full instruction leaflet, this shouldn’t be a problem with troops under correct instruction.
SUMMARY:
In short, I was impressed with the DG-3. I’ve been looking for an internal frame medium sized pack to supplement my large external frame DG-6 for some time. I was specifically looking for something that looked like a civvy hiking pack, but with military features. Yes, I want my cake and to eat it too.
My thoughts were to run 2 packs.
My DG-6 is intended for long range treks (greater than 5 days or in difficult climactic conditions that I found on the Overland Track in Tasmania) or for those ‘anti-social’ occasions when ammunition is needed. Such as zombie uprising, alien invasion, when I commence my great escape and evasion, and deer hunting when I need to recover meat and horns by carrying them out.
The DG-3 fills the niche for shorter range treks, such as general walking trips overnight or no more than a couple of day’s duration. Generally for ‘social’ occasions such as when I fly interstate to places like Melbourne to visit old mates and do some shopping for trendy clothes and what have you. Or, having the world end due to one of my major listed cataclysms, I can pass it onto someone else as a loaner. Hell, I think I’ve got enough kit to outfit a platoon plus between the trunks stored at my place and my parents.
My search for a pack is now complete. Well, until the next one I see comes down the track. The hunt for the perfect Action Man Accessory Set never really finishes.
Posted in Crossfire, Long Range, Packs & Webbing by 22F with 14 comments.


Leave a Reply