REVIEW – Wilderness Equipment SAS Mk6
ITEM: SAS Mk6 General Purpose Combat Pack
.
MANUFACTURER: Wilderness Equipment (WE)
.
DESCRIPTION:
An 85 Litre-ish general purpose combat pack with external pockets and an internal X frame.
REVIEW NOTES:
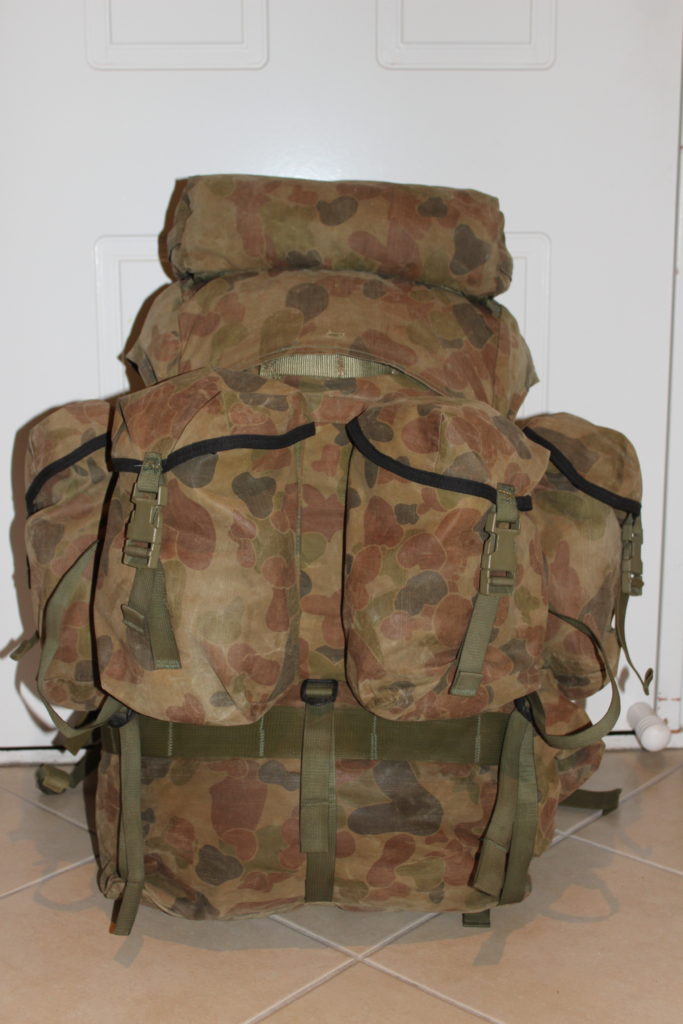
Those who have read reviews of Crossfires products on this website or advertisements on the Crossfire website will have read repeated mention of the famous WE SAS Mk6 pack. Yet if you scour the internet you’ll be hard pressed to find any pictures of one, let alone any detailed review or description of one.
Hell, even our webmaster 22F has yet to try one and you’ll be hard pressed to find a pack he hasn’t worn!
Therefore this article is to serve not only as a review but also as an introduction and, sadly, an obituary to what was indeed one of the greatest military packs to ever be produced in Australia.
.
Apologies for the pictures, some of them don’t do justice to this pack, especially the one of it being worn, I had nothing to stuff it with so I had to use inflated garbage bags and the result makes it look a bit weird!
Before we can conduct a fair review of this pack we must first place it in the context of its timeframe.
.
If you were in the army in 1986 the issued pack was a green bag divided into a ‘large’ top pocket and a smaller bottom pocket for sleeping gear, with two very small pockets on the side. All the hardware was brass and the ‘frame’ consisted of a piece of wooden board with two cushions sewn on.
.
The only other options available was to pay for a US ALICE pack if you could get your hands on one or a civilian pack of some sort.
.
It was during this time that Ian Maley, owner of a small Western Australian outdoor company called Wilderness Equipment, offered to make a pack suitable for use by the SAS. For some years Ian had been doing custom webbing work for the SAS and they readily agreed to conduct trials for the new pack.
.
The trials where run by Major(?) Norm Crookston who later worked for the Australian Antarctic Division, to whom Wilderness Equipment used to supply tents. 60 trial packs where created and SAS conducted the trials for 6 months. Based on the feedback supplied by Major Crookston the end result was the SAS Mk6, sometimes referred to as the ‘Crookston pack’ by guys in the Regiment.
.
For years it was the gold standard of infantry packs, photos from INTERFET show guys kicking around East Timor with them, old pictures of selection depict guys running with SLRs at the trail with a WE SAS pack snuggly on their backs. It seems that Keith Fennel, author of Warrior Brothers, had one and certainly members of his Patrol in Timor had them, albeit fitted with ALICE Frames.
.
Sadly the realities of the global economy forced the closure of the WE factory in Perth and with it went the production of the Mk6.
It was only a matter of time then before the packs that where in circulation started to meet their end. I’ve only seen a handful myself. My old SSM (Squadron Sergeant Major – 1st Sergeant equivalent) and RSM (Regimental Sergeant Major – Command Sergeant Major equivalent) had second-hand examples. I’ve also seen one in the possession of a WO2 in the Pilbara Regiment in Western Australia, and then of course, there is the one I have myself.
.
Ian has since collaborated with Peter Marshall of Crossfire Australia to produce what have been, each in their own right, the most advanced pack designs commercially available and, as you will see, they have truly outdone themselves with their latest offering.
.
As previously stated the purpose of this review is not necessarily to help one decide whether to buy this pack, but to put on record what made this pack so famous and to put into perspective the upcoming Crossfire DG16, the SAS Mk6’s Great-Grandson.
.
SPECIFICATIONS:
Dimensions
Height – 600mm
Length – 400mm
Width – 580mm
Volume – 85 Litres-ish
.
MATERIALS:
– Australian Corespun Canvas in DPCU (in 1986 AUSCAM was as Gucci as you could get!)
– Fastex Buckles (compared to the metal fixtures of issued equipment of the time)
– Mesh

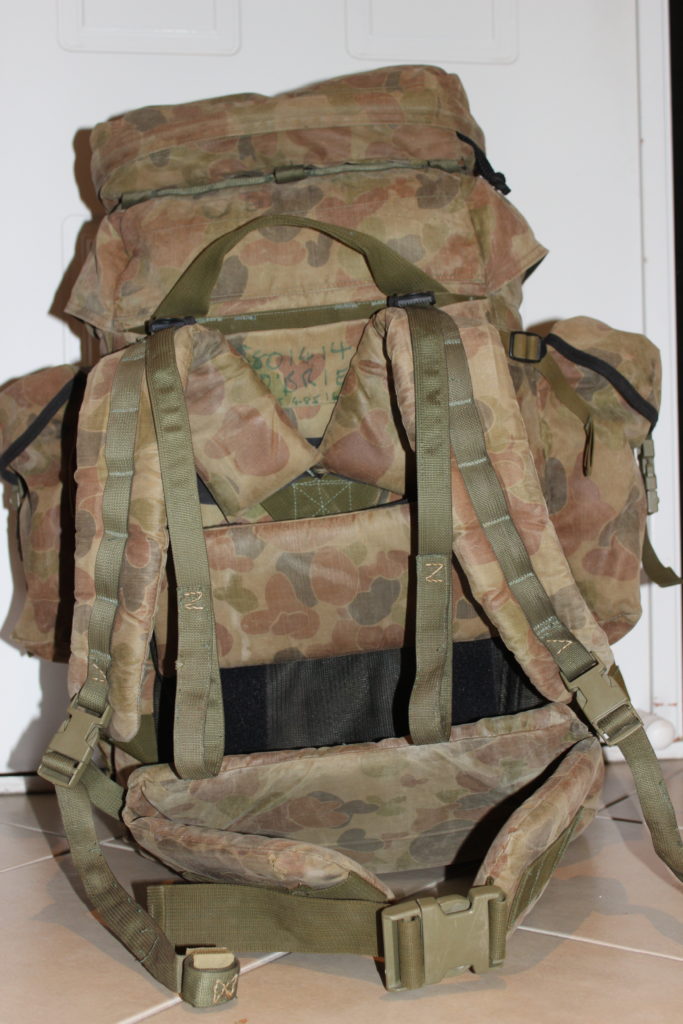
.
LAYOUT:
FRAME AND HARNESS-
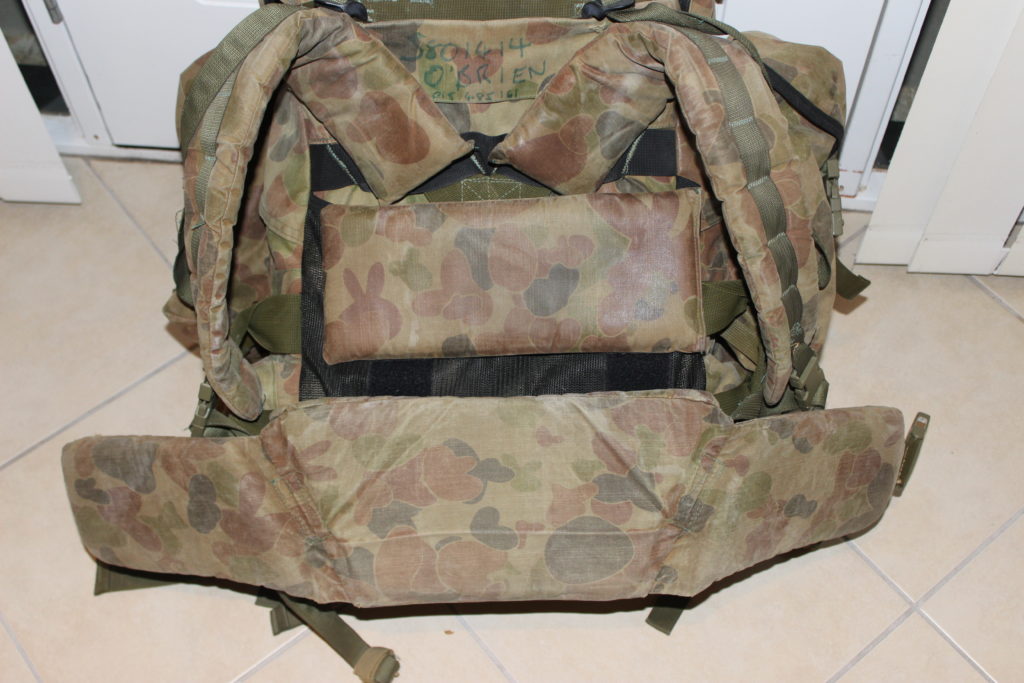
A three dimensional harness with hip-belt, shoulder harness which is adjustable for height and load lifters over the shoulders. These work together with a contoured internal X frame.
.
The hip belt is actually designed to sit above belt webbing and actually wraps around the stomach above the hips, allowing the belt rig to act as a second hip loading belt (almost acting as your hips), a method shared by British Bergens.
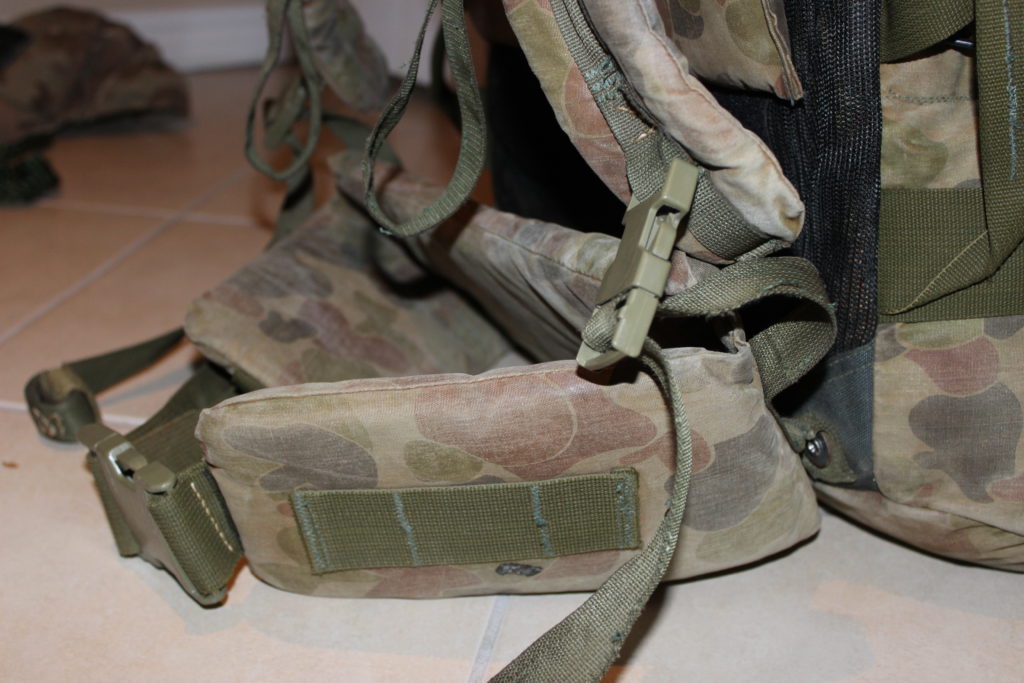
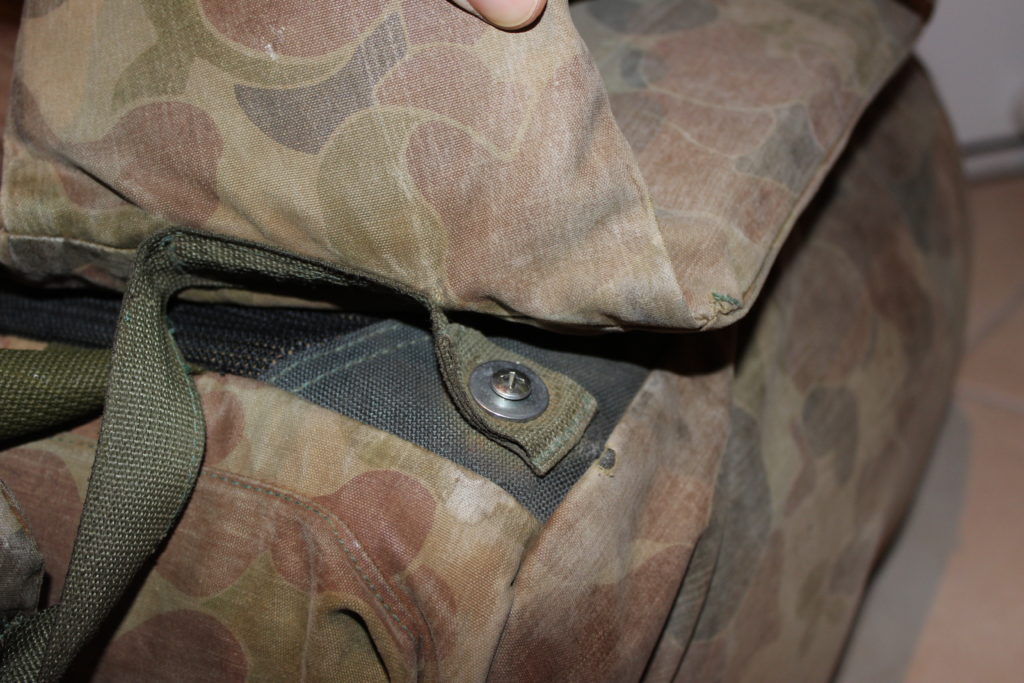
The hip belt is attached to the frame via two screws which creates a ‘hinge’ for the belt. I find when walking up-hill this set-up works beautifully, the straps run from the screws at the base of the frame through the hip belt up to the base of the shoulder straps. I find it allows the hips and shoulders to move independently of the pack and the sensation could be described as the pack carrying itself up the hill, the energy return is wonderful.
There are two layers of foam of different densities in the belt, which is something lacking on virtually all commercial and issued packs today!
.
It should be noted however that due to the height of the pack and the design of the hip belt it isn’t really possible to wear this pack with anything other than belt rig, however it is possible to fit an ALICE frame to these packs and wear it with chest webbing albeit you sacrifice all the ergonomic benefit designed into the pack. This became a popular choice by the time Timor rolled around and once the original harness perished. I had an example which I repaired that had been fitted with a black aftermarket WE harness and there is an example on line which has a Tactical Tailor harness and hip belt fitted.
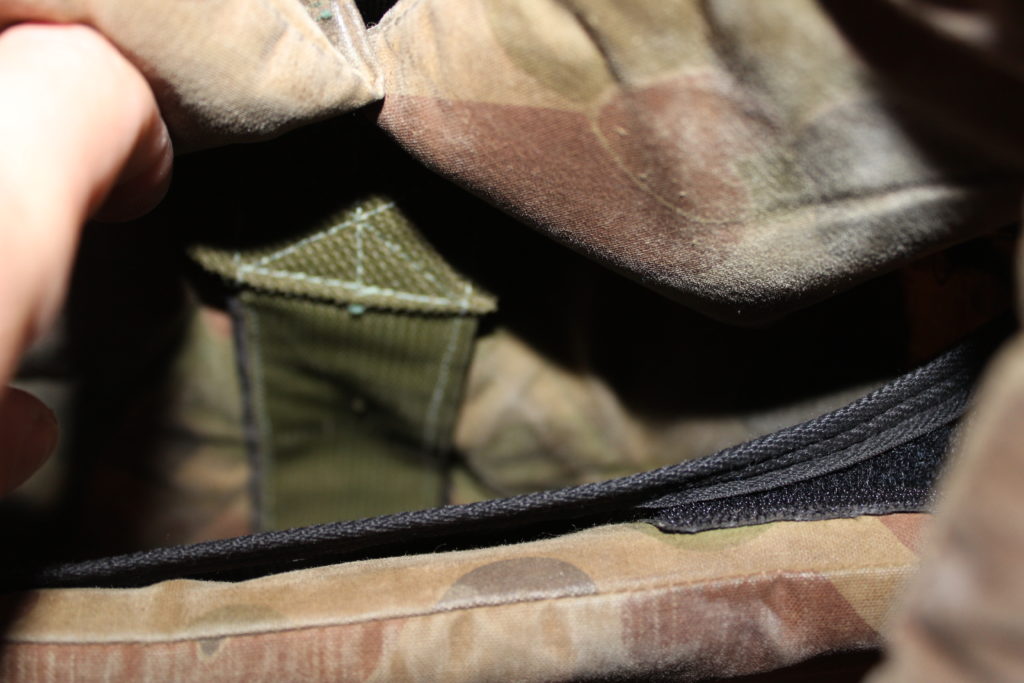
The shoulder straps attach to the pack via a Velcro strip which allows some adjustment for height. There are tri-glide load lifters over the shoulders which work to adjust the centre of gravity. Due to the pack height being designed to fit below the shoulders some would argue that these don’t work as efficiently as on taller packs for taking the load of the shoulders but I never found this to be a problem.
The shoulder straps have plastic reinforcement plates inside to prevent the straps turning into string, yet another feature the Mk6 offered in the mid 80’s that most packs today still do not offer.
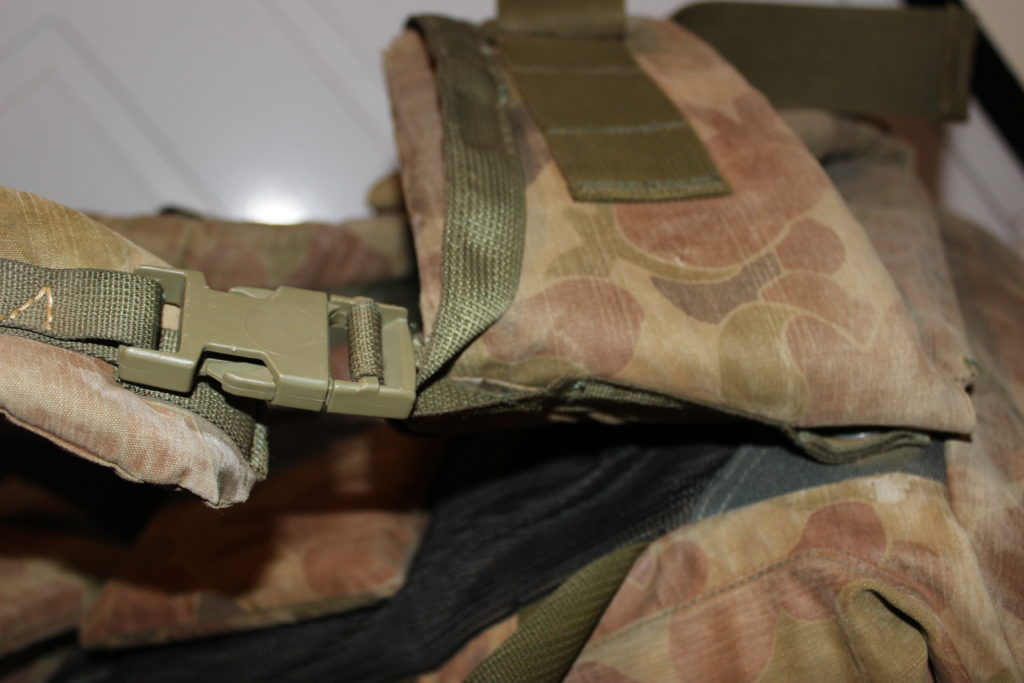
.
Two points to note about the shoulder straps:
– There is no sternum strap
– There are fastex side release buckles for quick release
We now know that these two items (or lack thereof) are big no-nos these days, but remember, this was the 80’s! I never found the lack of a sternum strap to be a problem. For me at least, the straps sat very comfortably on my shoulders and never slipped off nor did they exert excess pressure.
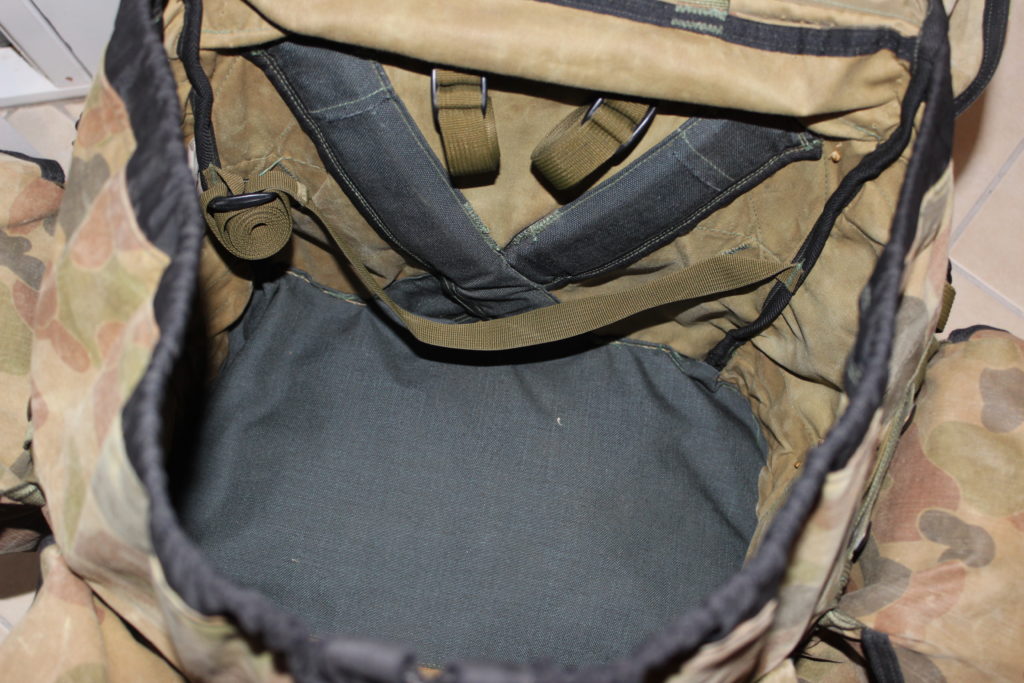
The frame is an internal X frame made of… sprung steel? Aluminium? Either way it allowed the load to work very comfortably with the body, not against it like an ALICE frame. Until the advent of hi-tech plastics an X frame was the best method of load suspension for a pack.
.
RUCKSACK-
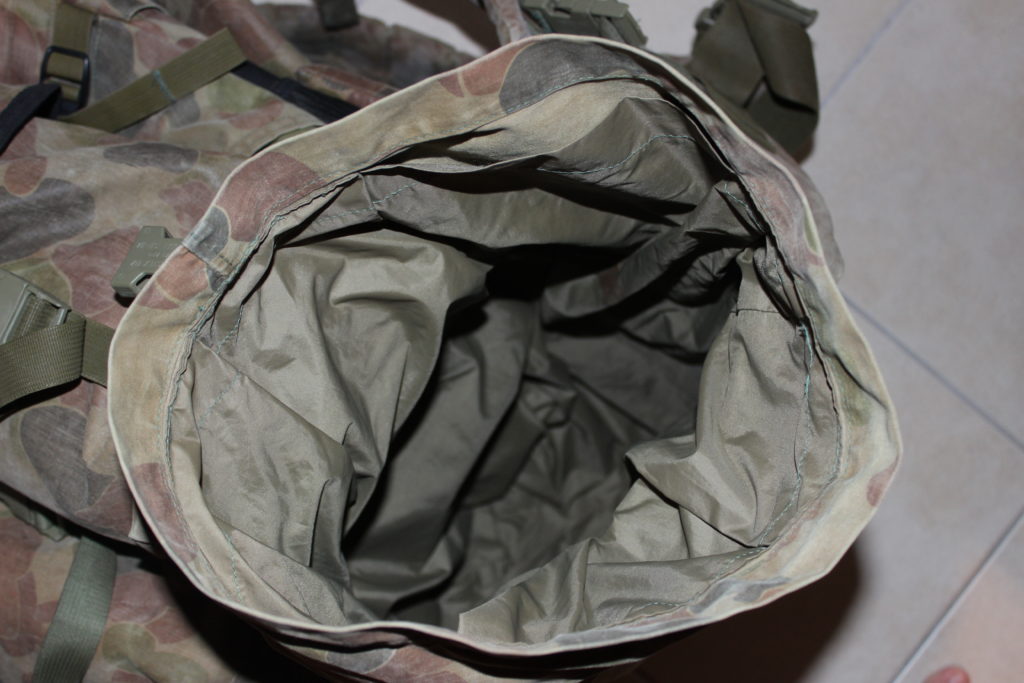
The rucksack itself consists of a bottom side access sleeping bag tunnel with fastex closure and three compression straps. This compartment is lined with a smooth water resistant material and is very spacious.
In mine I could fit:
– Malaysia Special Mozzie Net
– Drysack with four pairs of socks, polar fleece an beanie
– Puff Jacket
– Snugpack Recon Sleeping Bag
– Issued Bivvy Bag

An internal divider (which is sewn in place and can’t be opened) separates the sleeping compartment from the main upper compartment. This is also very spacious, it has three straps used for securing a man-pack radio and is secure via a draw-chord collar and the pack lid. Note though that it lacks a storm collar.
In here I could fit:
– Drysack with spare cams
– Platatac Windproof Smock
– Poncho Liner
– 2L Camel-back
All with plenty of room to spare.
(Note: most of this was for weight/bulk in lieu of rations etc. When I went field I would ditch some of it)
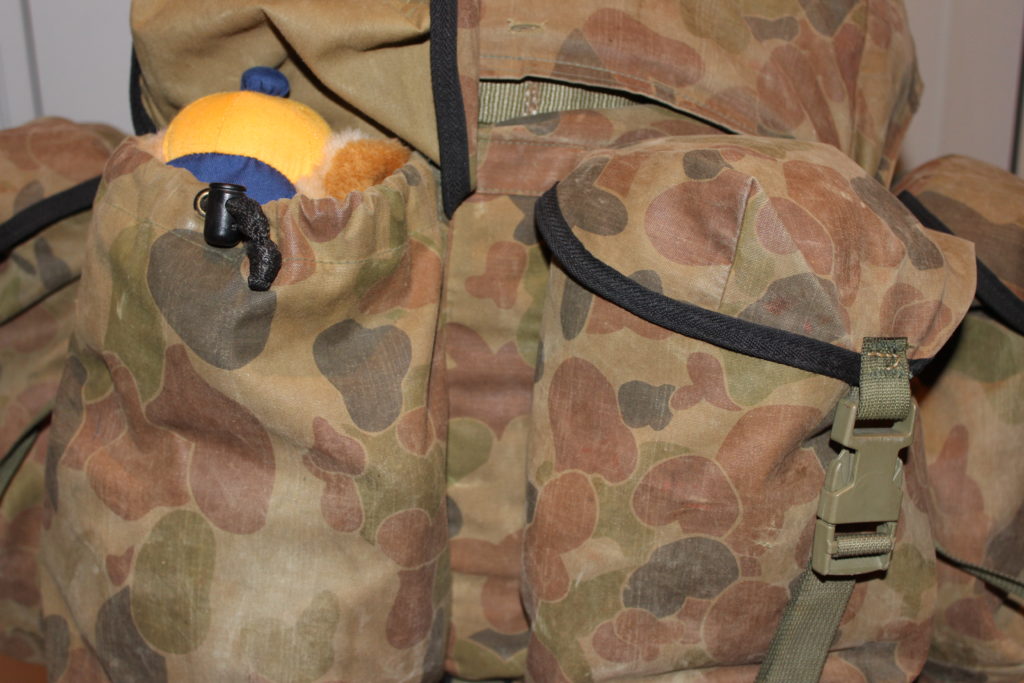
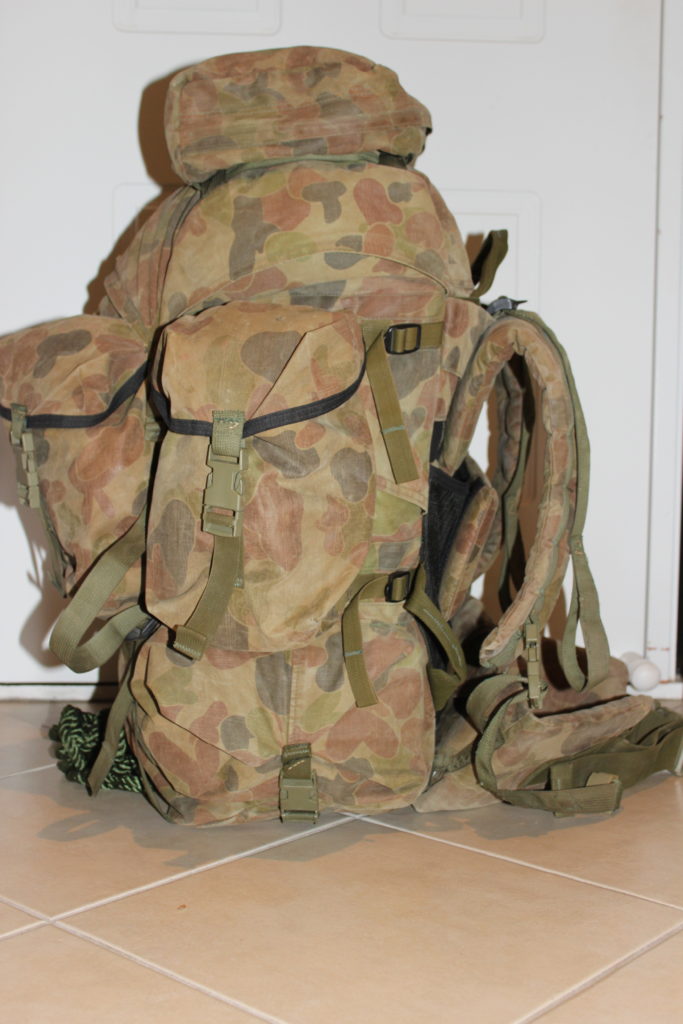
There are four external pockets which are secured by draw-cord and fastex buckles. The pockets are large enough to fit a full ration pack or a collapsible 2L water bottle. The side pockets were detachable to reduce the width of the pack if so desired.
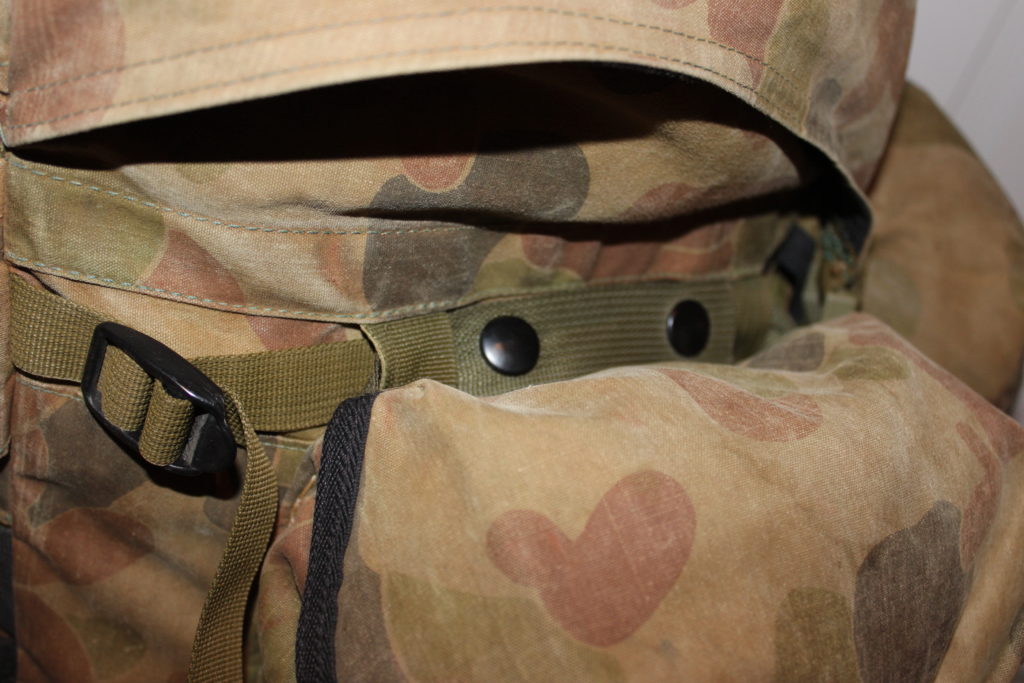
Running under the side pouches are two compression straps on either side and a heavy D-ring style buckle, which was designed to accept rigging for the parachute harness of the day.
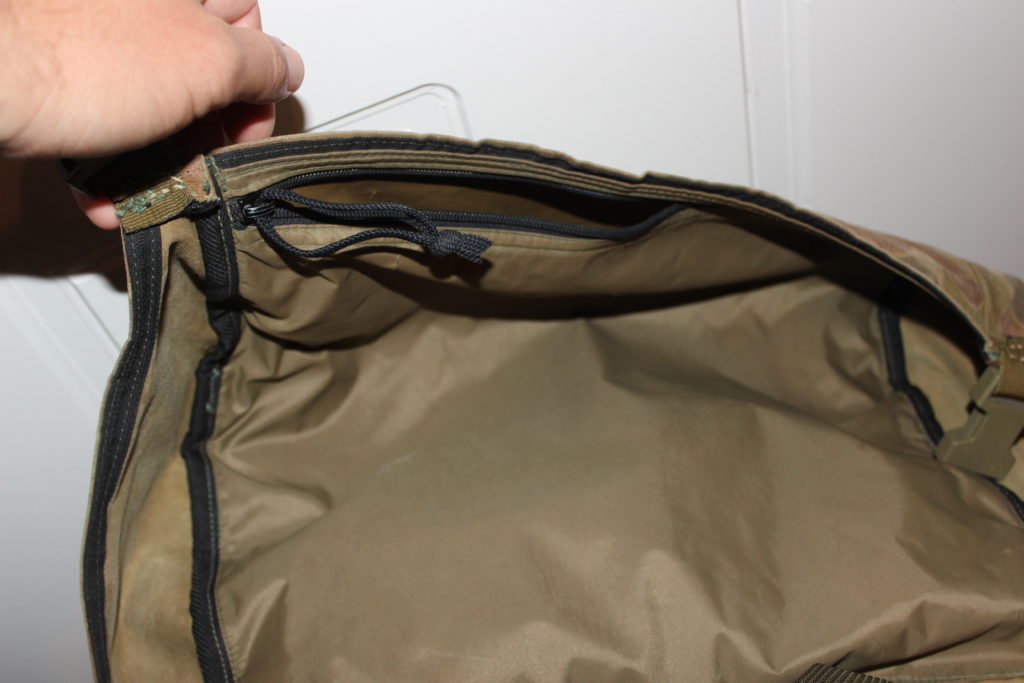
The lid of the pack encloses the top of the pack neatly and has a zippered compartment on the underside, which holds my hootchie nicely! The top of the lid has a detachable claymore pouch which is quite spacious and easily holds a complete claymore.
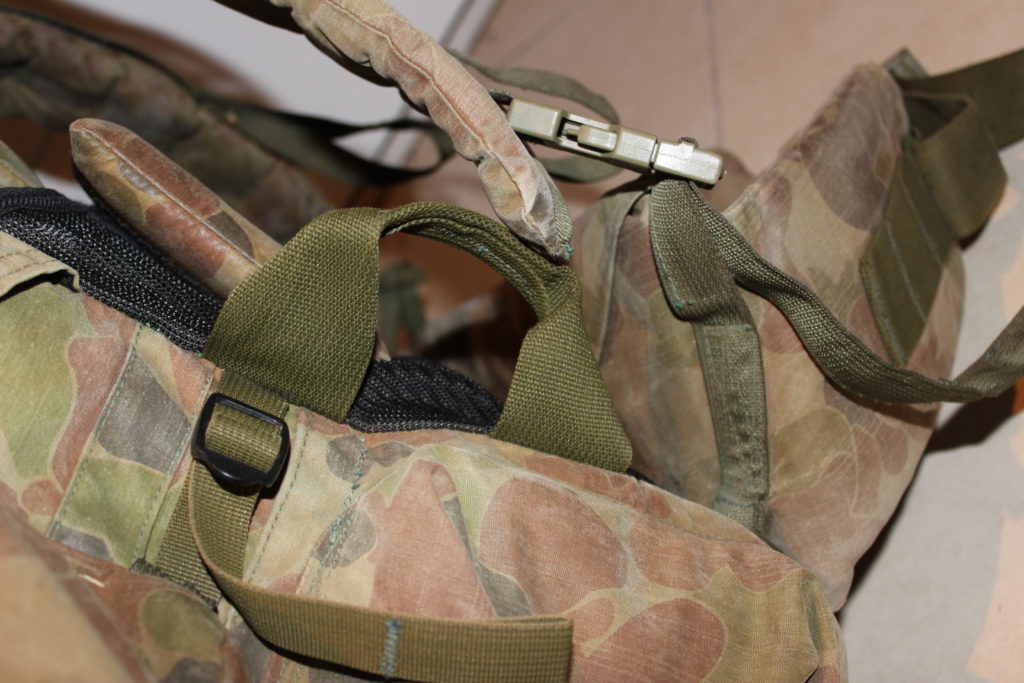
On either side of the pack were two drag handles, which are a feature which I find exceedingly useful and are again omitted from virtually all commercial and issued packs today. The rear of the pack which connects with the users back had a mesh lining with two strips of Velcro to attach a piece of thick padding which can be placed for maximum comfort. You could also potentially use this to stuff a sleeping mat though when I tried, it was terribly uncomfortable!
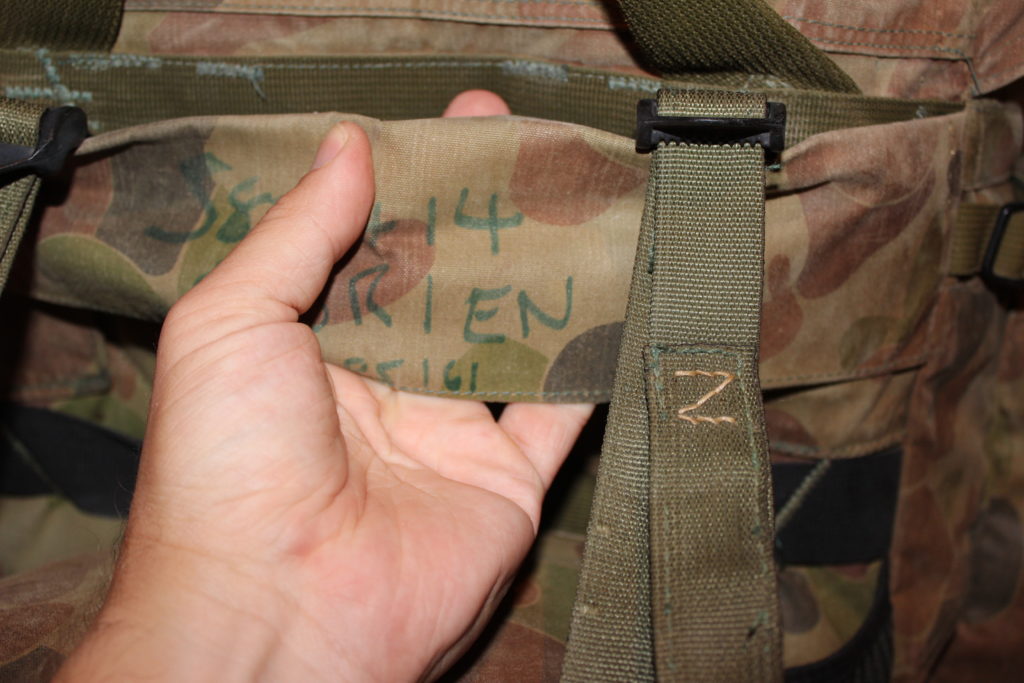
The pack also has a basic ‘envelope’ to rig up an ALICE frame, however it is devoid of padding and is a bit of a compromise, it takes a bit of improvising to make it comfortable but as previously mentioned it would negate everything that made these packs comfortable in the first place.
These were the original Tardis pack; you could just keep cramming stuff in here and it would never seem to get full.
.
PERSONAL ASSESSMENT:
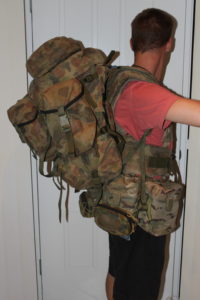
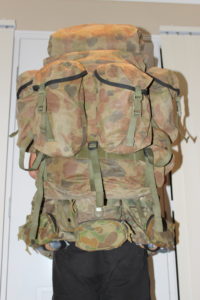
This pack set the standard for all military packs to follow and all were found wanting. The experience of strapping this pack on and the pleasant surprise when you walk in it is profound when compared with anything else (the upcoming DG16 being an exception).
At first it feels a little unusual but once you dial in the adjustments it becomes incredibly comfortable. I could (and have!) walked all day in this pack in comfort, uphill or down the adjustability of the harness made the load almost carry itself.
The capacity is quite adequate for what I do and certainly for its day it was very spacious, the layout is practical and functional and compresses the load quite well, the centre of gravity is superb and the fact that it is made of canvas means it is very water resistant and comfortable when in contact with the skin.
NOTE: Before I proceed with pros and cons let it be said that listing such things for a pack which was built 30 years ago is a bit like telling a 60 year old man that he’s slow and weak; he’s obviously not in his prime! Therefore I will be assessing it in its time and not by today’s standards.
PROS –
Construction is top quality, all materials are the best that was available and were years ahead of anything else that was available the time. The integration with belt webbing, which was all but standard at the time, is unmatched and the ability to fit an ALICE frame is a nice option to have if absolutely necessary.
The modularity of the side pouches and claymore pouch is very handy in reducing pack width and the D rings on the side of the pack body for rigging to a parachute harness is very handy feature for those that need it.
By far one of the best features was the height of the pack, to be able to hip load and still fit below the shoulders and still carry a decent load is out-standing!
Volume is just right and the centre of gravity makes this pack incredibly comfortable.
CONS –
Lack of a storm collar is a bit of an oversight that was continued on the DG6, but the shape of the lid helps to mitigate this.
Fastex quick release for the shoulder straps is a bit of a problem, the metal quick-release on the then-issued pack was probably safer however metal fixtures rust and then dry rot any webbing material, and this may have influenced the choice of fastex. I guess fastex was a bit of an unknown quantity back then and its shortcomings weren’t immediately obvious. In its day it was space age but now we know it’s bad practice.
SUMMARY:
In my opinion, the BEST pack produced in this country. Ian Maley is a master of pack building and this is by far one of his very best creations. When they stopped making these it created a void that many tried to fill; some companies have loosely copied this design and ruined it by making the pack too tall and changing it from an X Frame to parallel staves the result was truly terrible and they made it so cheaply it was just a disaster! (There’s $150 I’ll never get back!)
.
I had an example of what I initially thought was an early example of a Mk6, but I now suspect it was a copy manufactured by a long closed business in WA called Webforce, which made state of the art Belt Rig during the same timeframe the SAS Mk6 was made.
.
SORD Australia based their pack (the Large Field Pack, review seen HERE) around this and in my opinion didn’t do too badly; they came unstuck with the harness system but if you’re not afraid of a bit of DIY you can make it better.
.
Pack marching for me is in some ways therapeutic. If I have a problem or something troubling me in my life I’ll strap this on with my belt rig and go for a run, many nights down at Pucka found me running around the ring road, thinking things over and by the time I got back I’d usually feel better.
The last time I took this out was on my recent promotion course, I will always think fondly of our food and sleep deprivation exercise walking over the hill behind our Barracks at 2am with pack and webbing at 2 in the morning with my faithful SAS pack.
When I said at the start that this would also be an obituary it is unfortunately true. Canvas has a life span and these packs have sadly reached the point where they are all but threadbare. Mine took me through many an exercise, but will now retire to the man cave. I have finally found a replacement that lives up to this legacy……..watch this space!!
.
POSTSCRIPT:
Not long after writing this review I found one of these packs for sale on Ebay. Naturally I bought it and too my eternal surprise I found it was made of NYLON not canvas. It seems it was a one off custom order or something similar! The harness and hip belt was made of canvas however and where at the end of their life span, so I removed the internal frame and did a little surgery on the sewing machine.
I replaced all the old black fastex and the black webbing with green and mated the new Crossfire DG 16 frame to it and the end result was even better than the original internal frame.
Wait out for pictures!
Posted in Crossfire, Long Range, Packs & Webbing by Jacko with 19 comments.
Leave a Reply