REVIEW – AttackPak Defender Sustainment Pack
ITEM: Defender Sustainment Pack
MANUFACTURER: AttackPak
DESCRIPTION:
A top loading, long range pack with a unique hip-loading belt arrangement.

.
.
REVIEW NOTES:
The Defender has been graciously supplied by Attack Pak after having met with them in person for the first time at SHOT Show a couple of years ago (seen HERE).
Like any review of supplied equipment, I have done the review with the proviso that I will be painfully honest.
.
Please let our suppliers know how much you appreciate their support for this site. You can really show your appreciation by giving them your custom.
.
Don’t forget to follow Packs and Beyond on Facebook (https://www.facebook.com/packsandbeyond) for all our latest updates.
A big thank you to my Mum for her patience in being camera operator and film crew for my first integrated video.
.
.
LINK:
Defender Sustainment Pack – Attack PAK
SPECIFICATIONS:
DIMENSIONS –
Height: Approx. 600mm (26in)
Width: Approx. 350mm (13.8in)
Depth: Approx. 300mm (11.8in)
Volume: 50L (3000 cubic inches)
Weight: 2.85kg (6.3lbs)
MATERIALS –
500D and 300D material
Duraflex side release buckles
Webbing tape
Steel D-rings
.
.
LAYOUT:
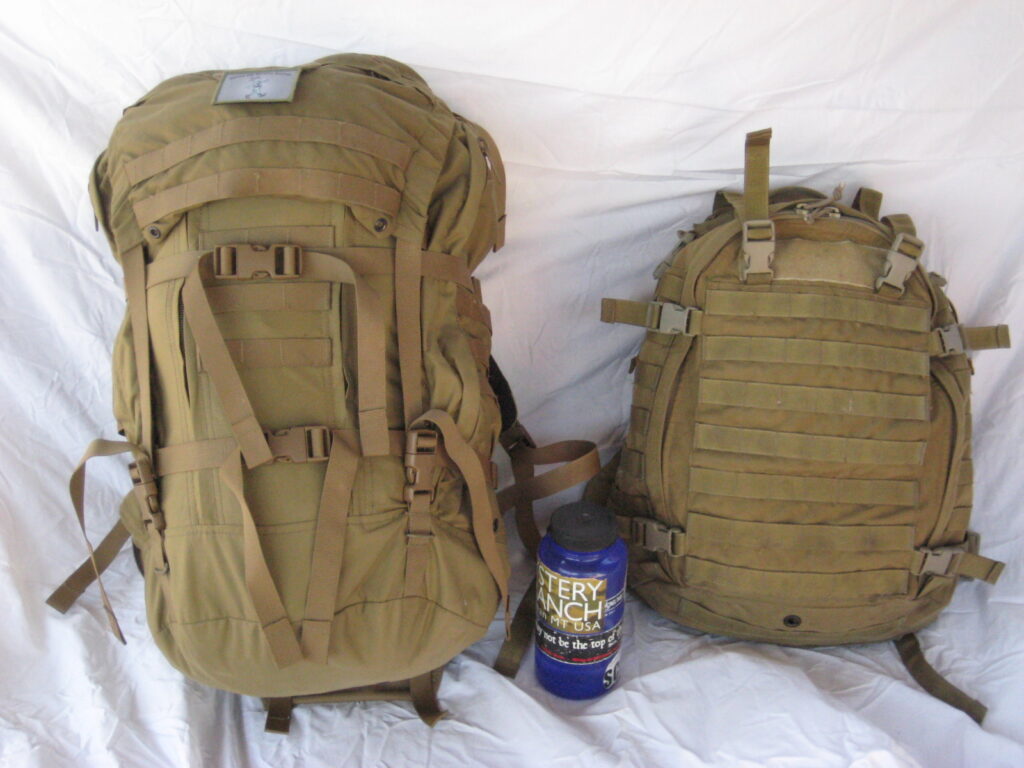
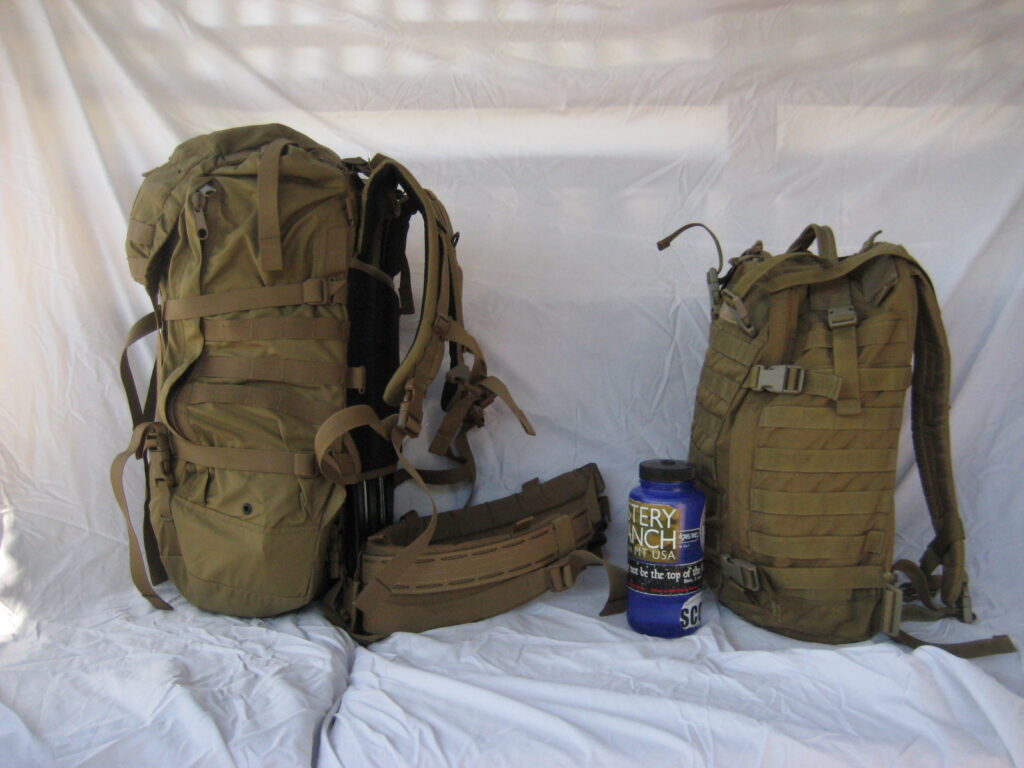
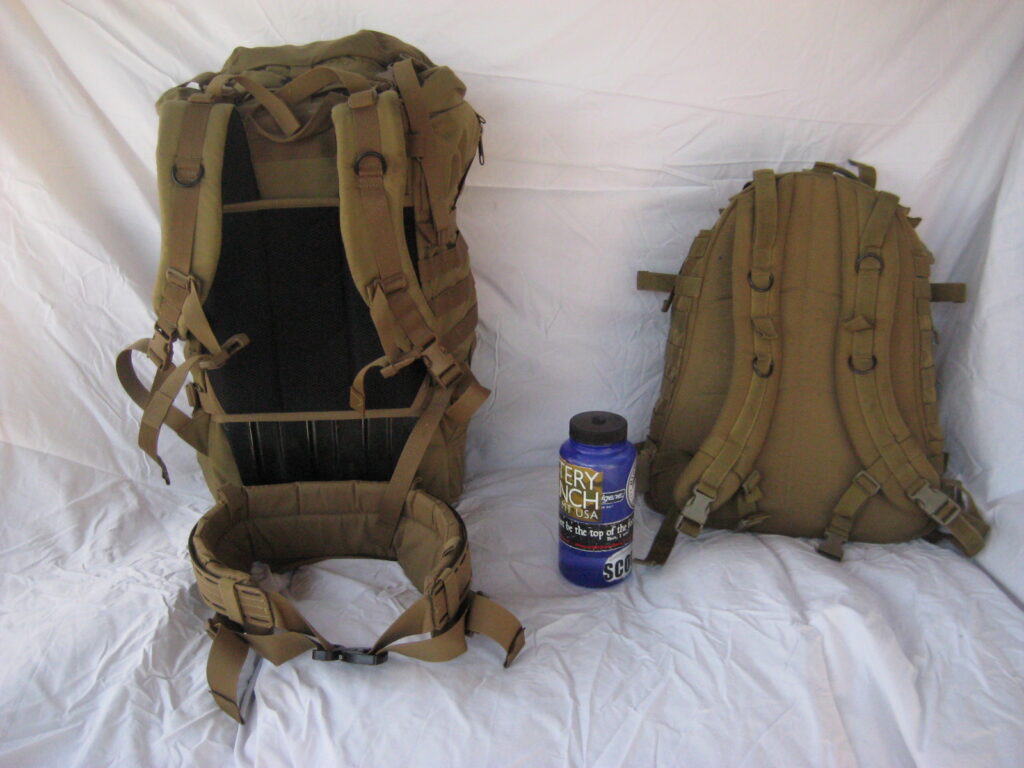
AttackPack Defender on left, ATS RAID on right.
.
.
.
FRAME AND HARNESS –
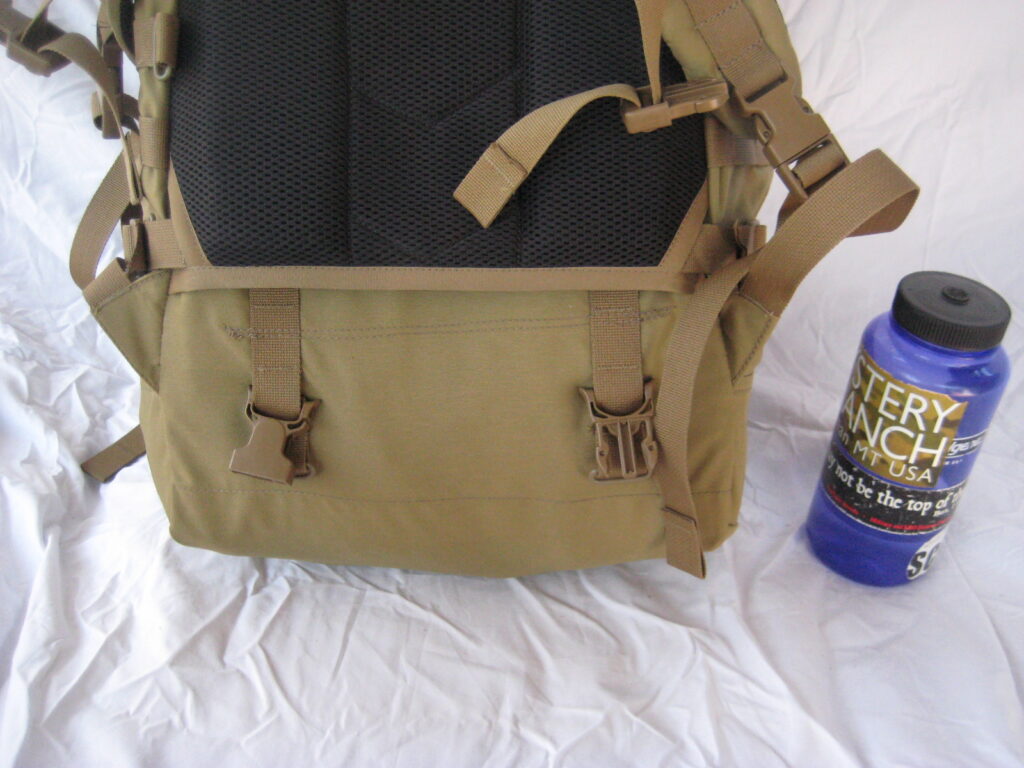
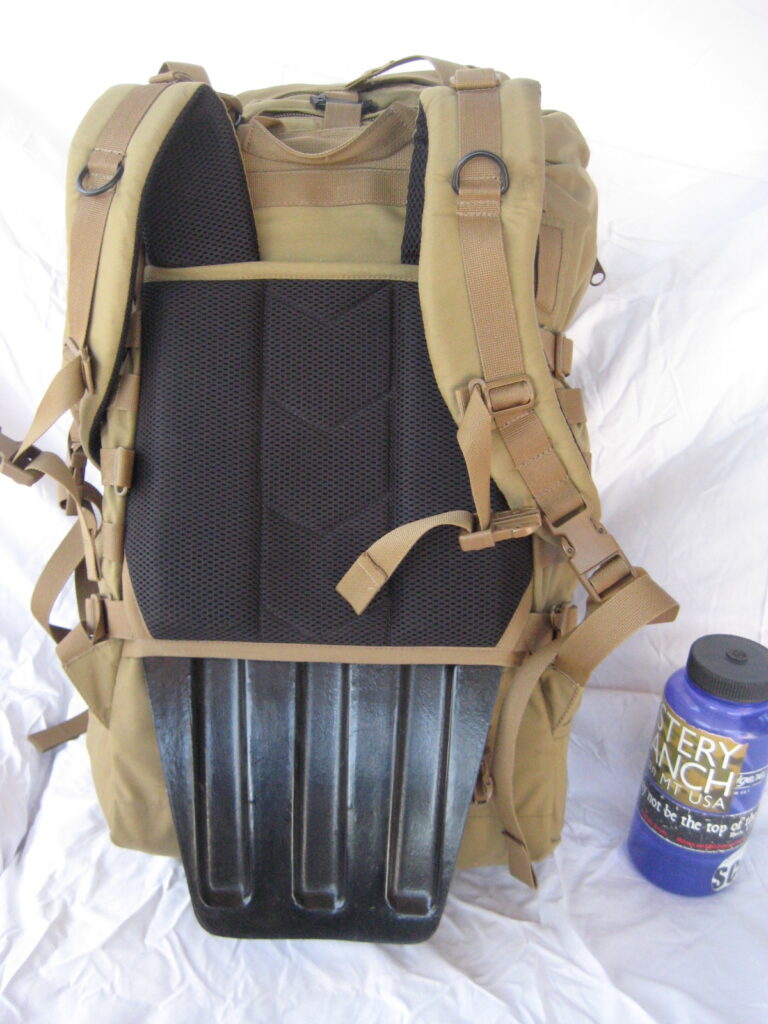
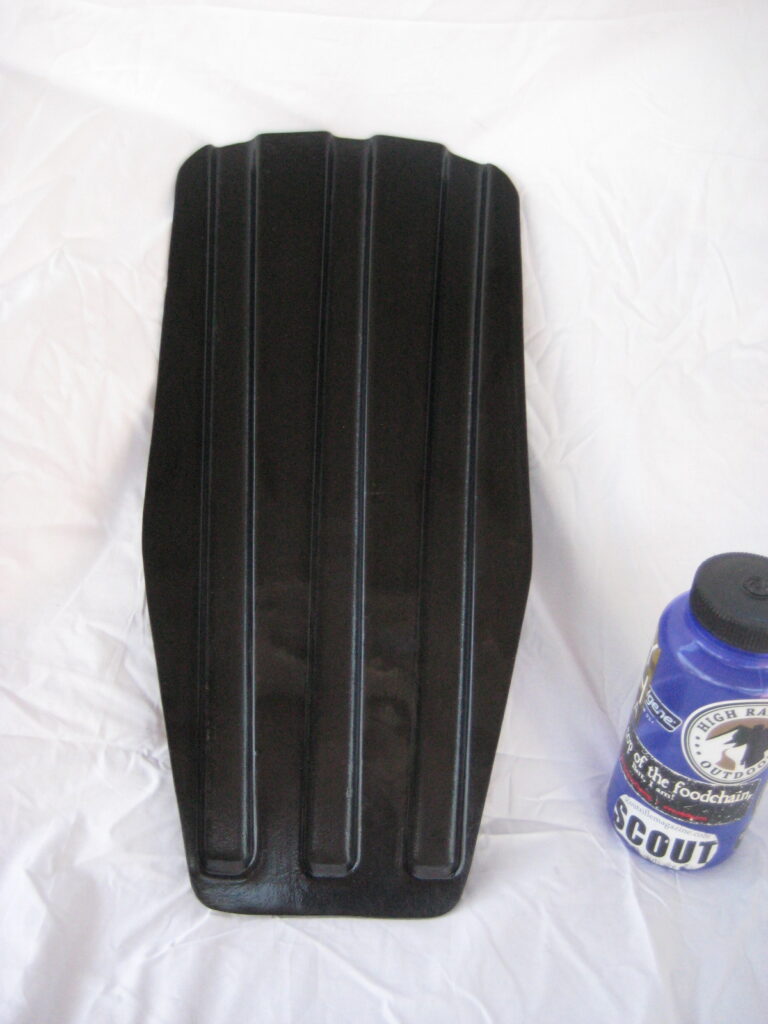
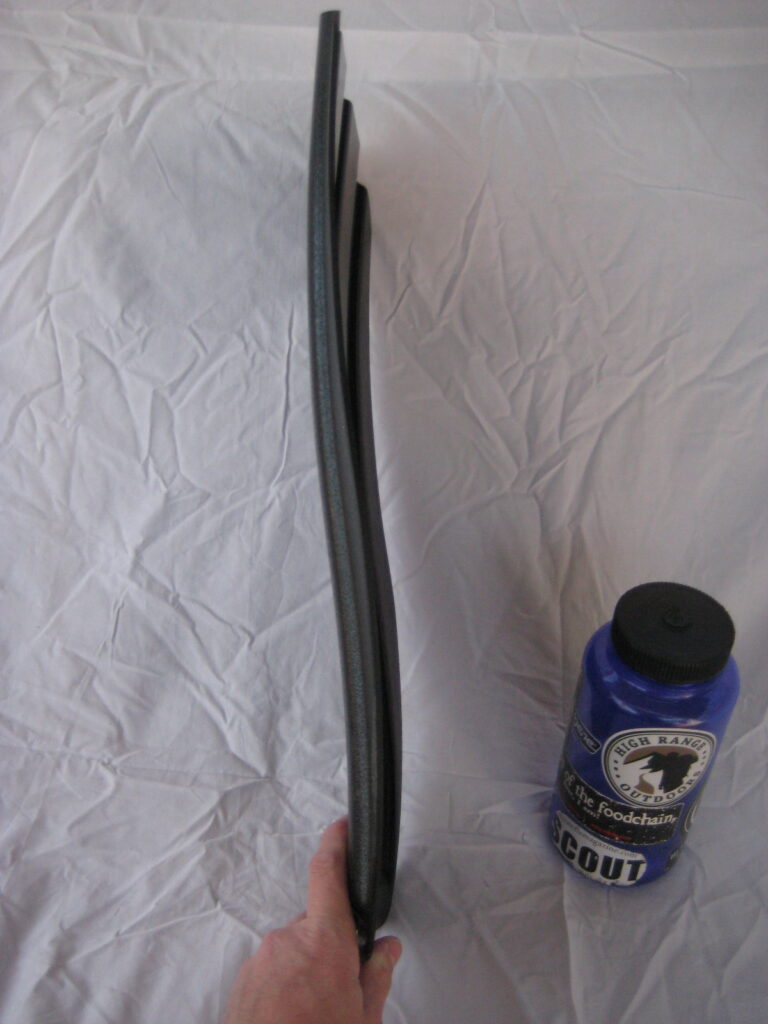
The heart of the AttackPak frame system is the ExoSpine pack frame. This is a solid, rigid, contoured frame sheet to keep the load close to the body’s center of gravity. It’s designed to be worn cleanskin or with body armour without bolsters that other companies utilise.
The ExoSpine frame sits in a pocket on the back of the rucksack. It’s easily removable, making it a simple and elegant system.
.
.
It has ventilation channels that also aid in stiffening the frame.
.
.
The tail of the Exospine extends down to the bottom of the rucksack. This large expanse of the pack frame hints at its purpose.
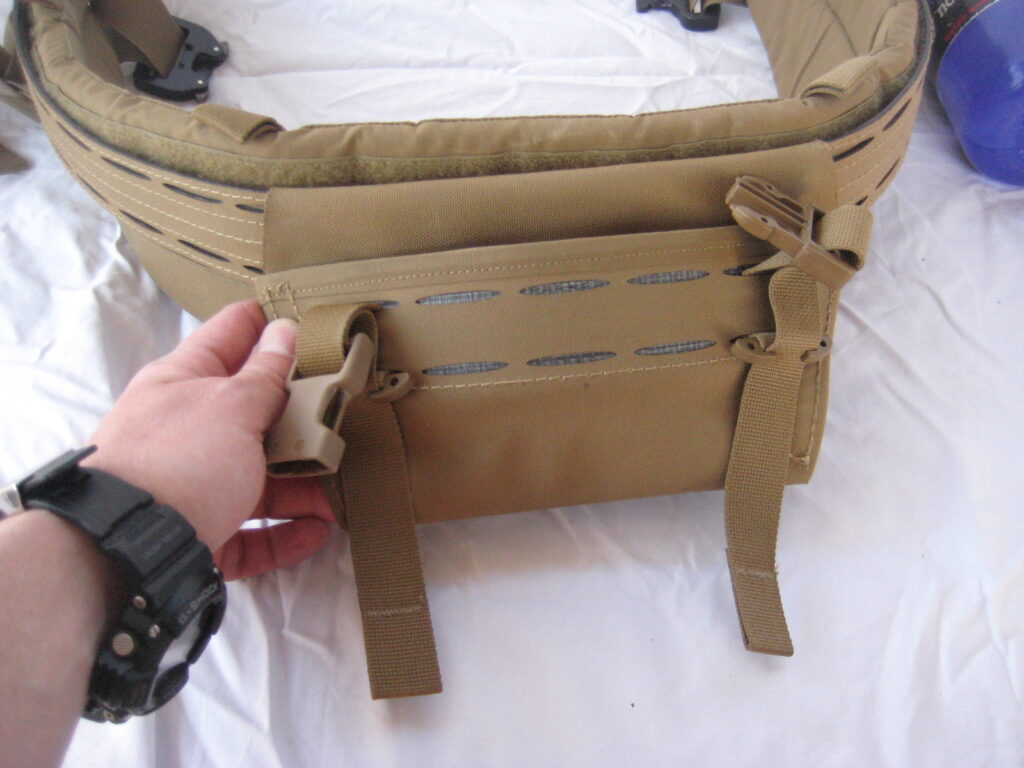
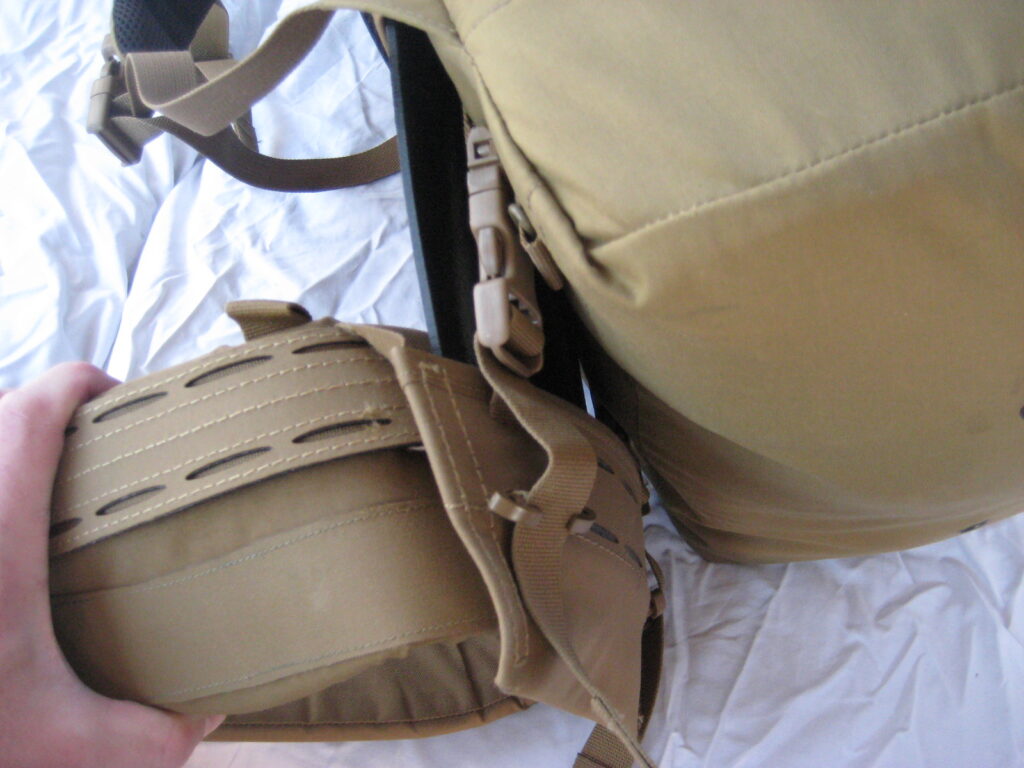
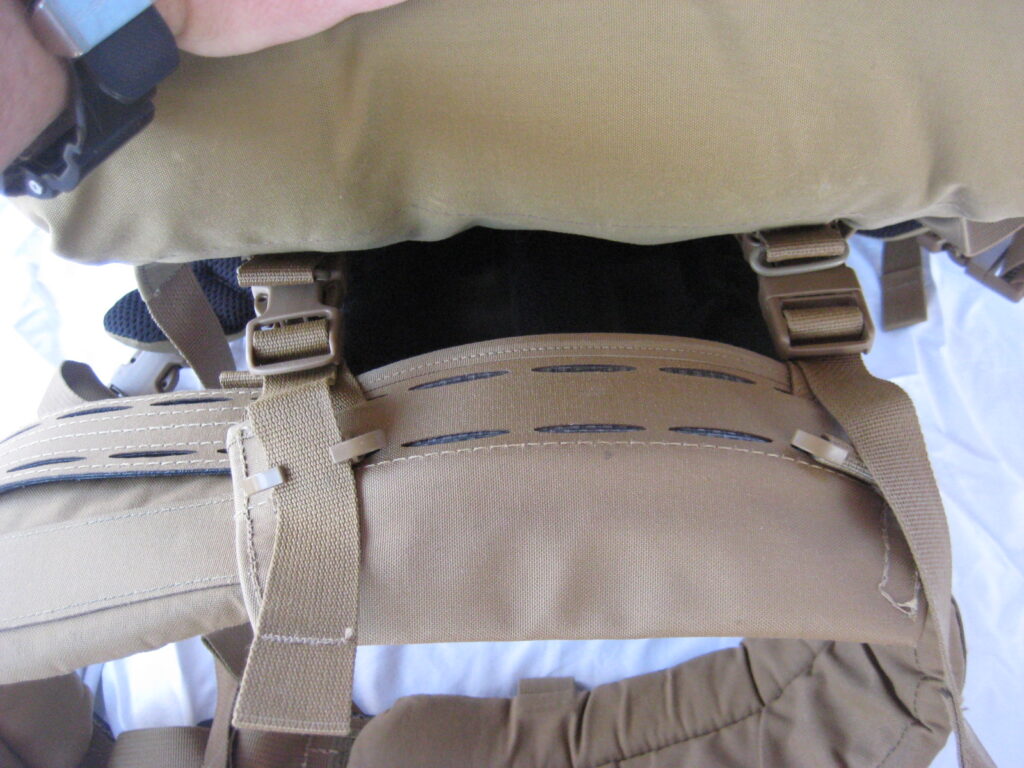
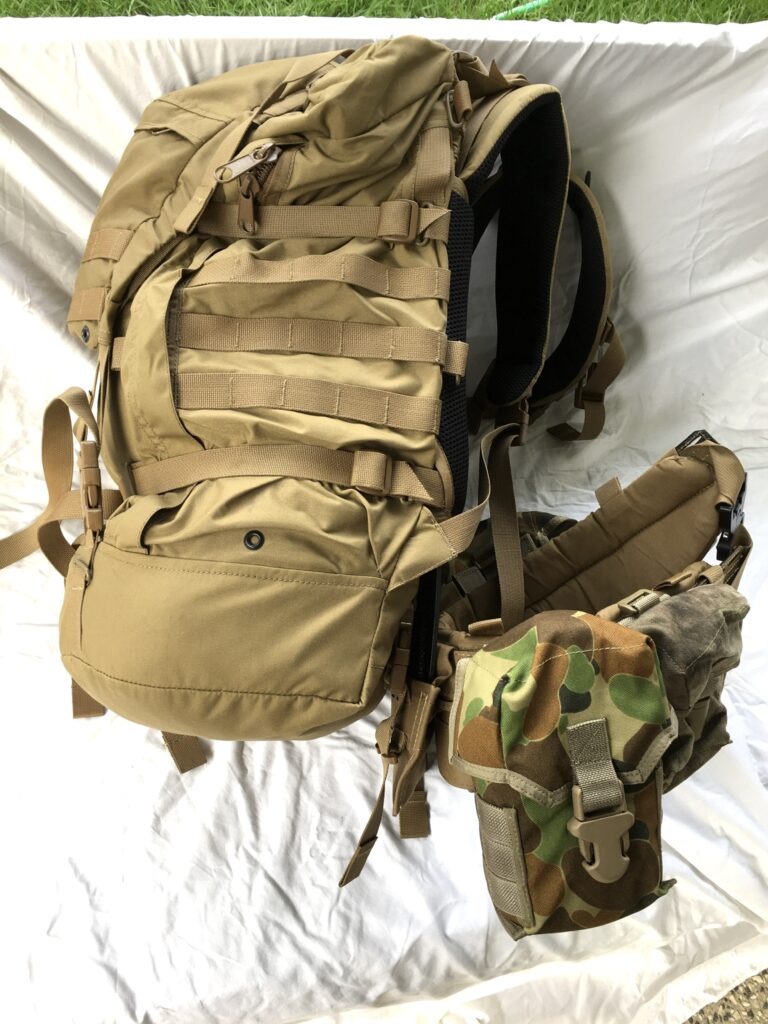
The large exposed tail docks within the Gravity Pocket mounted on the back of the modular hip belt.
.
Just like the ExoSpine frame, the Gravity Pocket is a simple, yet elegant solution.
.
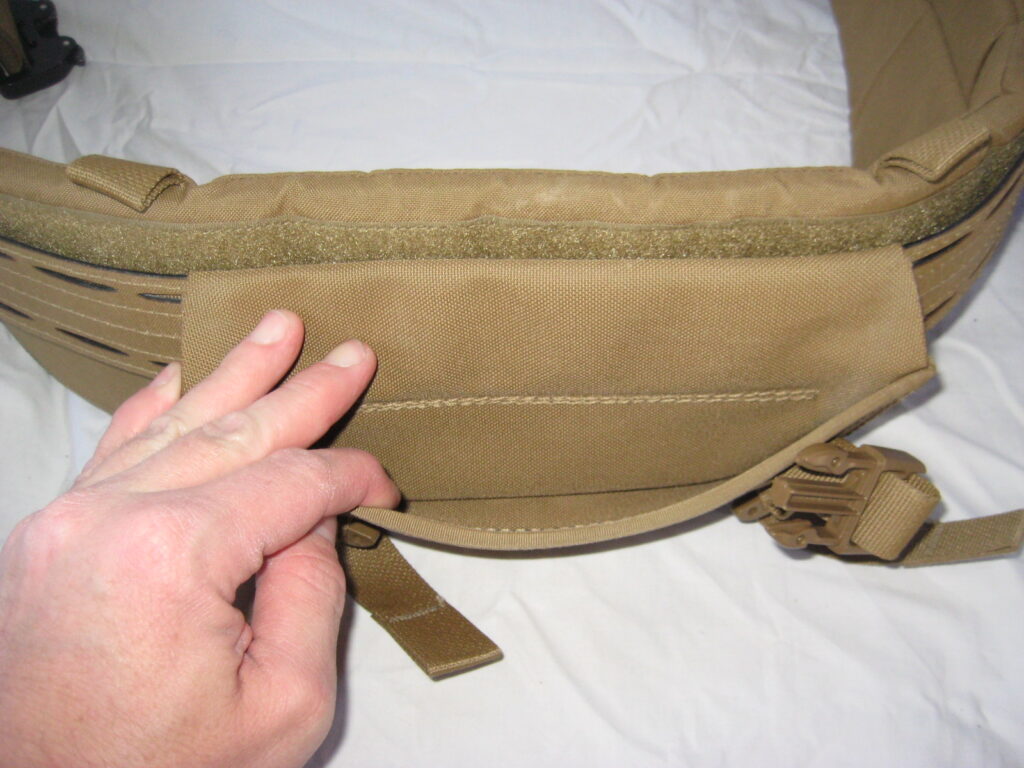
The Gravity Pocket supplied is double lined, with a polymer stiffener in the lip to allow easier insertion of the ExoSpine. It also has two side release buckles that match up to their opposite on the rucksack to secure the hip belt to when required.
.
.
.
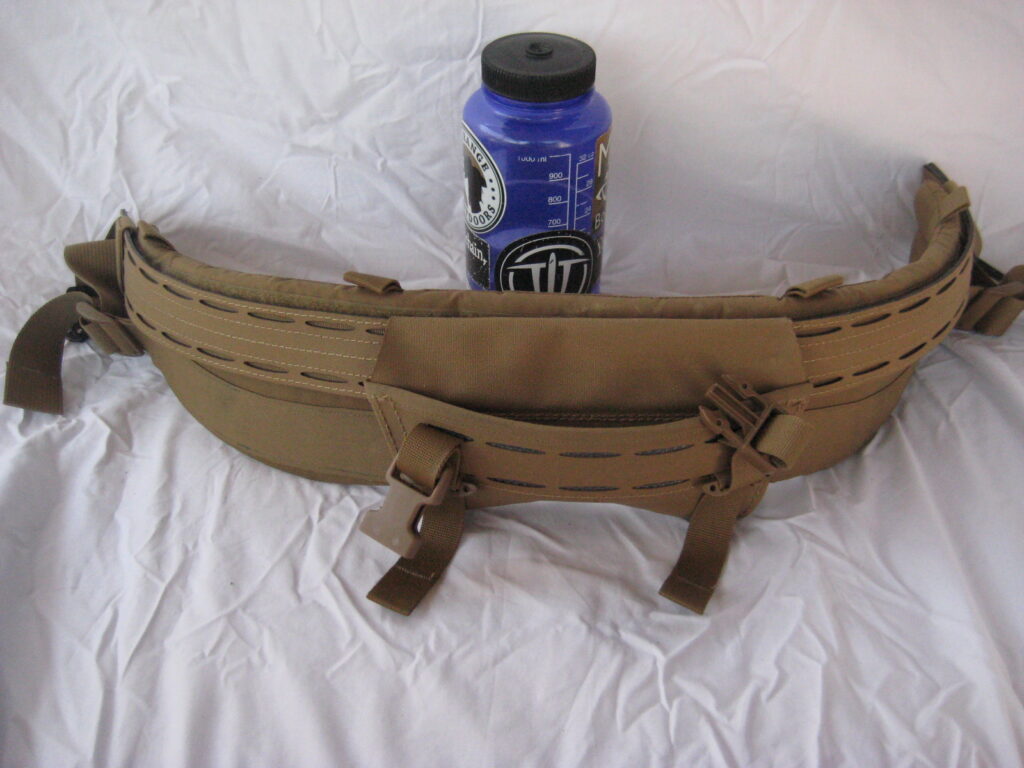
The modular hip belt is a multi-belt design. The outer belt is AttackPak’s Alpha Gun Belt. It’s a multi-layer polymer construction with relief cut-outs to allow mounting of pouches to the belt. The inner surface is hook lined to allow it lock to the inner belt which is of padded construction.
.
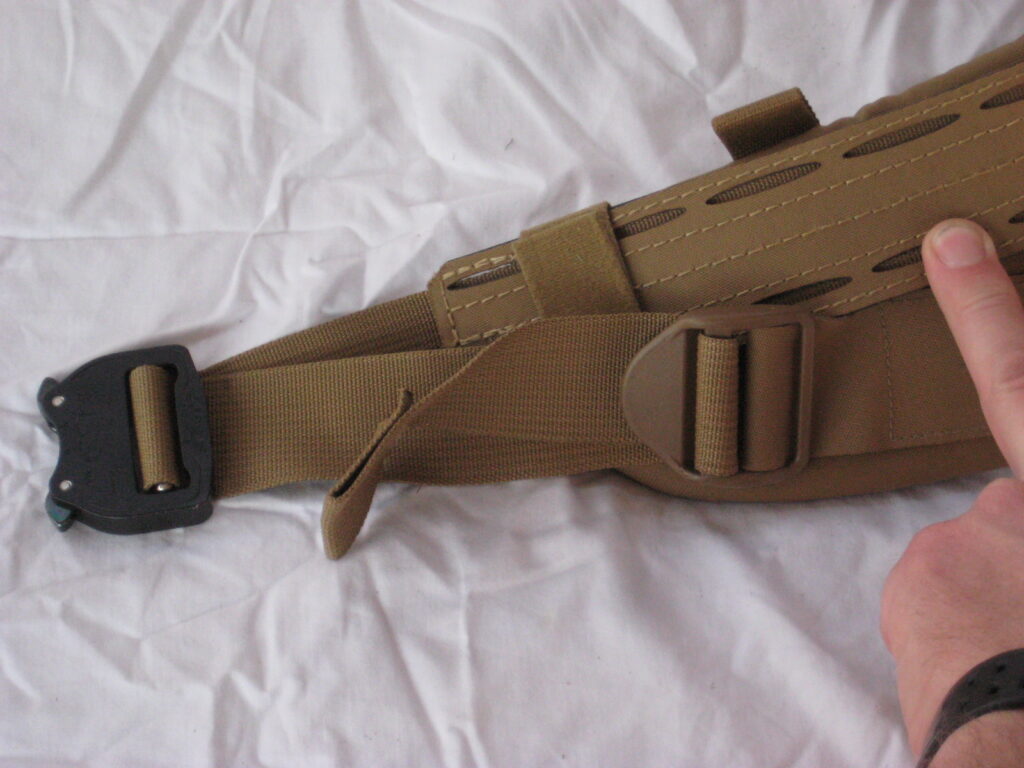
The padded inner belt is nicely contoured and has a cobra buckle on a pulley system. The pulley system allows ease of tensioning.
The tensioning system also has a structural element to allow maximum tension and load bearing ability of the padded hip belt to occur.
.
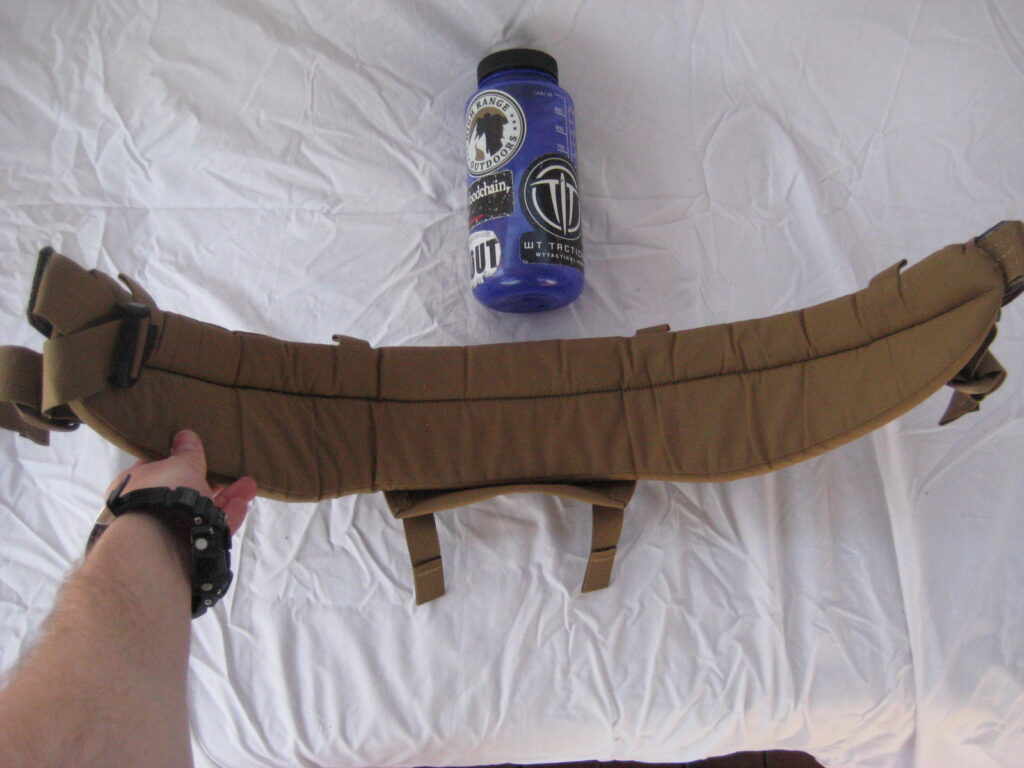
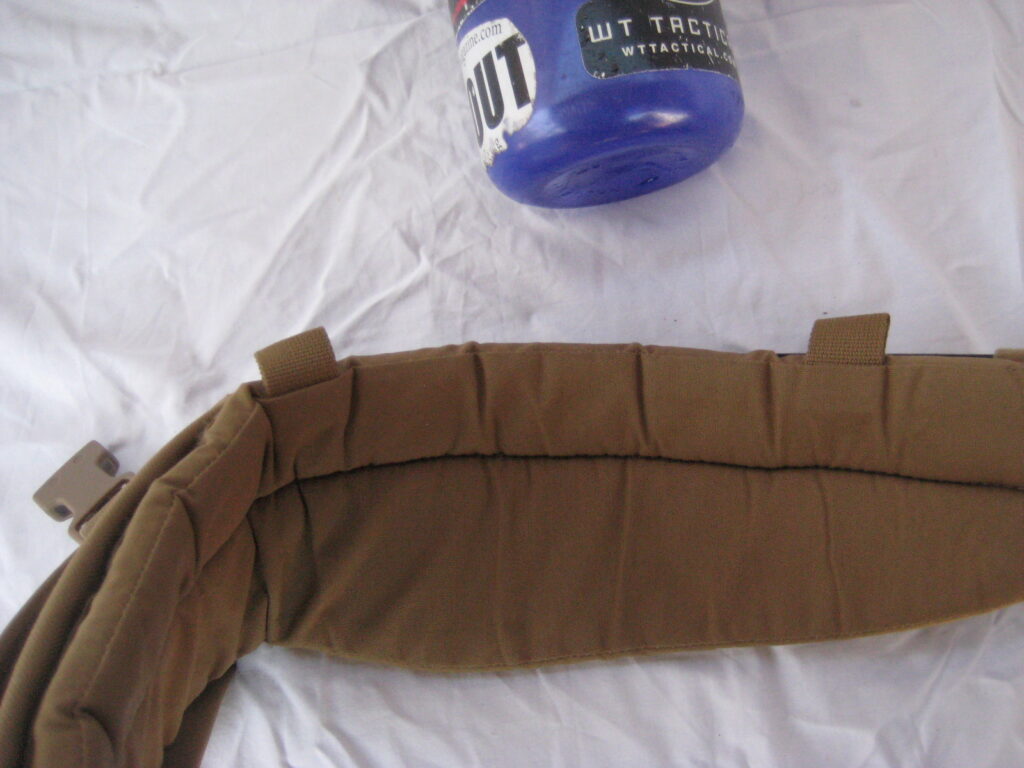
The design of the padded belt is simply inspired. There is a seam about three quarters up the height of the padding, that when tension is applied on the belt to tighten it, a natural pocket forms to cup the hip bones – this aids significantly in setting up the belt properly for the wearer.
.
The top of the padded belt has loops for the attachment of shoulder straps or suspenders if required.
.
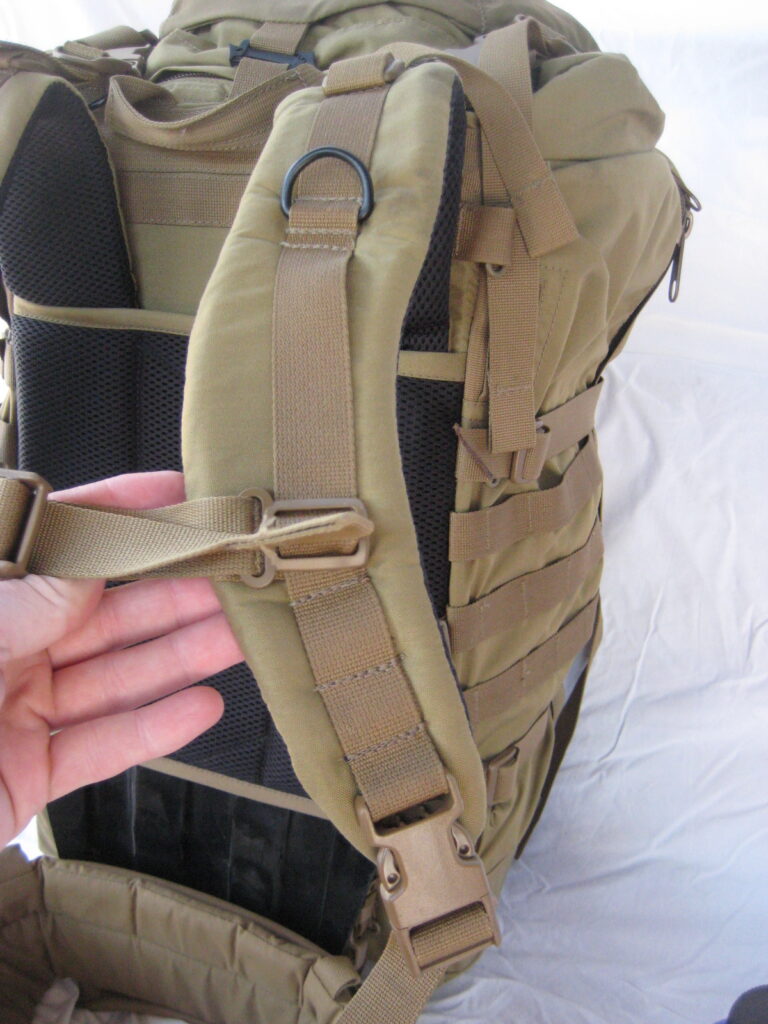
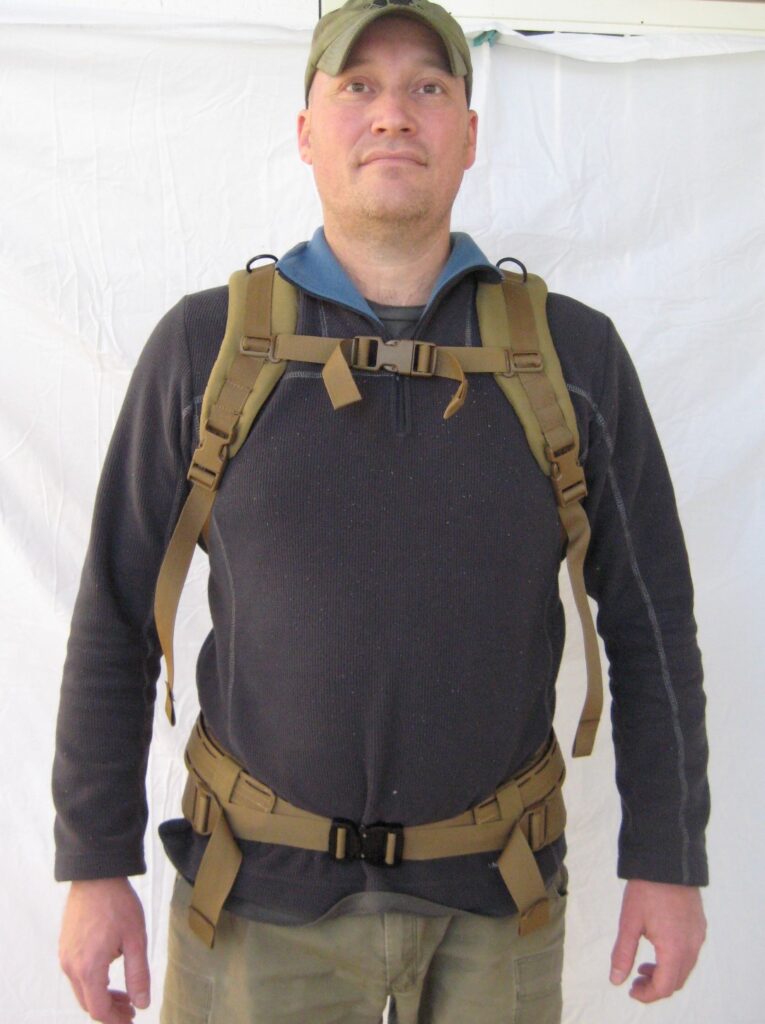
The shoulder straps are contoured, with top tensioners fitted.
D-rings are fitted for hydration hoses, radio handsets and other equipment.
A height-adjustable sternum strap is also supplied.
The shoulder straps have side-release buckles for quick release of the rucksack.
.
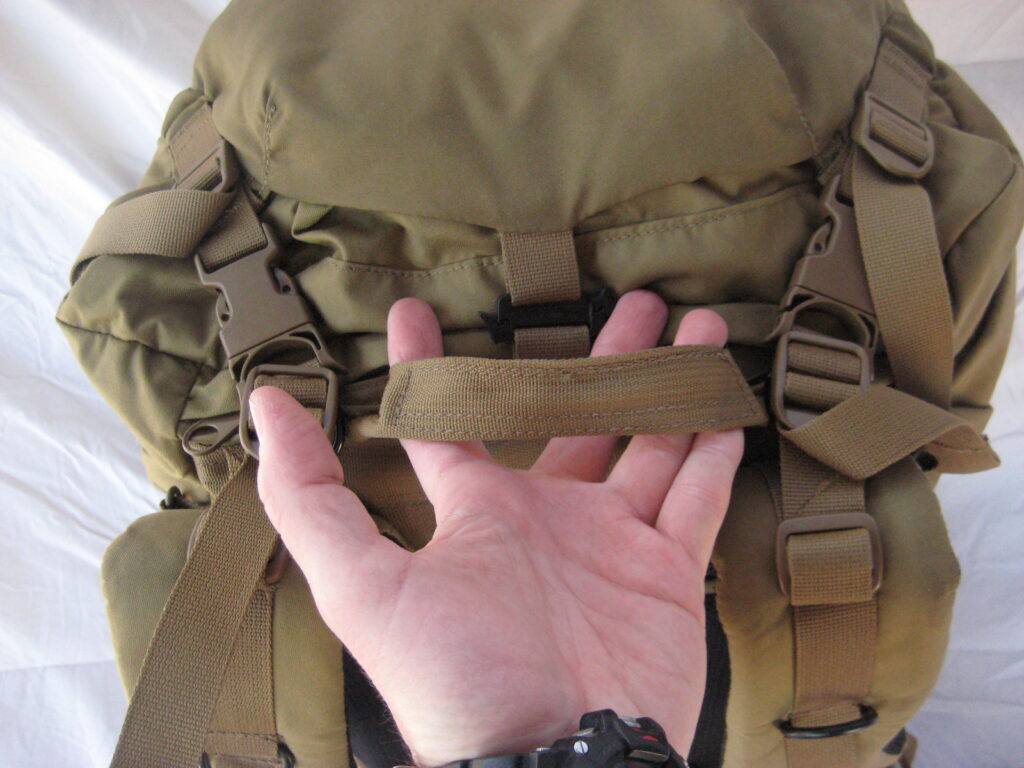
A stoutly constructed drag handle is at the top of the frame/harness assembly.
.
RUCKSACK –
Material for the main rucksack is a combination of 300Denier and 500Denier material.
The upper portion is the lower weight 300Denier, whilst the bottom of the rucksack is the heavier 500Denier for abrasion resistance.
.
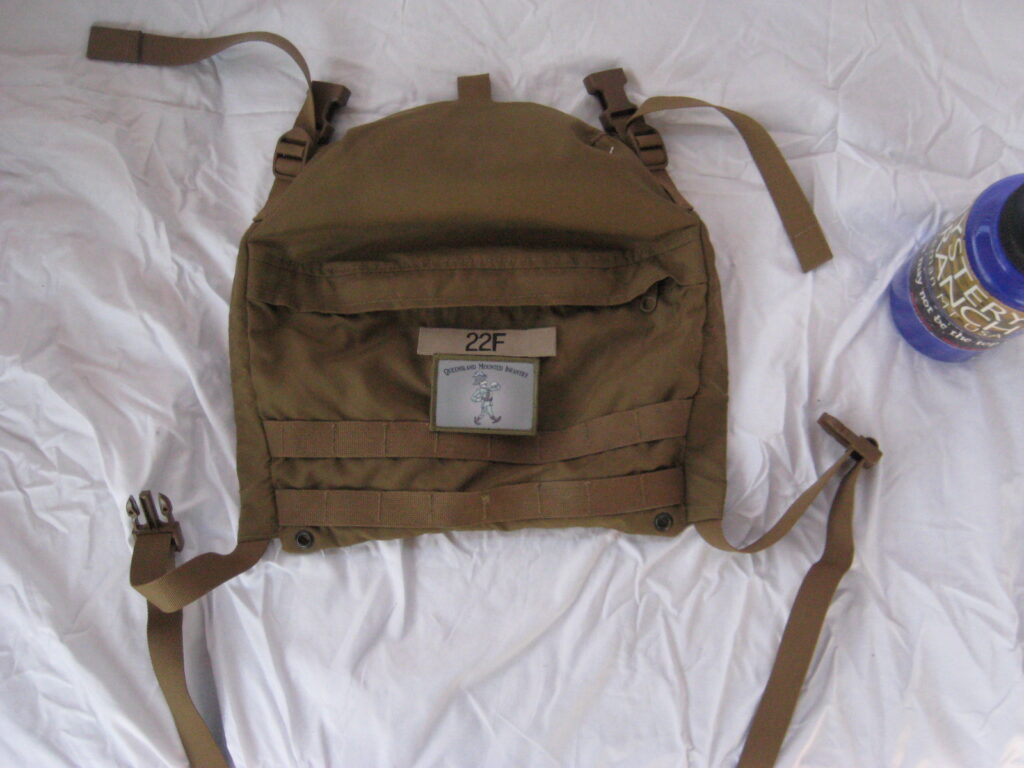
The Defender is fitted with a Go-bag lid.
.
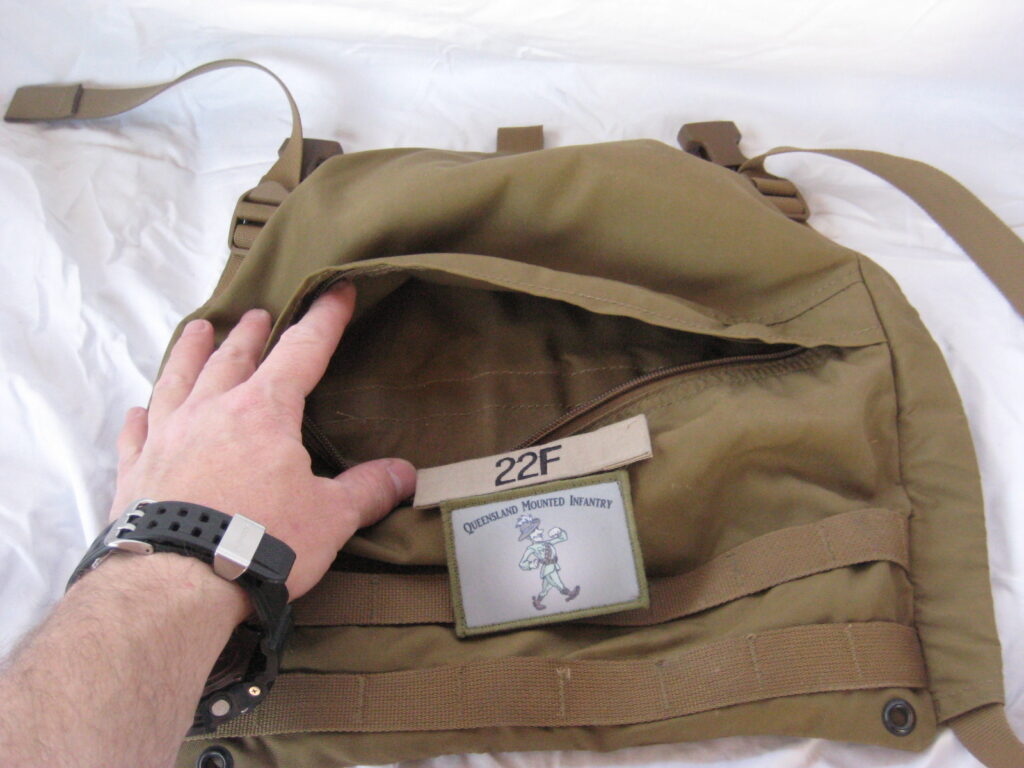
On the outer surface, there is a zip-accessed pocket for small sundries, a panel of loop Velcro for IFF patches. Two rows of PALS channels provide for external attachment of accessory pouches.
.
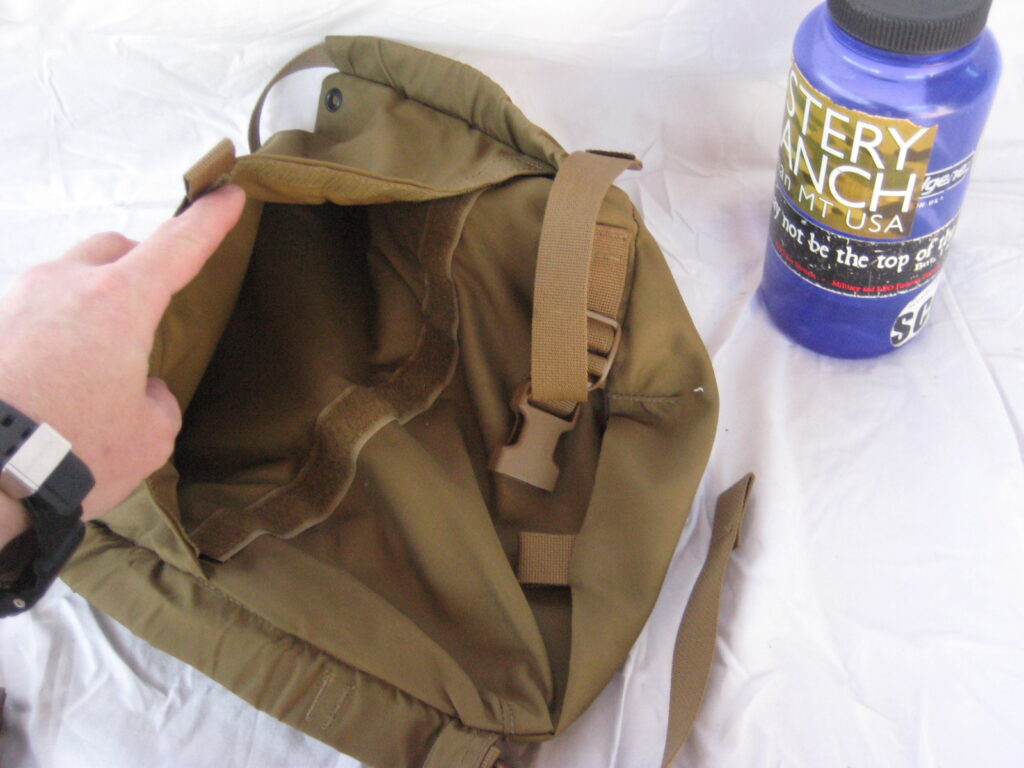
On the inner surface of the Go-bag lid is a Velcro-secured map pocket with drain holes.
.
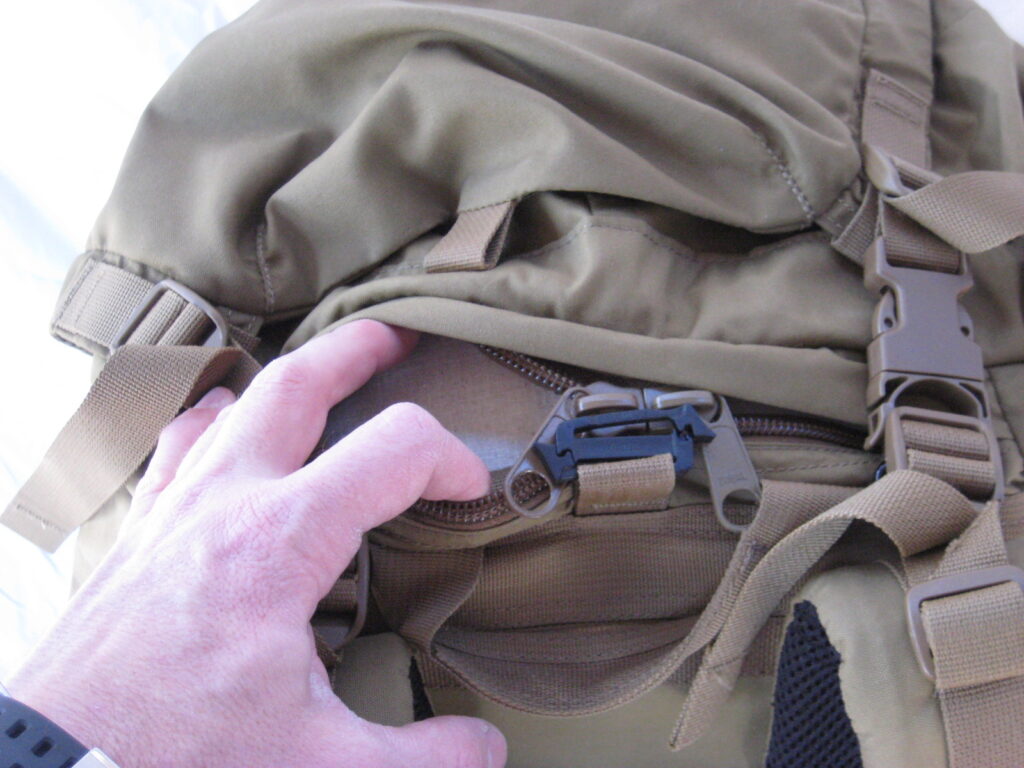
Moving to the main rucksack, there is zip access the main compartment for hydration hoses and radio handset cables.
.
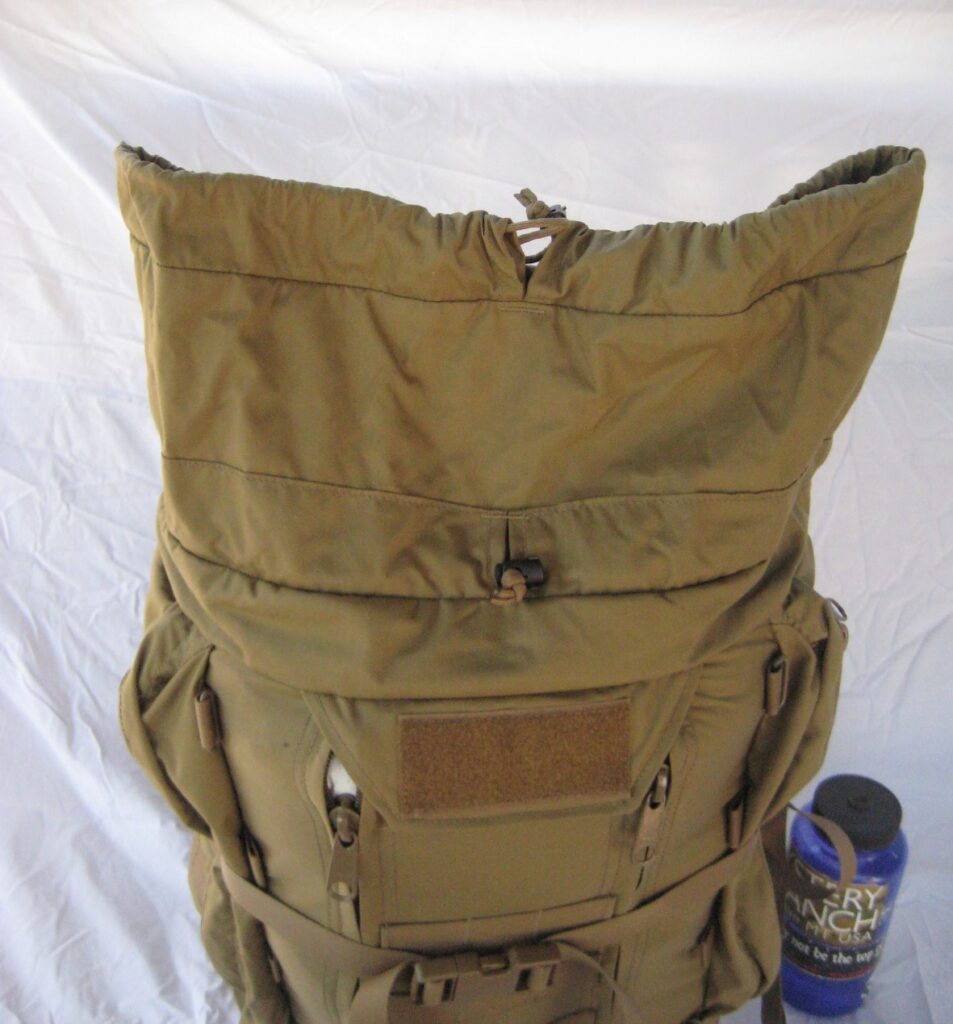
The top-loading main compartment has a storm collar secured via dual draw-cord. The storm collar allows for expansion capacity should extra equipment be carried.
.
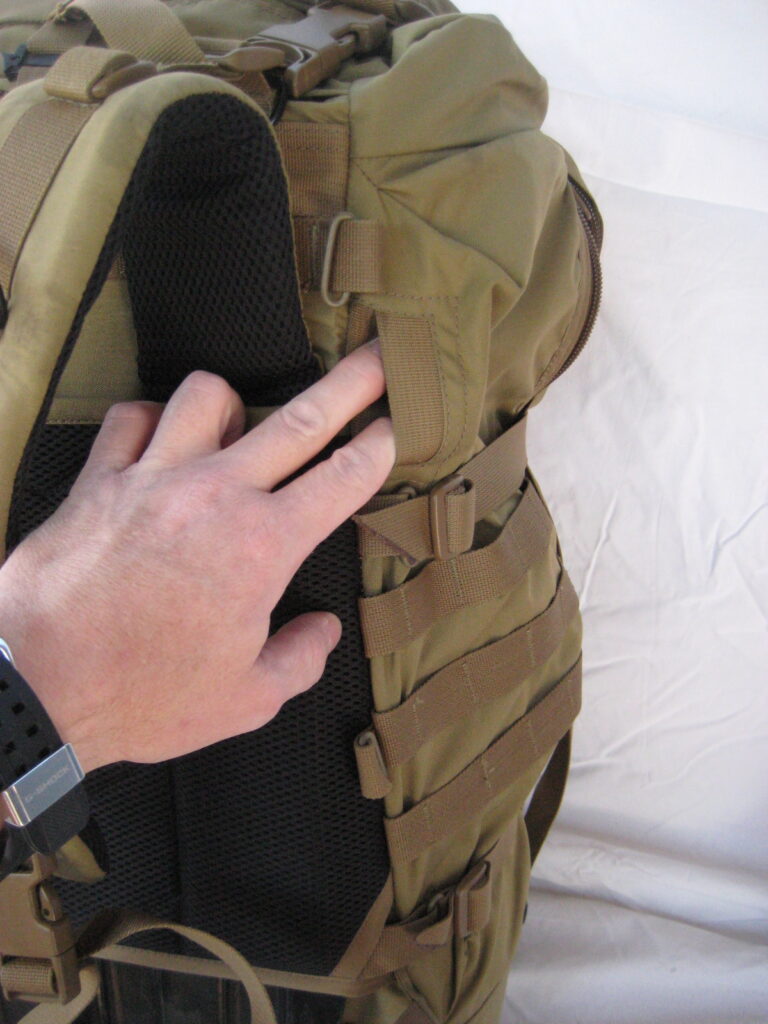
On each side of the rucksack is a side pocket. Each of these side pockets is designed to accommodate a 3 litre hydration bladder. There are pass-out ports for the hydration bladder hoses to the outside, and a drain hole at the bottom.
.
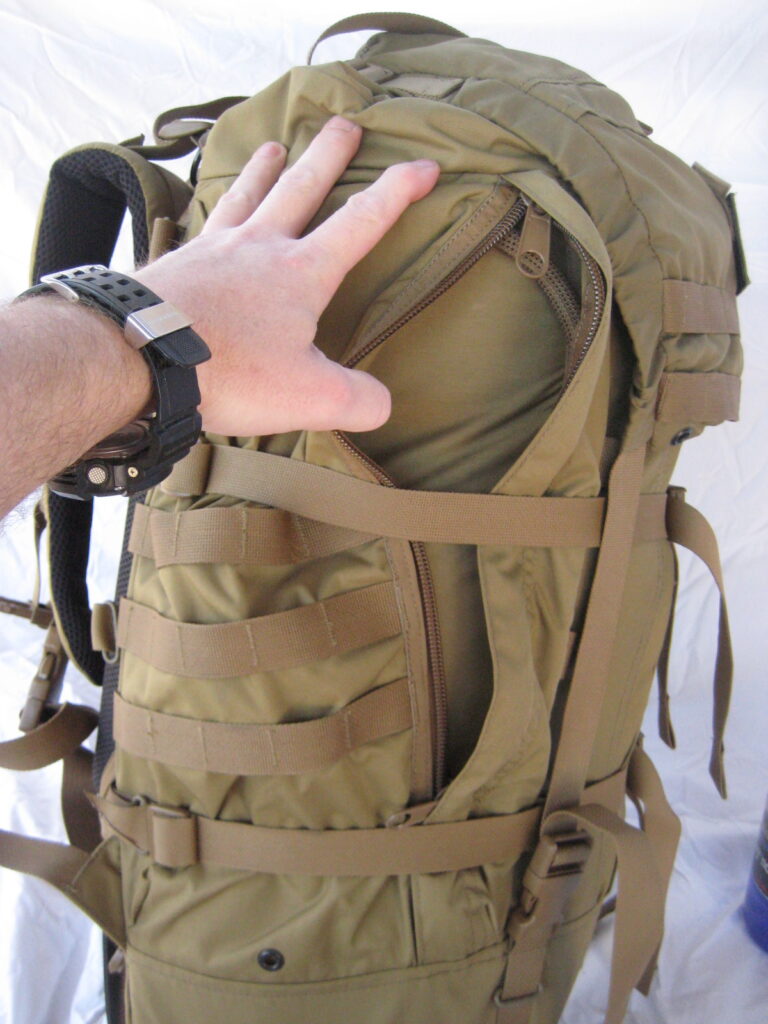
There are PALS channels on the outside of each hydration bladder pouch for additional external stowage.
.
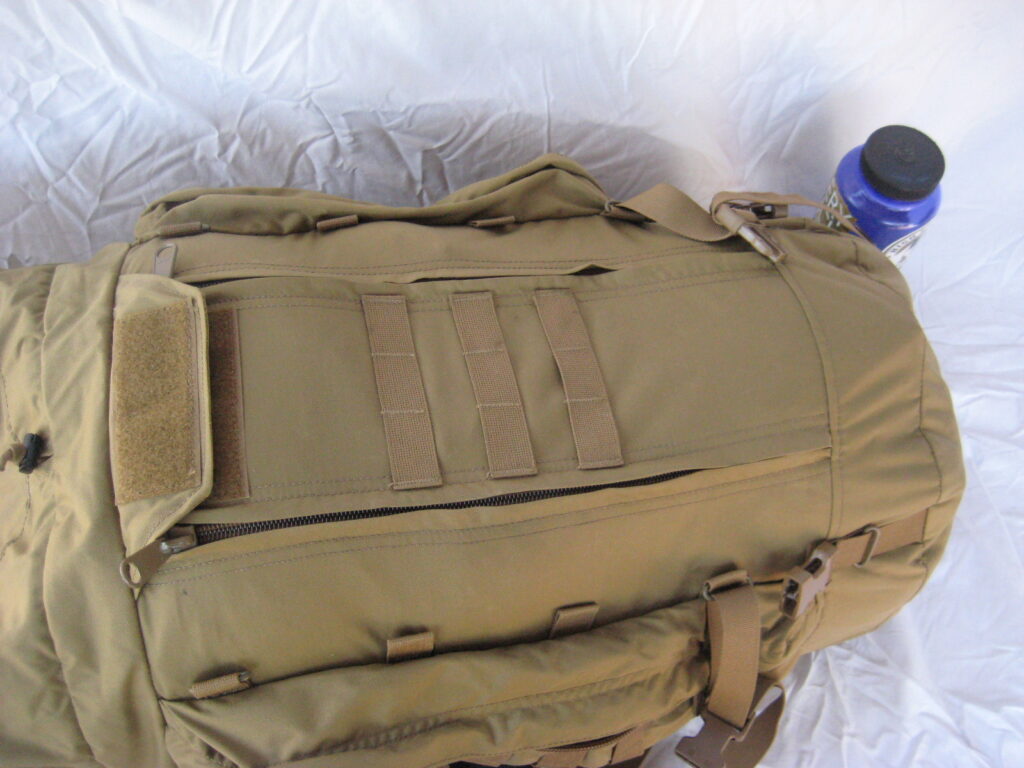
External access to the main compartment is also possible via a double zip panel.
.
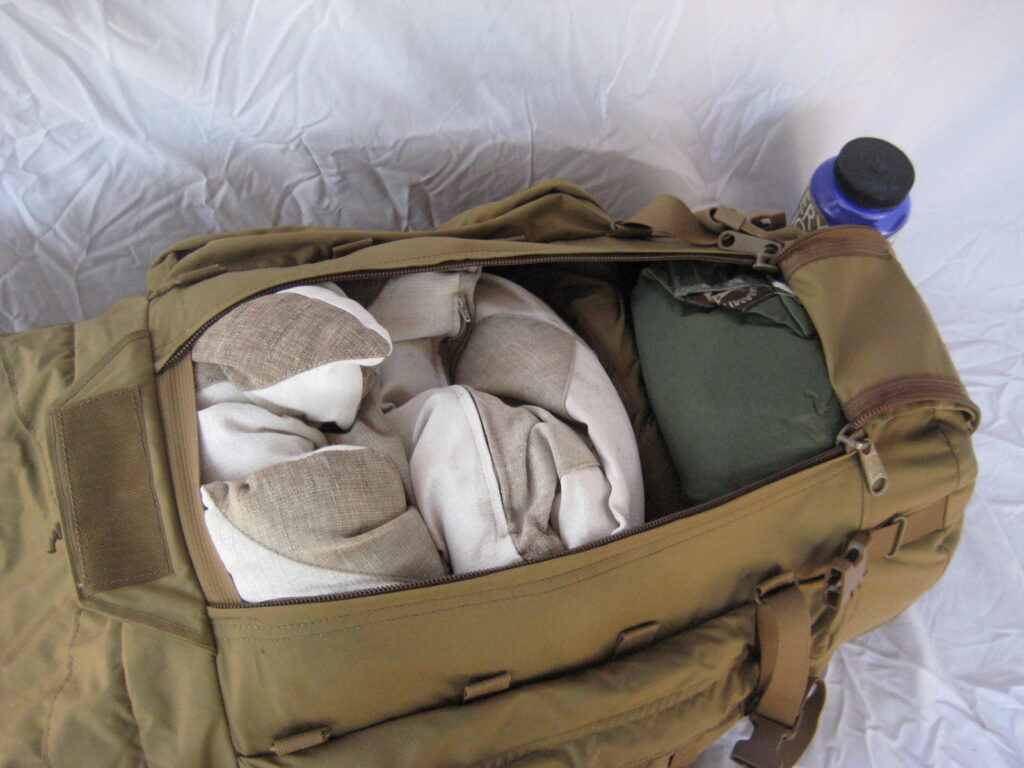
This also has a loop pile for IFF patches.
There are two removable compression straps and a series of steel loops to secure equipment externally.
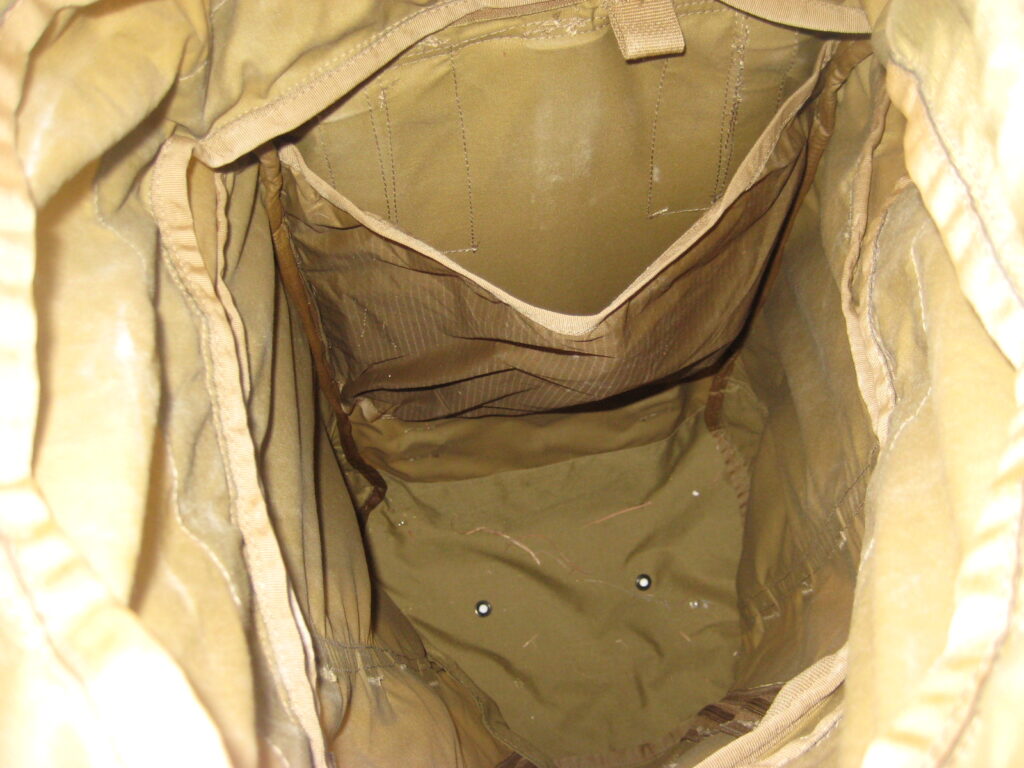
Internally, there is a hydration bladder pocket, and drain holes at the bottom of the main compartment.
.
.
PERSONAL ASSESSMENT:
.
.
.
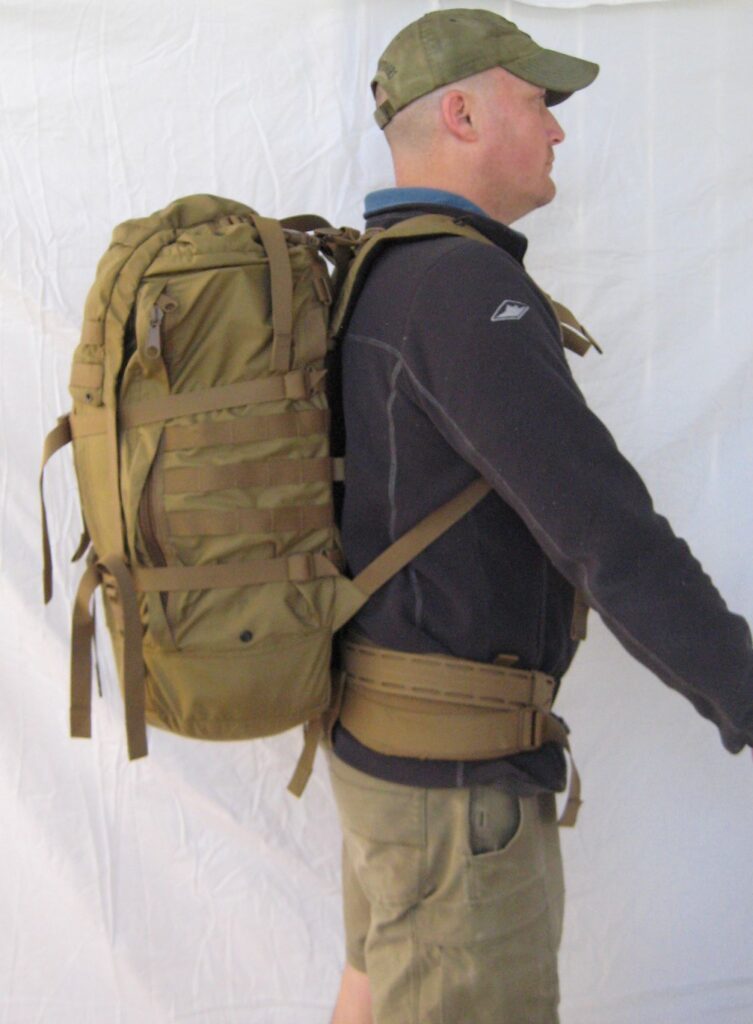
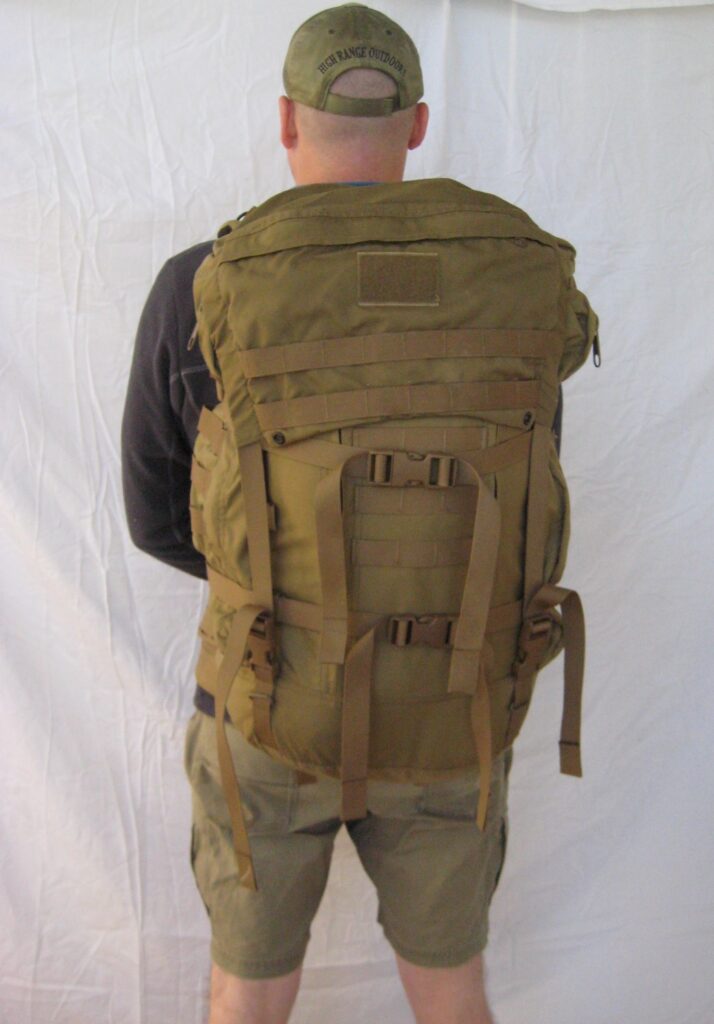
AttackPak and their ICLS (Integrated Load Carrying System) is a truly unique solution to the great conundrum of outdoor professionals of integrating ergonomically safe load bearing equipment and mission load.
.
As we’re all aware, a hip-loading belt on a large pack is the best current ergonomic solution for carriage of large backpacks. There are issues however, with integrating mission or combat load with hip loading belts.
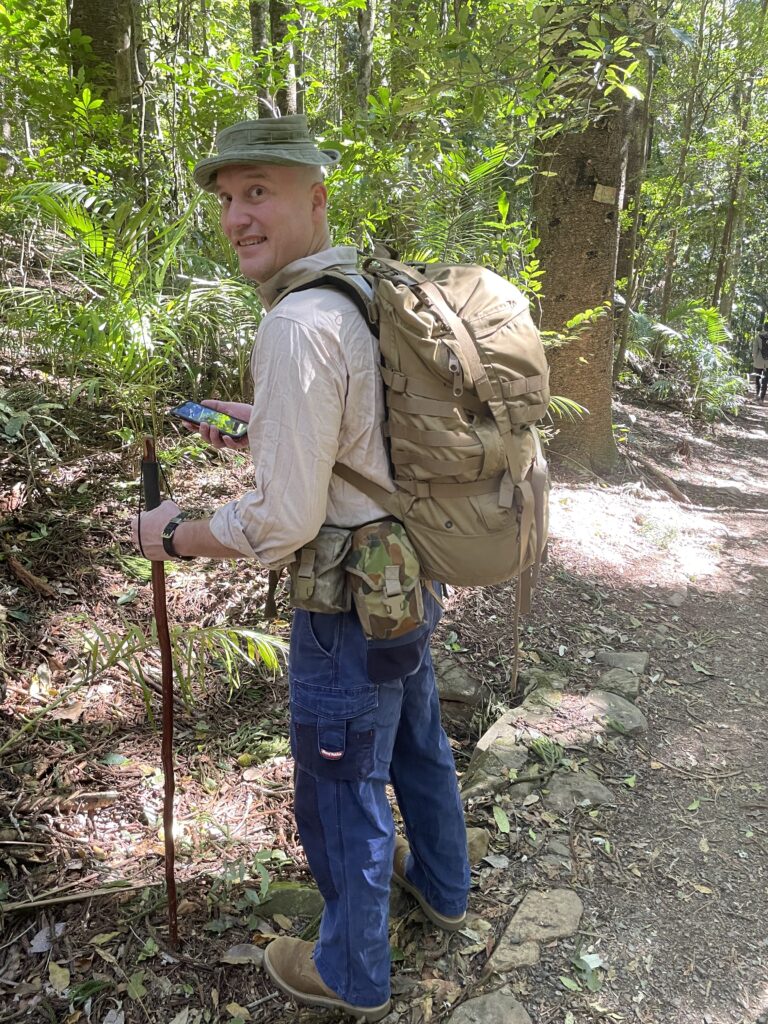
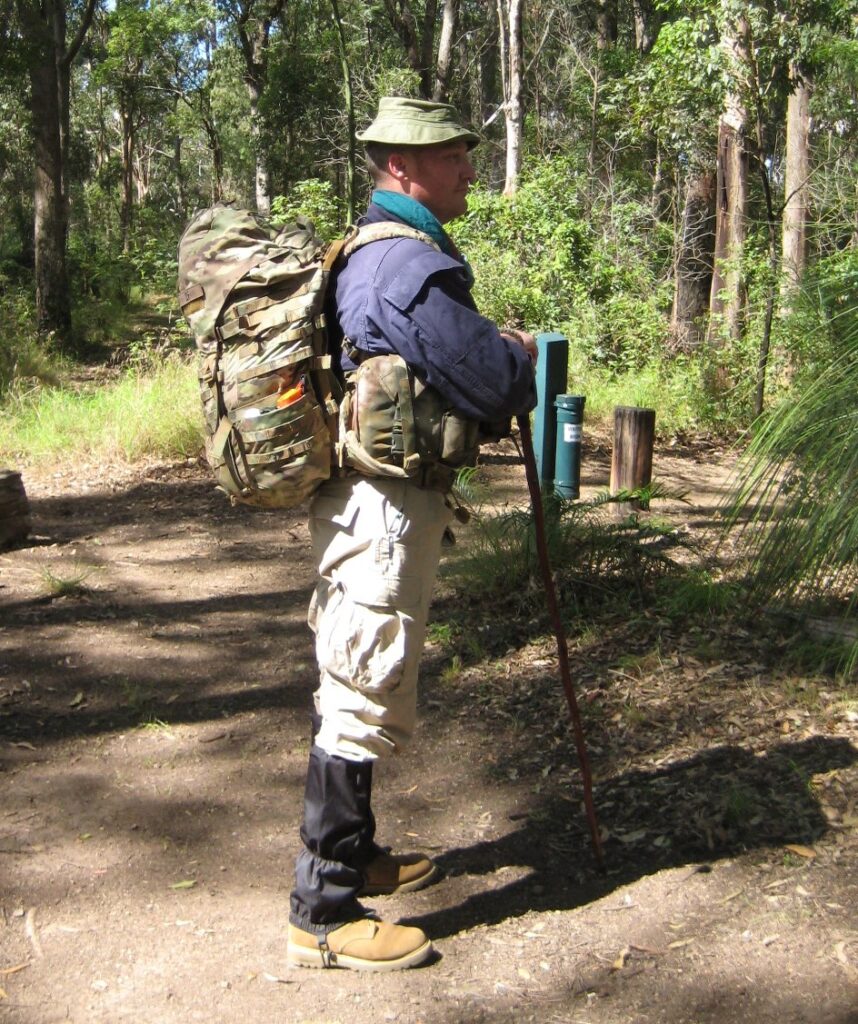
Traditionally, this issue was solved with some use of chest webbing and a hip-loading belt on the pack. Here, you will see a demonstration of what I mean with a previously used picture of me with a Crossfire DG-3 and Smamit chest webbing.
This traditional equipment setup can be quite bulky and often suffers from integration issues.
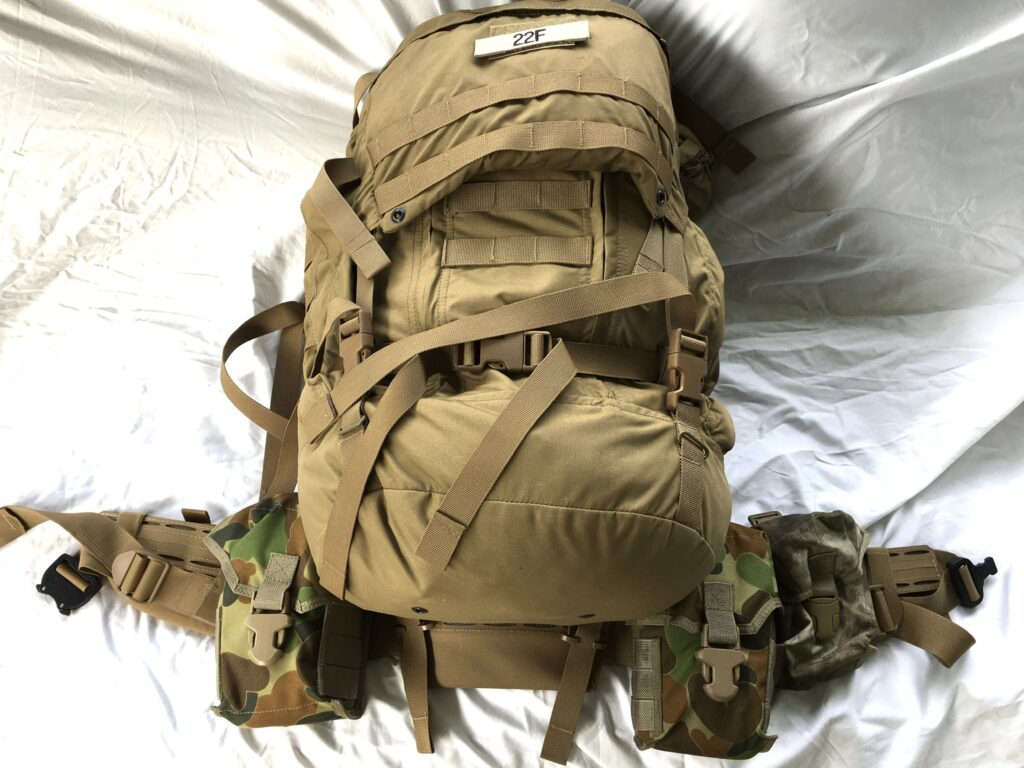
Comparing these pictures with the AttackPAK harness seen above clearly demonstrates how less cluttered the Defender pack is.
.

.
AttackPak has offered a solution to this problem by integrating the load bearing belt into the battle belt. This has been attempted before, most notably with the prototype MOLLE pack designed by the US Military NATICK labs many years ago, which integrated the belt with the pack frame with a ball and socket set-up. Unfortunately, this ball and socket design was less than optimal.
.
I believe AttackPak offers a very good solution to this conundrum. In their own words, it’s quick ditch / easy don, all whilst still providing ergonomically safe hip-loading of the main rucksack.
For the first time ever for a review on this site, we now have a couple of short videos to demonstrate just how easy it is to don/doff this pack.
.
So, what sort of usage and applications do I see the Defender pack in?
I’m not sure if it’s suitable for line infantry usage in the ADF context, but nowadays I simply don’t know enough about the Fight Light concept to comment further. Although I fervently wish that such technology such as this would be considered.
But in other applications, I see this technology being a real asset for many outdoor professionals.
I consider this a hunting rig par excellence. The ability to carry a useful sustainment load through rough terrain and have a useful 2nd line of mission kit still available when the 3rd line is dropped or cached is a fantastic capability.
.
I also consider this pack an excellent option for many other armed professionals other than military users. A “guerrilla rig” for prepared individuals as it were. In the USA, these packs are currently being in used in practical long range precision shooting competitions that combine land navigation, traversing rough terrain with long range precision shooting stages.
For other civilian end-users, I can see utility for anyone wishing to have a useful load of safety equipment instead of carrying a separate daypack for side-trips on long range expeditions.

.
Because of the sheer flexibility of the design, other pieces of equipment can be integrated with the Defender Pack. I would envisage if an end-user had a requirement for more cargo capacity of the 2nd line, such as more ammunition or administrative/personal equipment (eg cameras etc), then the addition of a common/preferred chest rig such as (insert link from one of my chest rig reviews) or the a chest pack from such companies as Hill People Gear (Link HERE) could be easily integrated.
.
Personal usage of the Defender pack has included being worn for over 200km, comprised of training walks and a couple of overnight trips.
The longest trip worn was 21 kilometers (approx. 13miles) in a single day with a 20kg (approx. 44lbs) load.
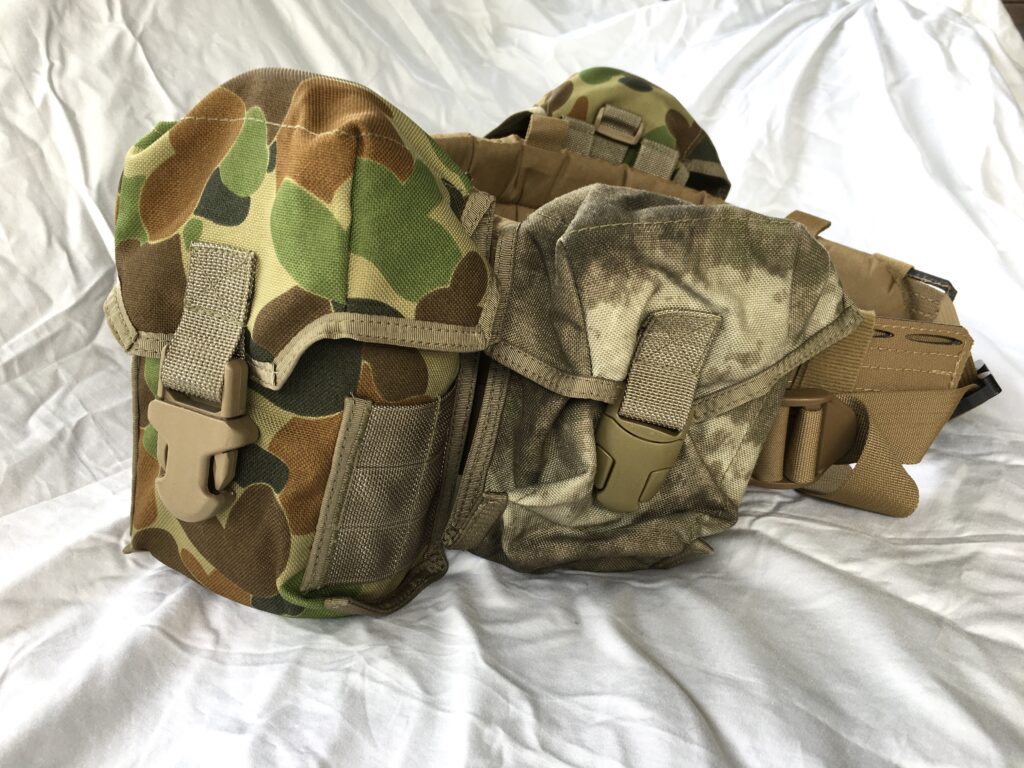
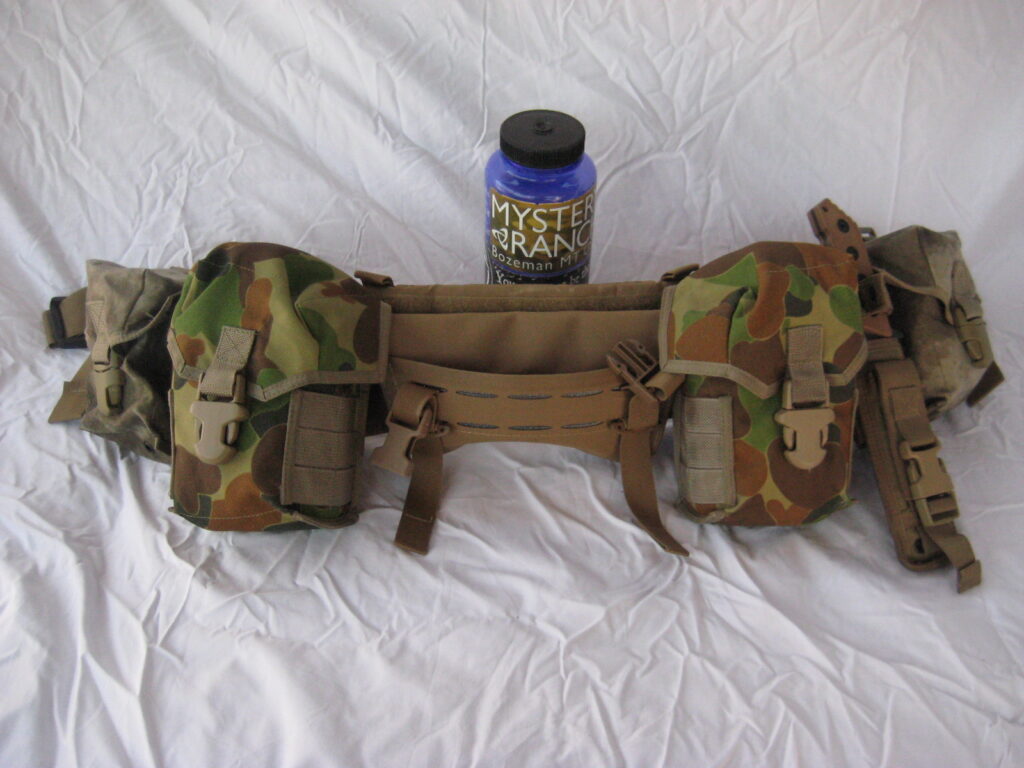
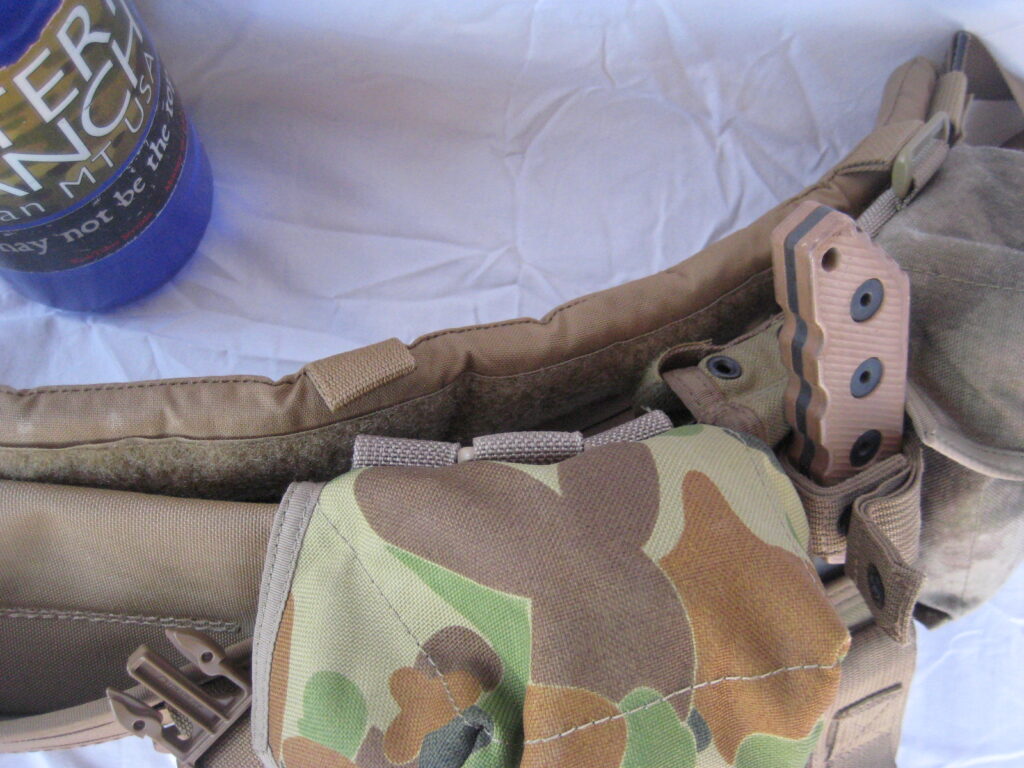
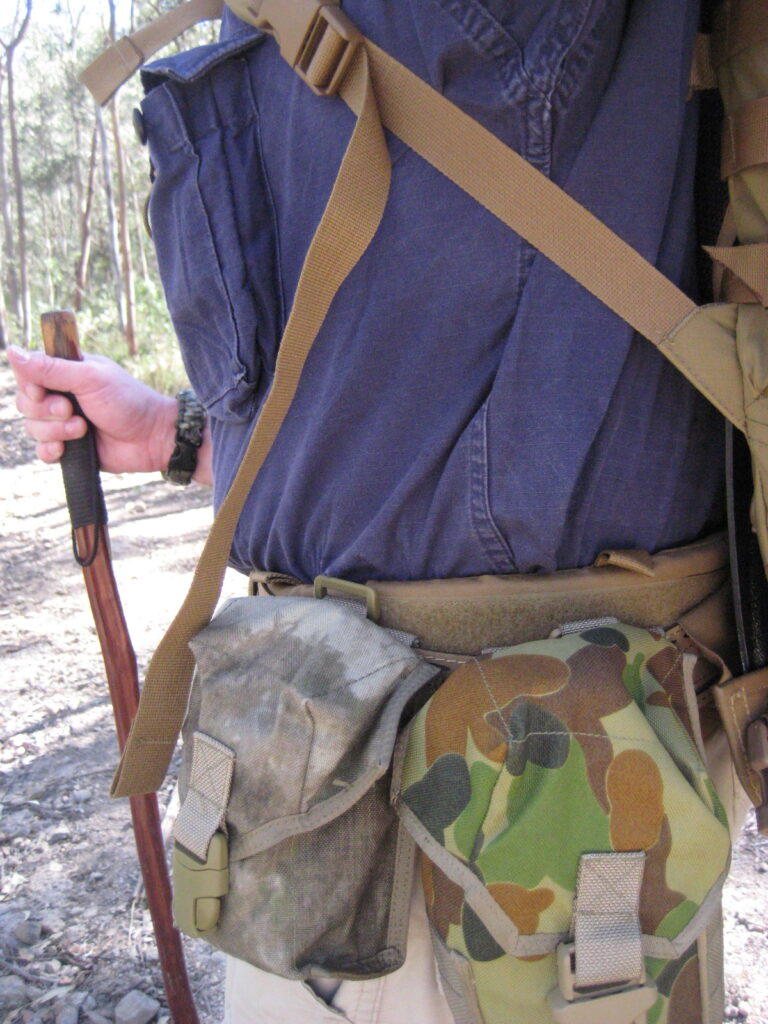
Initial usage was with the belt kept cleanskin. Later, what I would consider a typical load for the Australian bush was added. This comprised of 4 SORD pouches, two pouches for ammunition/small sundry items and two larger utility pouches to carry 1-quart canteens and a sheath for a knife
.
.
.
.
PROS –
The detachable hip belt design is simple, and rugged, perfect for rough field use. The sheer flexibility and simplicity of the design allows the pack to still be worn and useful even if the tail of the Exospine isn’t inserted into the Gravity Pocket, such as when moving away from problem areas in a hurry (emergency exfiltration or conducting a fighting withdrawal off a position).
.
The detachable hip belt is an inspired design that answers so many requirements of load bearing equipment sought by end-users for many years.
That this design from AttackPak has provided a solution that is simple, effective and reduces weight is amazing.
.
CONS –
The Exospine pack frame is very easy to remove from the rucksak. Perhaps too easy, allowing it to remove itself or fall out inadvertently during use. I can see issues with the Exospine frame falling out of the pocket if the pack is hung on the side of a vehicle and bouncing repeatedly whilst moving cross country. Perhaps some sort of means to secure the Exospine frame to the pack may need to be considered.
.
Due to the quick ditch/easy don feature of the hip belt, one doesn’t attain the maximum efficiency of a fixed hip loading belt on a rucksack. Considering the flexibility of the design and the sheer useability, this is a minor point.
Also, to continue with the belt, is the ability to accept pouches. I’m not sure if I did this correctly, so that it may have been outside the design parameters of the belt and possibly overloaded it. But I did find with pouches attached that the Velcro hook and loop didn’t work as well
The loaded pouches would prevent the hook and loop from attaching properly, which would allow both inner and outer belts to separate which reduces the load bearing ability of the belt. This reduces comfort and ergonomics. I have some thoughts on how to remedy this, and have communicated this to AttackPak. They are currently working on developing fixes to these issues.
.
.
I find the Go-bag lid to be satisfactory, but not great. But to be honest, this is because of my significant exposure to other market options. For my long-term usage, I will replace the OEM item with an aftermarket unit.
.
.
SUMMARY:
AttackPak have offered a truly innovative solution to integration of Second and Third Line loads.
I’m looking forward to seeing this design gaining in popularity and even more development.
Posted in Civilian, Military, Packs & Webbing, Short Trip, Specialist by 22F with 1 comment.
Leave a Reply