The Mistress – A Marlin 336 in .30-30 Calibre
This is my rifle. There are many like it, but THIS ONE is mine.
.
.
This has been a long, tortuous path. For the last few years, I’ve lusted to get back into owning a good long arm in this lucky country. It’s been a long journey in part due to my previous work, which made me a professional vagrant of no fixed address, and little time at home to actually enjoy some recreational shooting.
.
For those of you who don’t realise (especially my international readers), there is a certain amount of hoop-jumping that must be achieved in Australia in order to own a firearm for recreational and sporting purposes. One needs to have a legitimate use, which for me is being a member of a recreational sport shooting club, and engaging in target shooting and recreational hunting. At no stage am I allowed to possess a firearm for the purposes of self-defence. I’m rather lucky I am able to own this firearm, otherwise I guess I would be using a Jaktkniv for hunting trips, and that probably wouldn’t go very well considering I only use my hunting knife to cut away at rope or overgrown bush.
.
One must then participate in, and be assessed to pass a firearms safe handling course. After all these requirements are completed, an application to obtain a shooters license must be completed and submitted with proof of the firearms safety course and legitimate use. It took a period of ten months for the Queensland Weapons Licensing Branch to conduct a background check, declare me an upstanding member of the community, and issue me a sporting shooters license. I feel as though if I lived in the USA and I completed a Maryland background check or somewhere else instead, I would have been granted my license much quicker. Then I had to fill out the paperwork for a “Permit to Acquire” with a greater than 30 day wait for my first rifle to be approved and issued to me. Subsequent “Permit to Acquire” applications are much quicker to be approved, generally a fortnight (two weeks).
.
Unfortunately, due to the wonders of living in a Nanny State, I’m not allowed to own certain types of technology. I’m not allowed to own a self-loading rifle with a standard capacity magazine. Obviously, this limits the amount of firearms I can get my hands on, and I can only sit here in envy of some of the rifle collections I see on the internet, especially in the U.S. If you’ve got a nice rifle collection, you may want to consider purchasing a secure weapon storage system to keep your weapons safe and secure.
.
I’m a subject of the Commonwealth after all, which means some pretty big restrictions on what firearms I can own, and the features they have. So, my first preference of a civilian model F88 (sorry, Steyr AUG), which is a platform I have a great deal of experience using and living with, is well and truly out of the question. Unlike some of my American friends who spend many years getting to know a platform (the M16/AR15 family of weapons) and get to carry over that experience to their own time and recreational shooting.
.
If I had my ‘Druthers, I’d have a civilian model (semi-auto only) AUG in it’s original 5.56mm (.223 Remington) or some other calibre based on the 5.56mm NATO length case (or similar), such as 6.8mm SPC, or .300 Blackout. My other choice would be the L1A1 SLR in 7.62mmNATO (.308 Winchester), but that unfortunately, is also not possible.
.
Since I can’t have such a weapon, the search then, for the “perfect – for me” rifle has been mulled over with considerable effort for quite some time. Many discussions, emails, Google searches and heaps of poring (and pawing) over catalogues and rifles in the last few years.
My requirements reflect my shooting and life experiences. I want a rifle that I can use for hunting, plinking or practical shooting competition. Service grade accuracy (4-6inch groups at 100m) is more than sufficient for my needs.
In no particular order, I want a weapon that does the following:
(a). Has decent, controllable recoil., capable of engaging multiple targets (big mob of pigs), or deliver a rapid follow-up giving the coup de grace on an already struck target, in the interests of humane hunting (like a deer).
(b). Fires a round that needs to be terminally effective against large (‘ish), tough animals that have a great will to live.
(c). Be effective up to 200m, possibly up to 300m with suitable care and application of marksmanship principles and knowing the characteristics of the round.
(d). As short an overall length as possible, whilst still having a barrel long enough for affective external and internal ballistics to comply with Point B above, and still controllable as per Point A. In addition, it needs to remain within legal requirements of being longer than 750mm overall.
(e). A useful magazine capacity that doesn’t raise the ire of the authorities. “Large capacity” magazines of more than ten rounds tend to be frowned upon in these parts. Something that also draws the ire of the local authorities is using magazines from Category D (military grade self- loading) weapons. So that weapons like the Remington 7615, which uses magazines from the AR-15 family of weapons tends to garner some suspicious looks from the local authorities. An option for me is to carry extra ammunition on-board the weapon to allow quicker reloads.
(f). A fast, easy to use, relatively simple mechanism.
(g). Capability to add accessories and optics to my own tastes.
(h). Back-up iron sights (preferably of ghost ring or peep type) for when optics fail.
So, like anything I carry out into the wilds, I want a nicely setup rig that I don’t have to think too much about using. My philosophy is keep things simple, and my equipment should do everything to aid me as much as possible.
So, what have I decided as “perfect for me”?
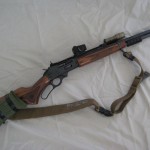
Behold! A Marlin 336W in .30-30 Winchester.
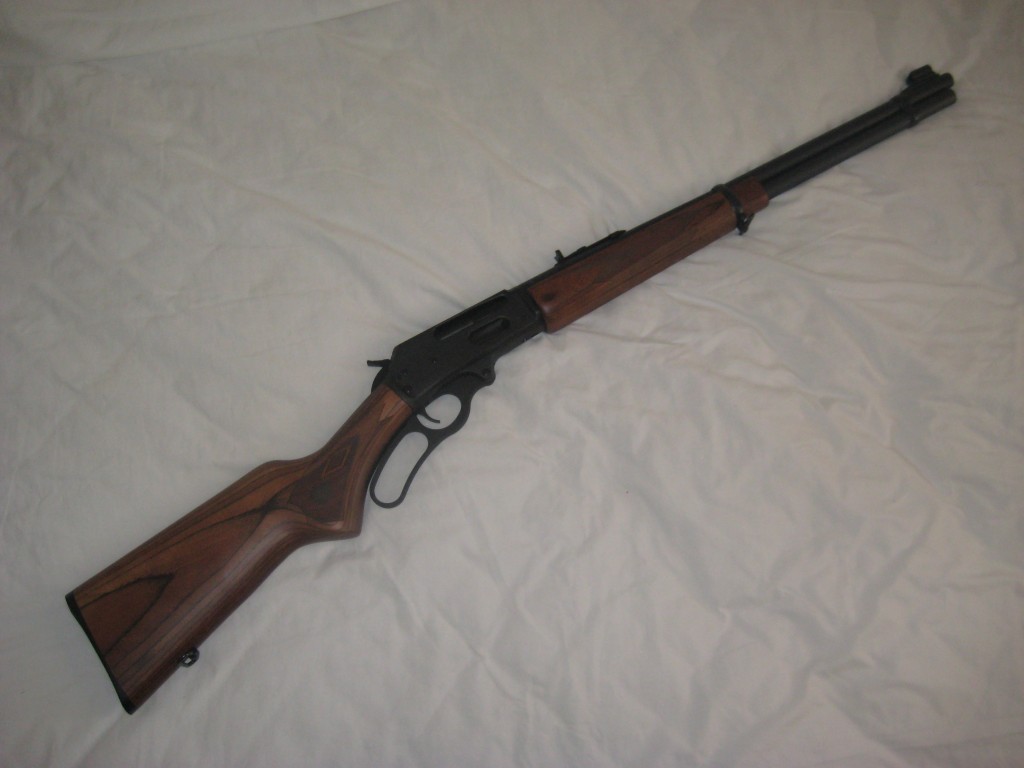
These then are the shots I took just as I brought it home from the local gunshop. Let’s call this the “Before” photo.
 .
.

.
Out of the box, the rifle was a bit rough. Some areas such as the join between the stock and metalwork were not quite what you’d expect for a brand new item. The checkering on the pistol grip and forearm feels a bit too smooth, not really offering much of textured grip.
Thankfully, I’m not too concerned with the aesthetic appearance, as this is going to be a scrub rifle for hard use. So I’m not too worried about looks, just concerned for general reliability.
A rather more important consideration for me was that the buckhorn sights and sling swivels were pretty average. Nowadays gun sights can come in various types for different gun usage. People who do shooting regularly for hunting, etc. will look up information on ‘the best holographic sight‘ or ‘what sight would fit my gun’, and so on. However, some people will still want to use buckhorn sights no matter the progression in equipment.
What drew me into the old lever action?
It’s pretty easy to work out when comparing to the list of my requirements. The lever action gives a quick, easy to use mechanism. Field stripping is pretty easy by undoing one screw, removing the finger lever, bolt and ejector. Magazine capacity is a useful six rounds plus one in the chamber.
The .30-30 Winchester is a classic round that is capable of humanely dropping just about any large animal within the desired range that I can hunt on this continent. It’s also quite controllable for follow-up shots should they be required.
The rifle is capable of having extra rounds loaded into the magazine whilst remaining in the shoulder, and still able to be fired with very little delay.
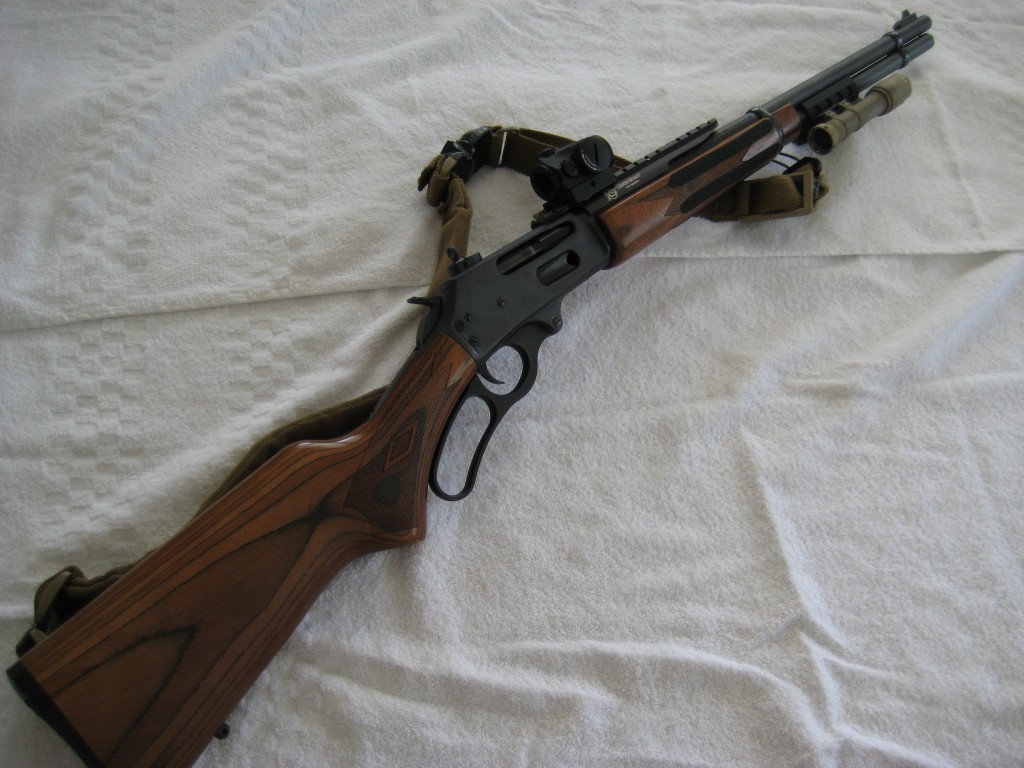
With the aid of fellow Lightfighters and other friends, I’ve been able to acquire some bits and pieces for this rifle of mine. I don’t believe in the “tacticool” concept, I prefer to use the term “enhanced for my usage”.
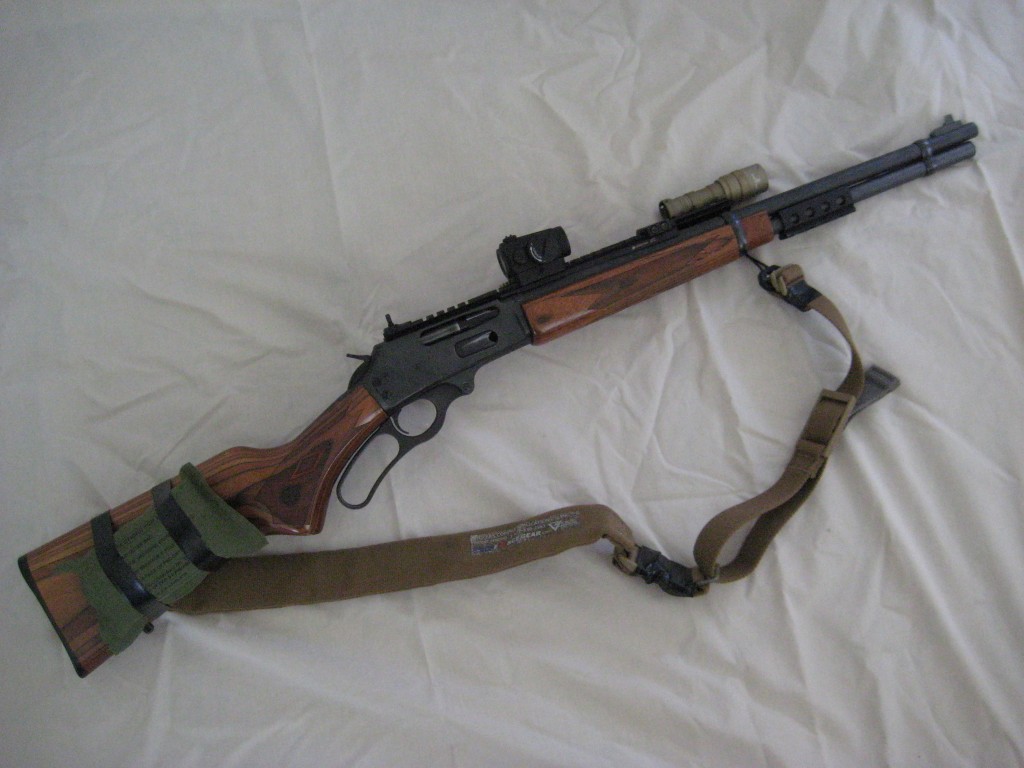
Let’s call these the “After” shots. So, what I have done to “The Mistress”?:
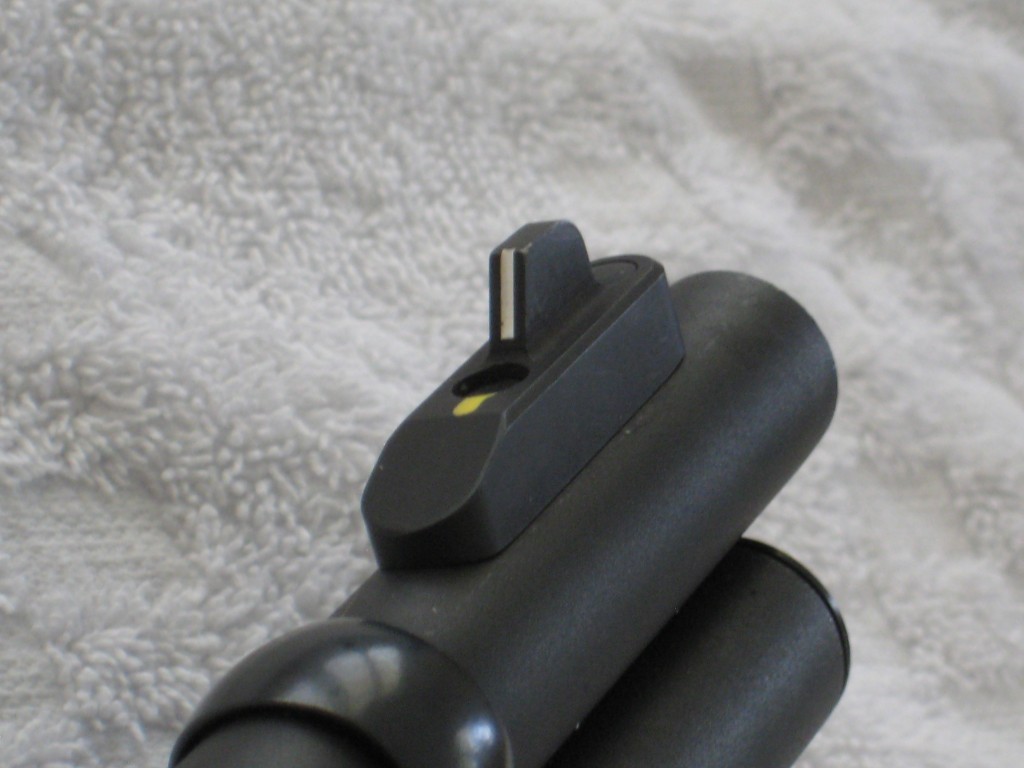
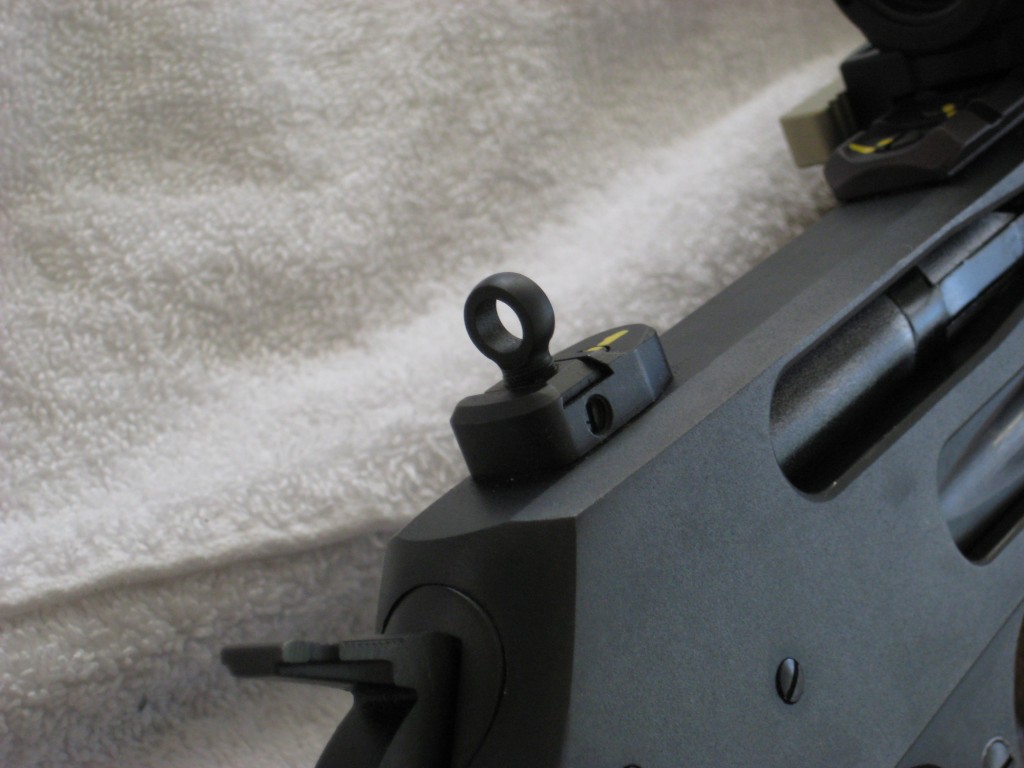
– Install XS Sight Systems Ghost ring Sights.
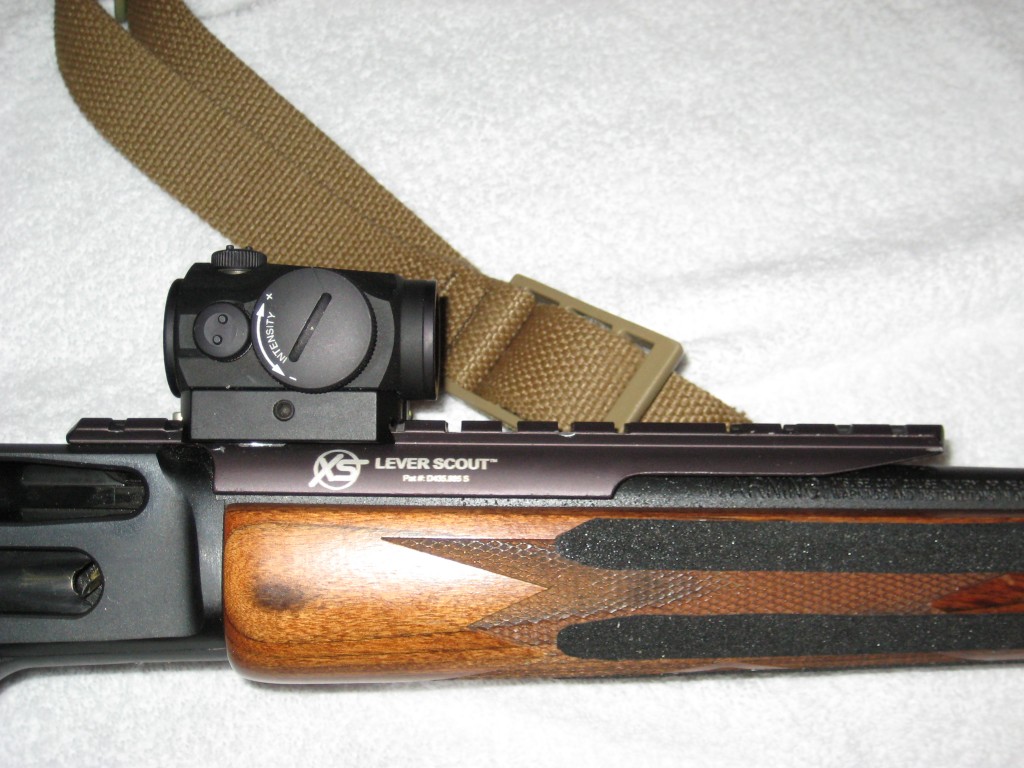
– Install XS Sight Systems Scout Optics Rail.
– Add Aimpoint T1 Micro.
– Install Wild West Guns Laser Rail.
– Add Surefire M600 Scout light.
– Add Blue Force Gear Padded VTAC sling – adjustable, with a universal wire loop adapter at the front end and a surplus cavalry carbine sling mount on the rear end.
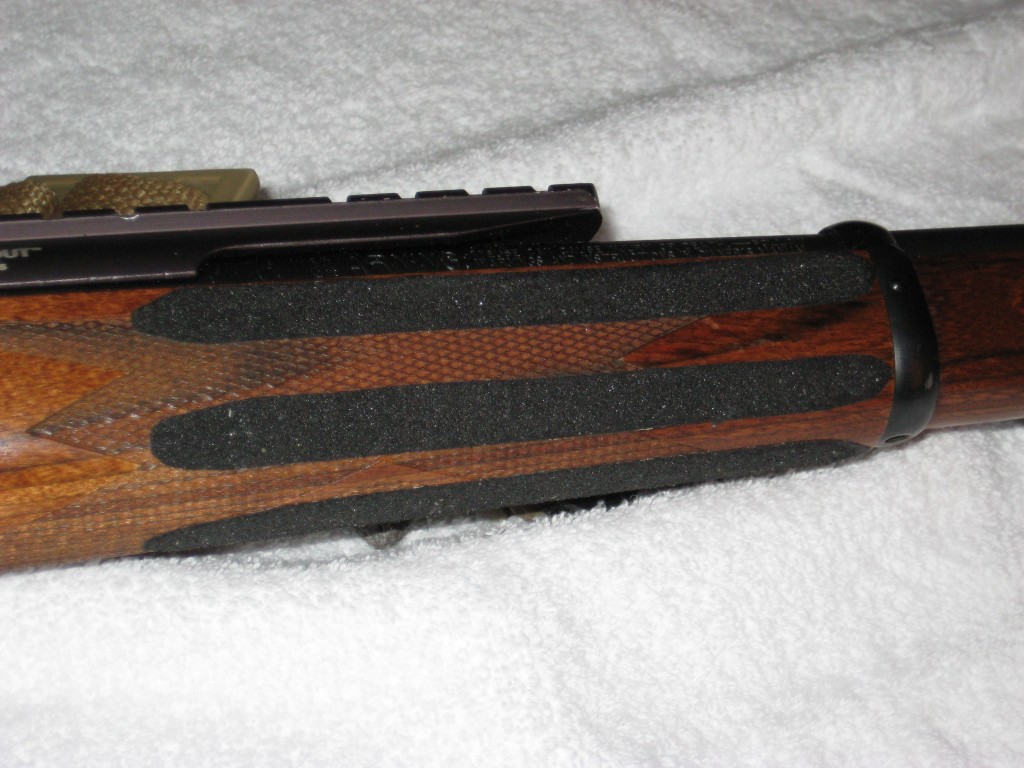
– Add non-slip stair tread tape to the fore-end to enhance grip and handling of the weapon in stressful (sweaty hands) or wet field conditions.
.
I was very fortunate with being able to use my contacts within the industry for a few of these bits and pieces. So let’s go into more detail.
.
SIGHTS –
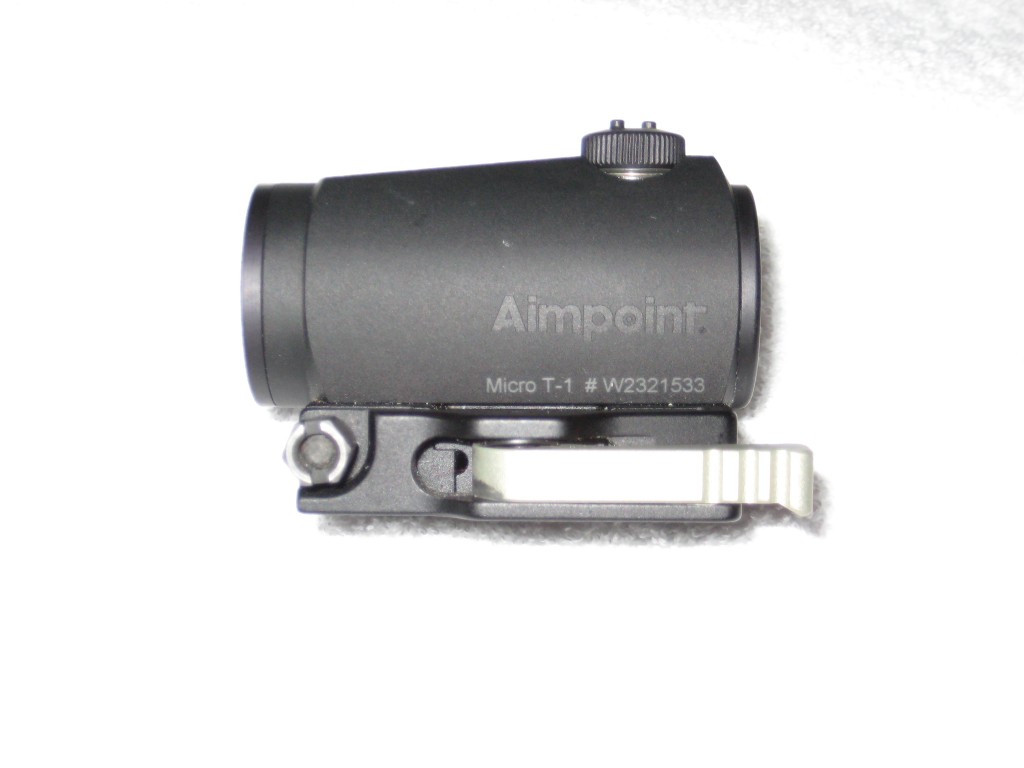
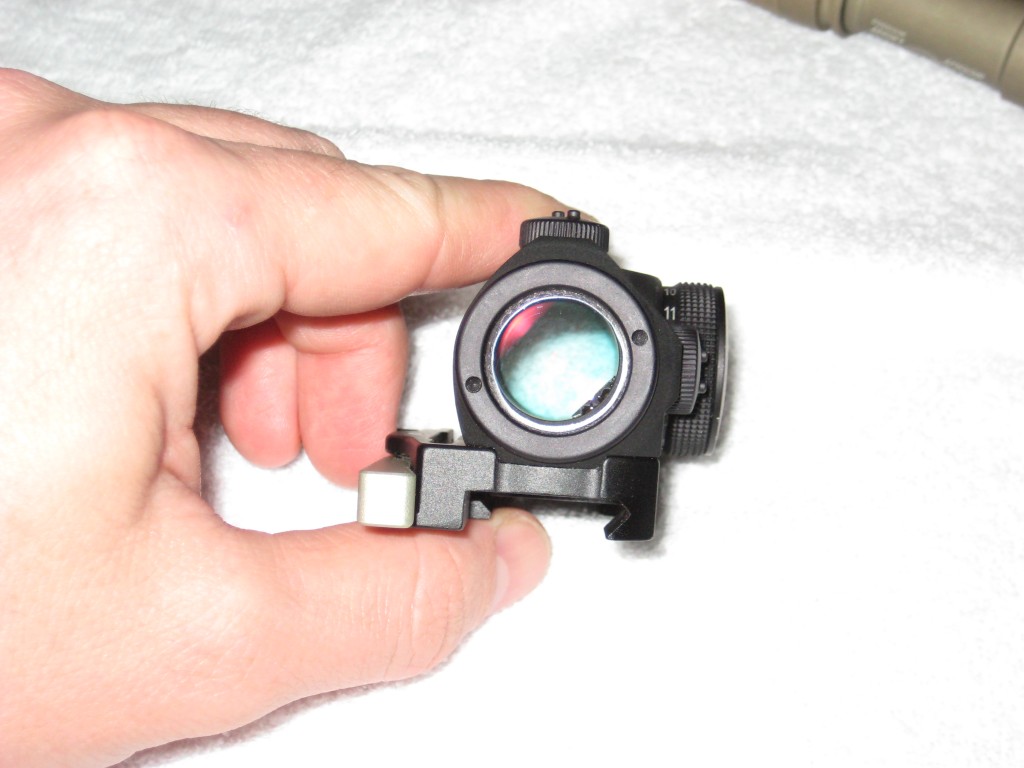
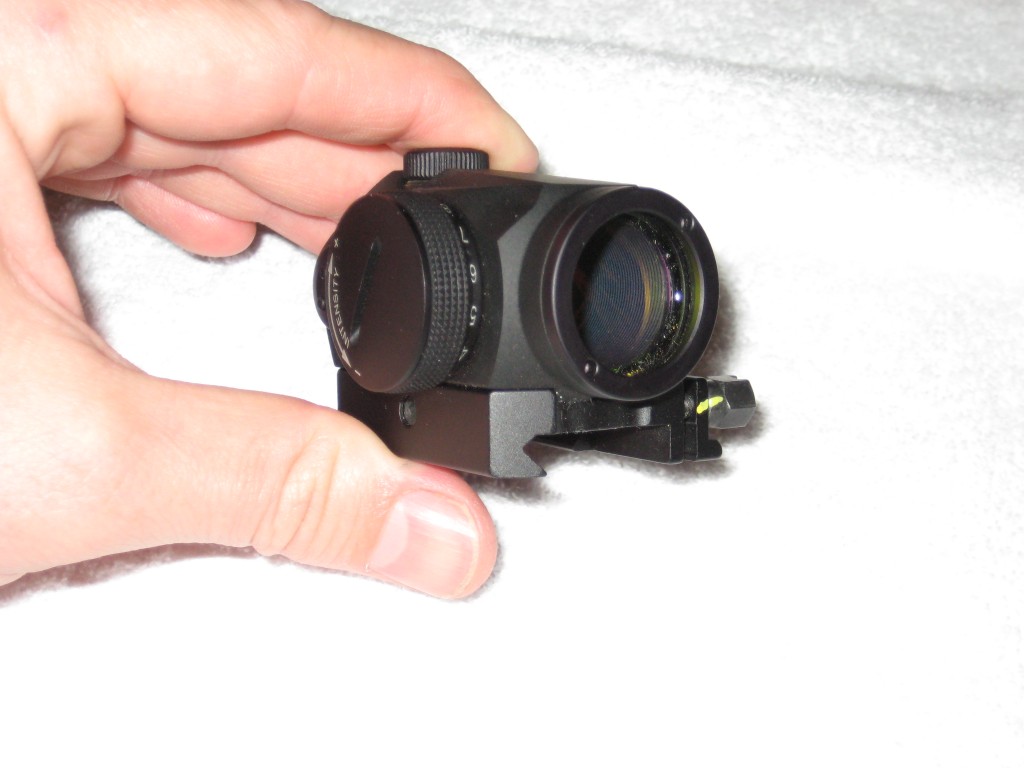
The Aimpoint T1 is a very small, unobtrusive and tough red dot optic. I was fortunate to be introduced to the Australian distributor by the wonderful team at Crossfire Australia. This is the original model with a 4MOA dot.
 .
.
. 
.
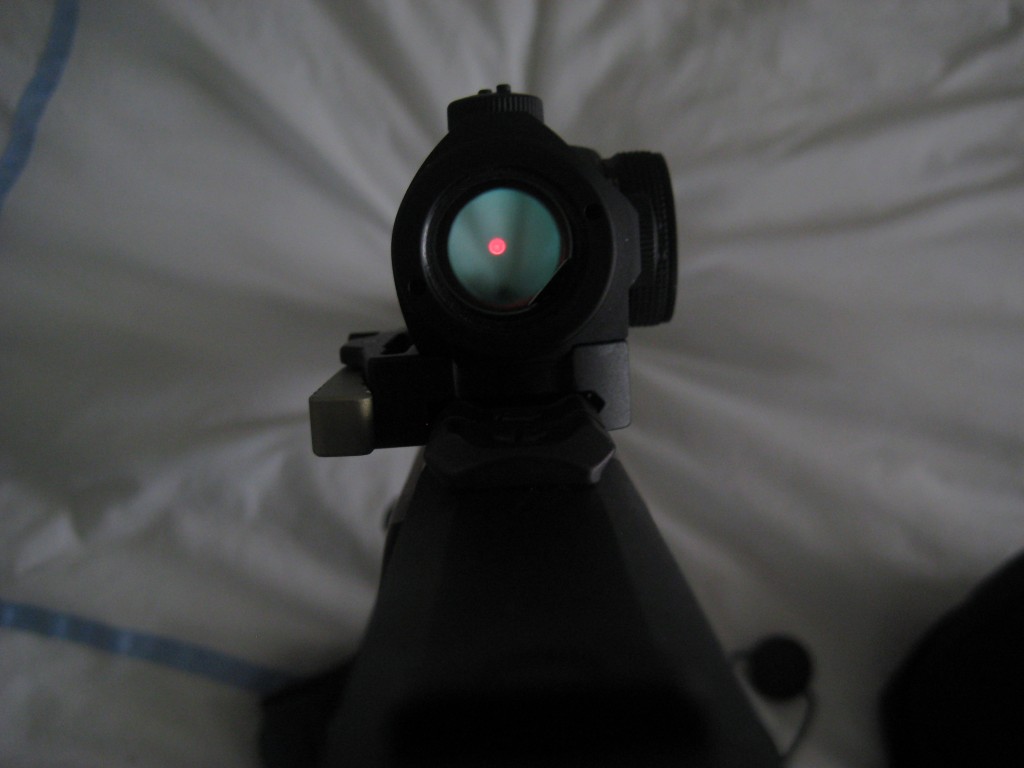
Red dot optics work by the same principles as a fighter jet’s Head-Up Display (HUD), using the principle of an optical collimator, where an LED projects a dot onto a lens which can be seen into infinity. Once zeroed to the weapon, the round will strike to the desired POA (Point of Aim) wherever the red dot can be seen by the firer.
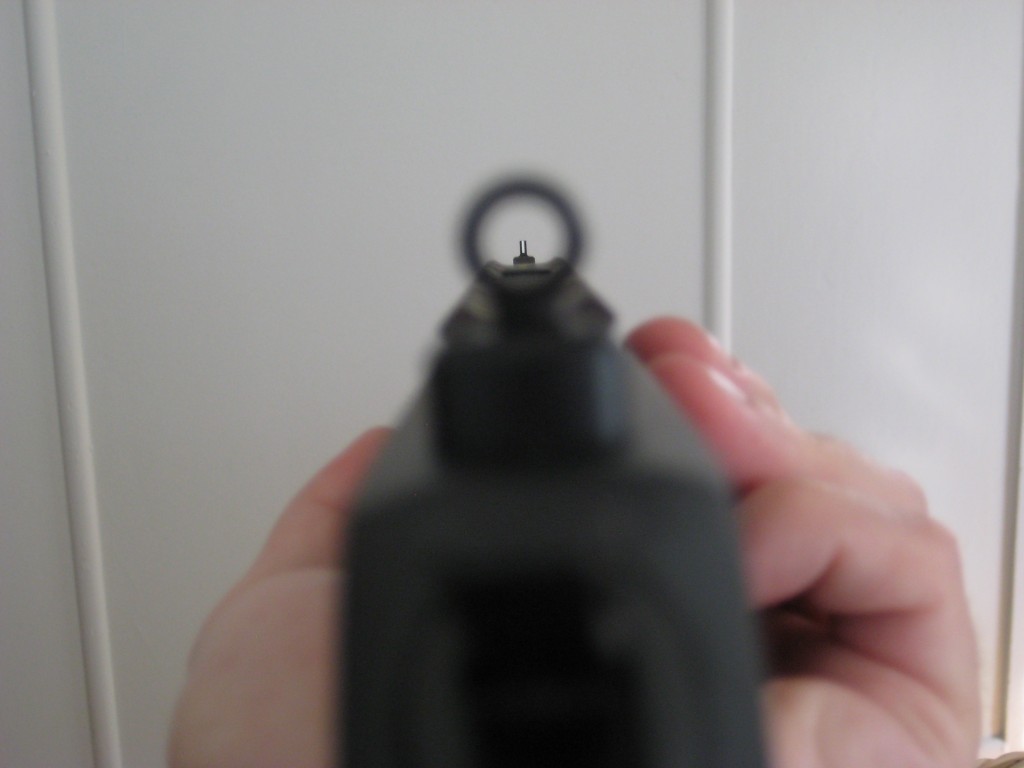
It’s a very easy to use sight, due to being only a single plane for the firer to focus on. It’s as simple as placing the red dot onto the target, applying the principles of marksmanship and squeezing the trigger correctly. Compare this to traditional iron sights, where the front and rear sight must be correctly aligned, then the target acquired, then the focus placed upon the foresight when all factors are ready.
.
The Aimpoint quick release mount was suggested by a fellow Lightfighter who used to work for that company. Many thanks to Colonel Blish for his great advice – I owe you a beer Freddy.
This suggestion was greatly received after the Larue Tactical quick release mount I had originally bought was found to be incompatible with the low profile Weaver profile of my optics rail.
There’s a couple of reasons I wanted a quick release, return to zero mount for my red dot optic.
.
Primary reason is that it’s what all the cool kids have.
.
Secondary, is that should the extremely unlikely event of my optic failing, then it’s incredibly easy to remove it and continue the shooting session using the ghost ring.
.
Thirdly, it’s nice to have iron sights to teach inexperienced shooters the basics before moving onto the “advanced” optics. I’m something of a traditionalist “belt and braces” kind of bloke on some things. I truly appreciate technology, but sometimes feel it’s nice to understand the past so context can be provided for moving onto the future. In other arenas of my life, I’m quite capable and prefer using computer software packages, but still know and understand the background calculations and knowledge required to do things manually.
The XS Systems ghost ring sights and Scout Optics Rail was provided by my old friend Justin when he was working for XS – many thanks to him. I can only hope he really enjoyed the bottle of Bundaberg Rum that was supplied.
XS make some really nice after-market sights and optics rails for a few different weapons, including quite a few pistols, lever action and military surplus rifles – and of course, the ever-present AR15 and AK-47 in the American market. My ghost ring sights are solid steel, and the foresight has a large, easily acquired white strip that works well under lower light conditions such as found in thick scrub or under tree canopy.
Scout Optics Rail:
.
Foresight:
.
Rear sight:
.
Sight picture:
.
SLING –
The sling is a padded VCAS (Vickers Combat Application Sling) from Blue Force Gear. I’ve been fortunate enough to have met the crew at SHOT Show in previous years. The VCAS is an adjustable two-point sling. What this means, is that the length of the sling can be adjusted longer or shorter, via a sliding buckle, depending upon conditions and user requirements.
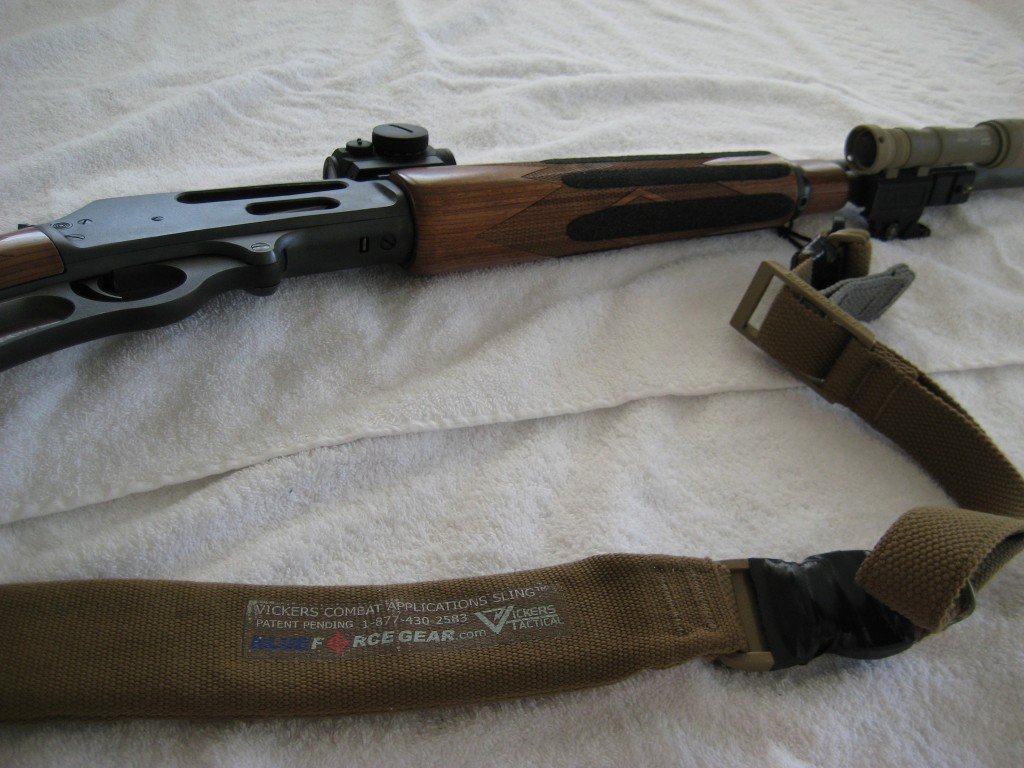
.
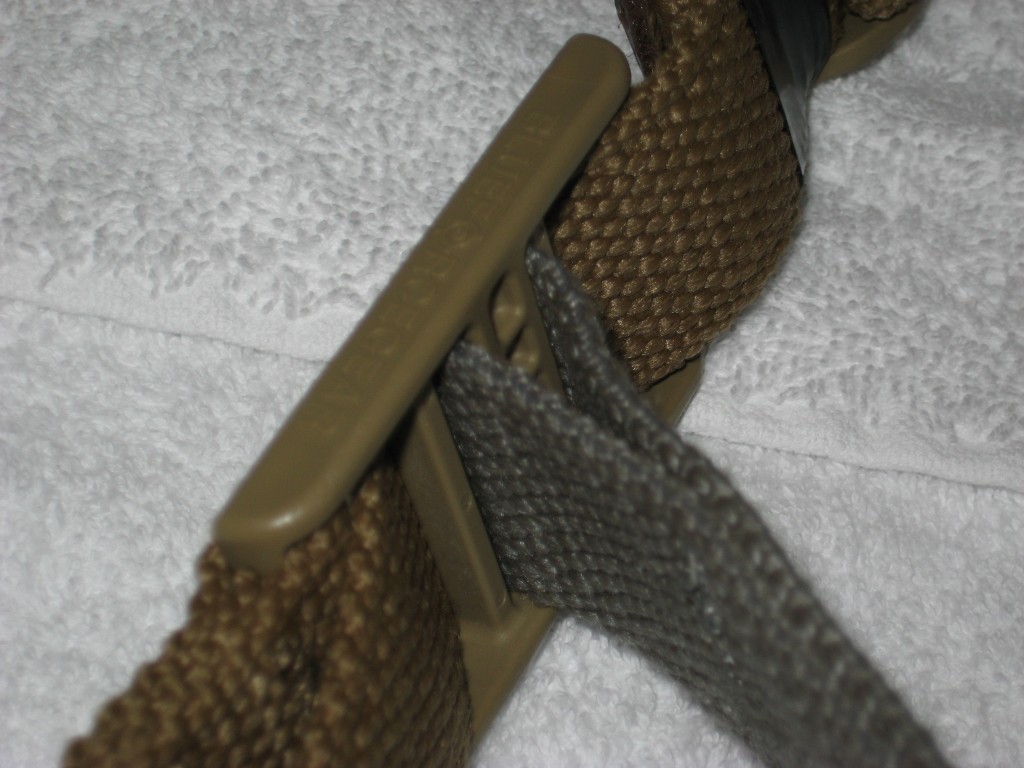
.
I’ve tried unpadded slings for many years, ended up abrading the skin off my neck, and hence prefer something padded. Leave me alone, as I’m getting soft in my old age.
Sling attachment on the forearm wood was accomplished by tunnelling under the barrel band and using a Universal Wire Loop (UWL) also from Blue Force Gear. Thankfully, our friends at OPTactical were able to ship the sling and UWL to Australia.
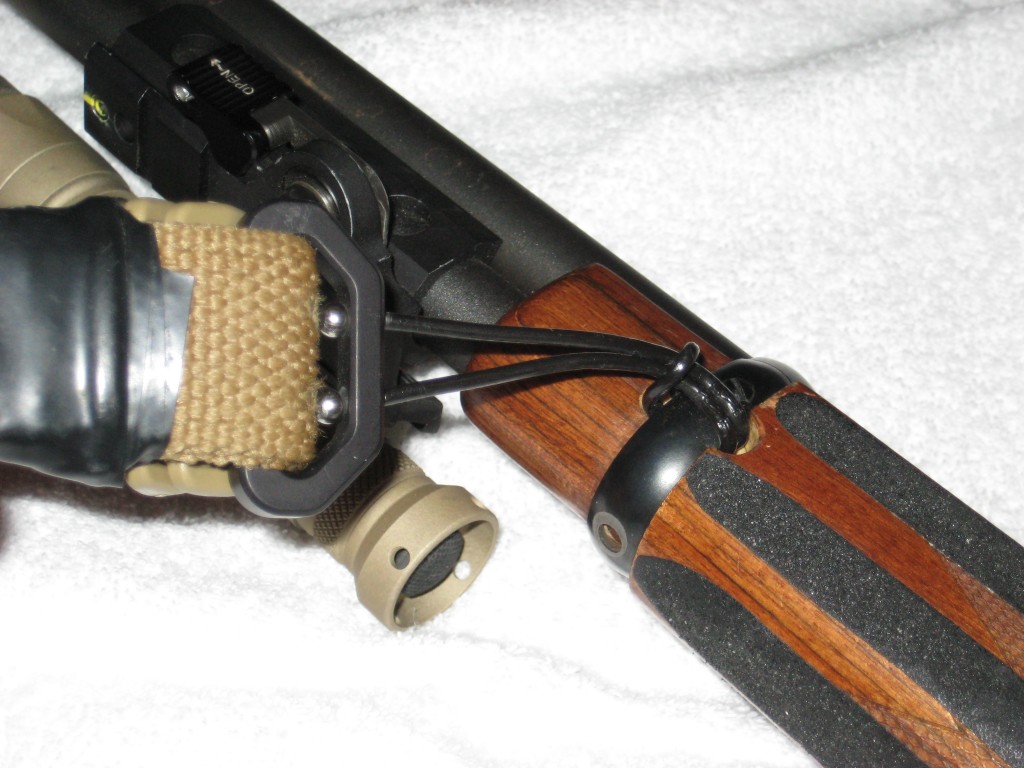
.
The rear sling attachment point is surplus item off the Argentinian Mauser rifle. I installed this sling attachment point myself by using a Dremel handheld grinding tool.
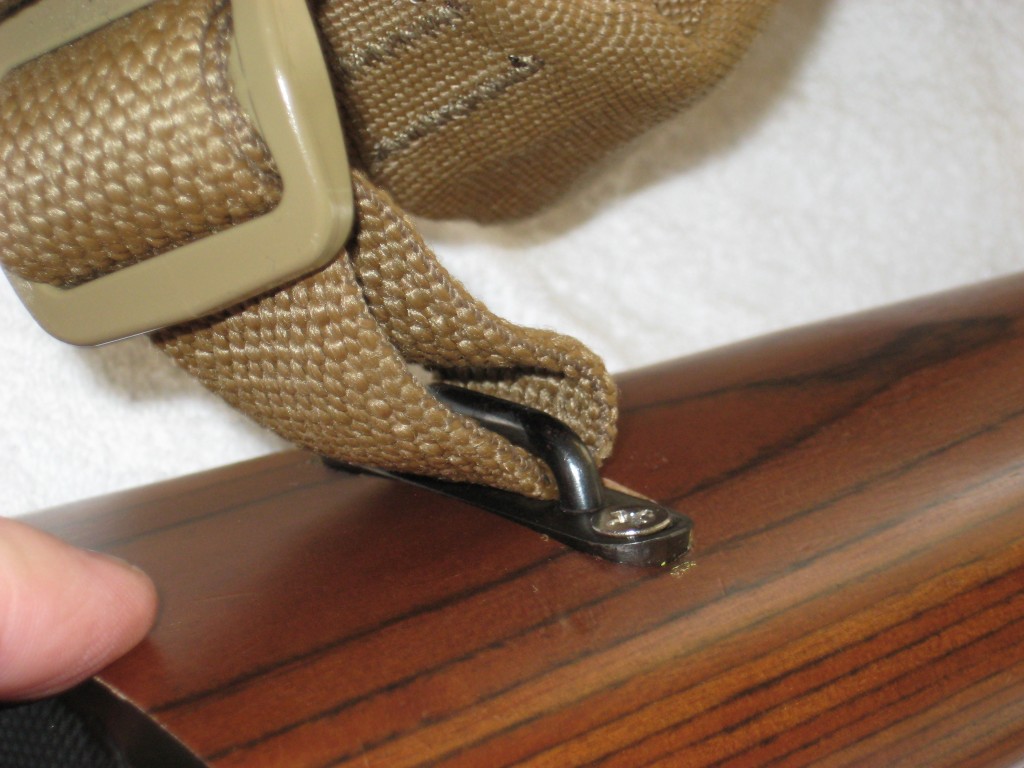
.
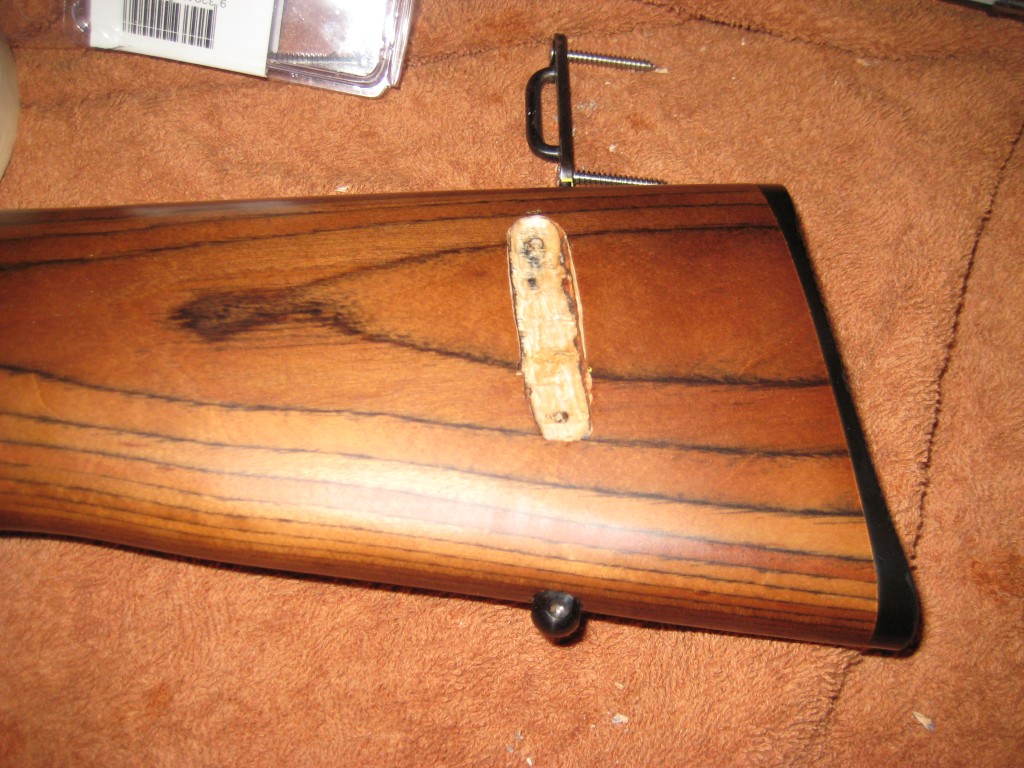
.
The sling setup allows the rifle to hang in front of me for ready use, or to be slung out of the way when required. It can even be used “conventionally” if that’s a requirement, especially for pure admin moves on public range facilities.
I’m really liking it so far. Let out an inch or two, and the sling allows the rifle to hang perfectly for shouldering, whilst being short enough not to snag on too much. Let out the sling a few more inches, and the rifle can be slung behind my body, out of the way.
Sling tight:
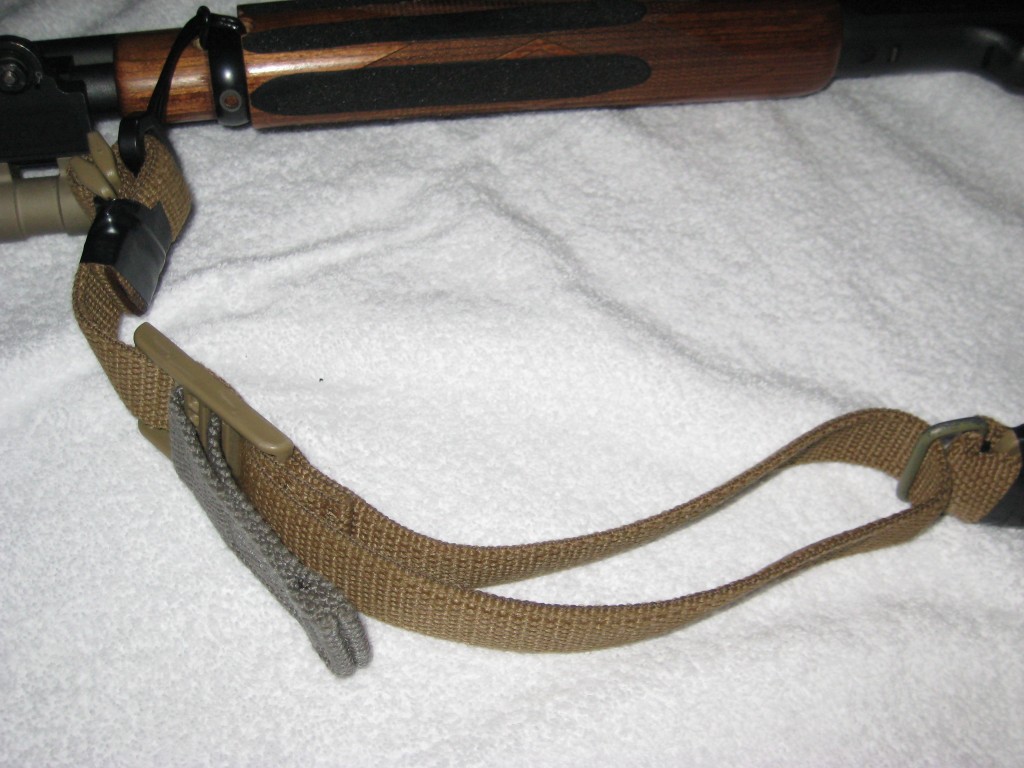
.
Sling let out:
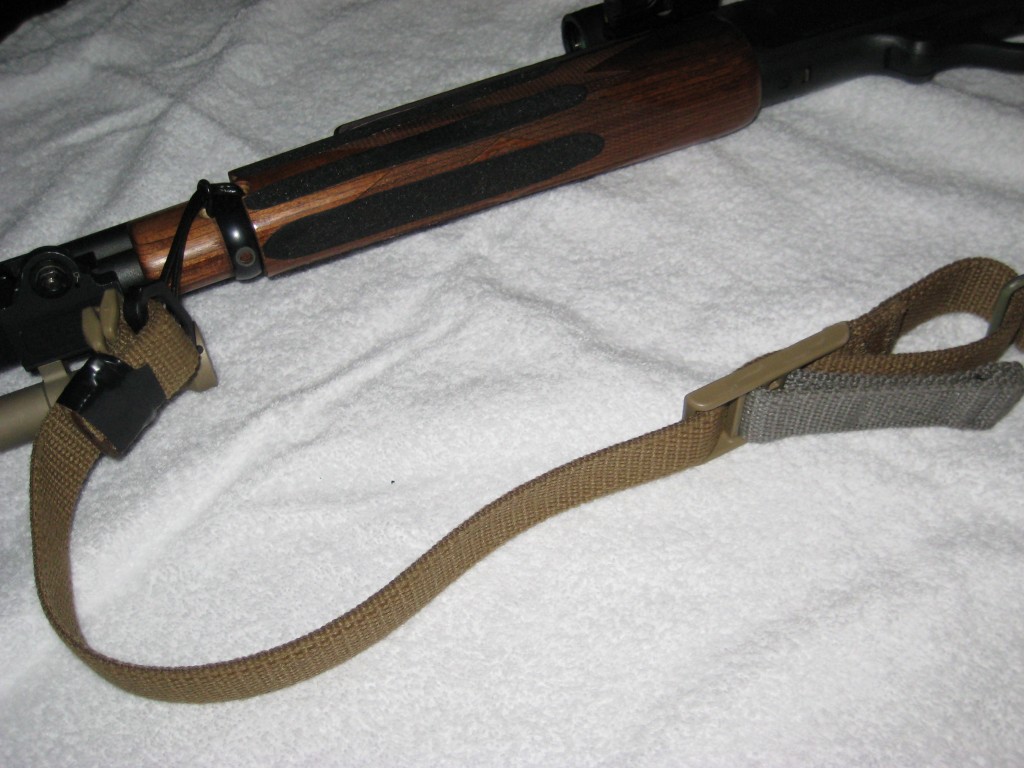
.
In use:

.
LIGHT –
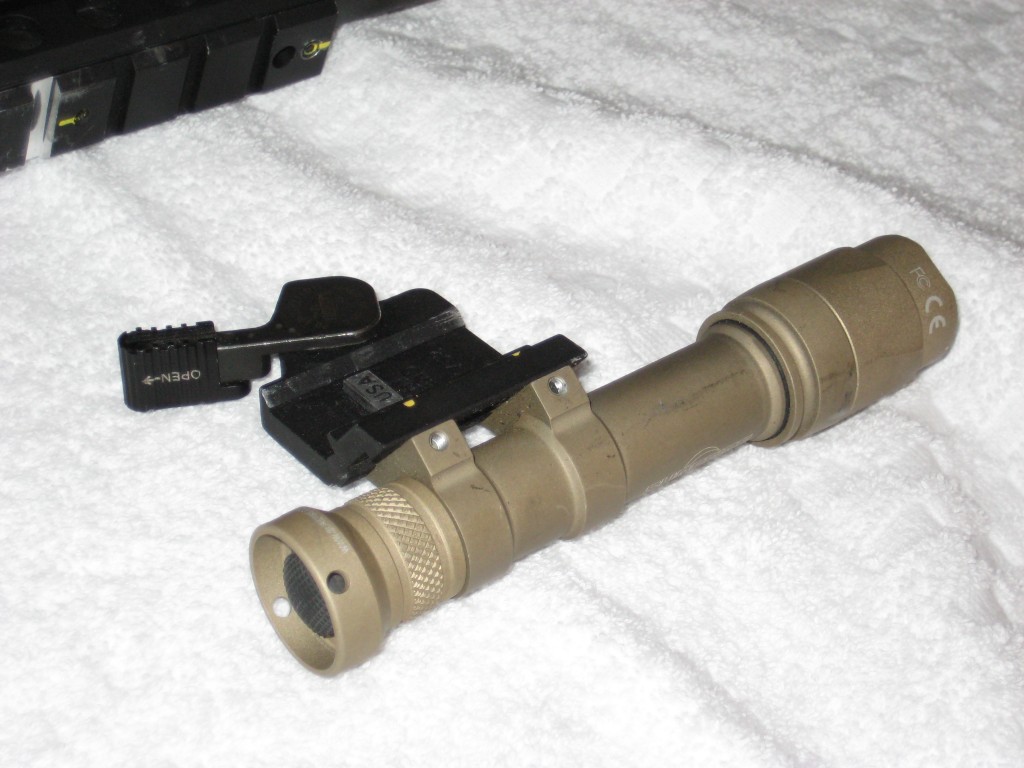
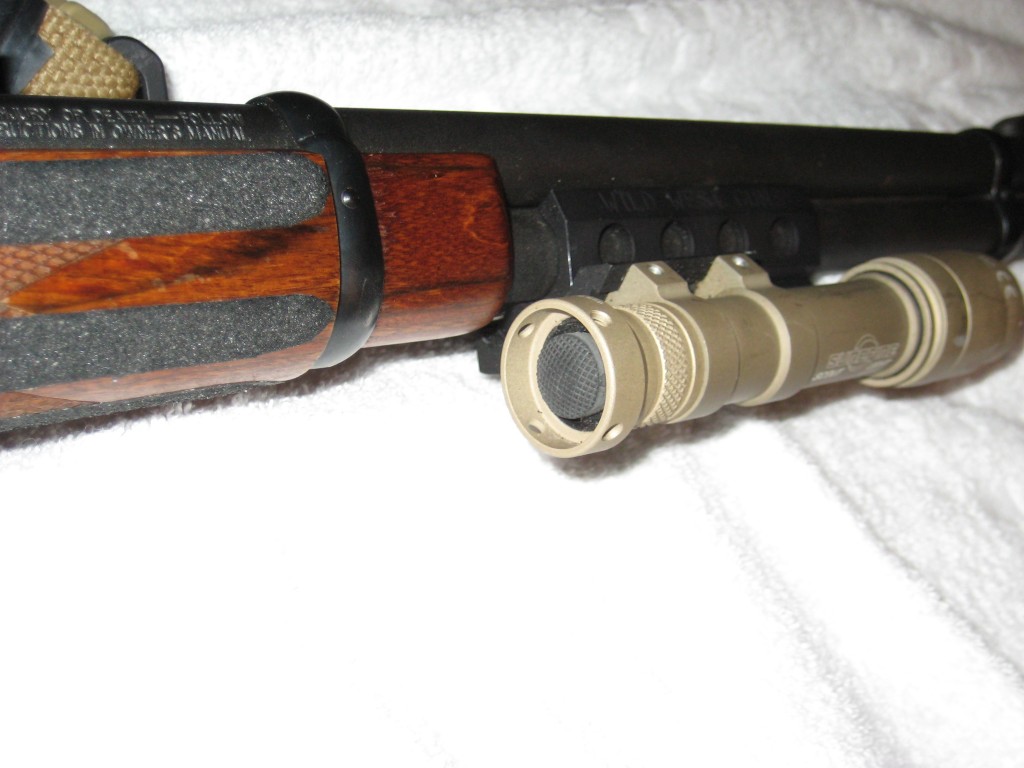
A method to attach a high intensity light was needed, since I want to use this rifle for spotlighting of feral pest species as well. A Google search revealed a solution from Wild West Guns and their laser rail. This rail attaches to the rifle by clamping onto the magazine tube underneath the barrel.
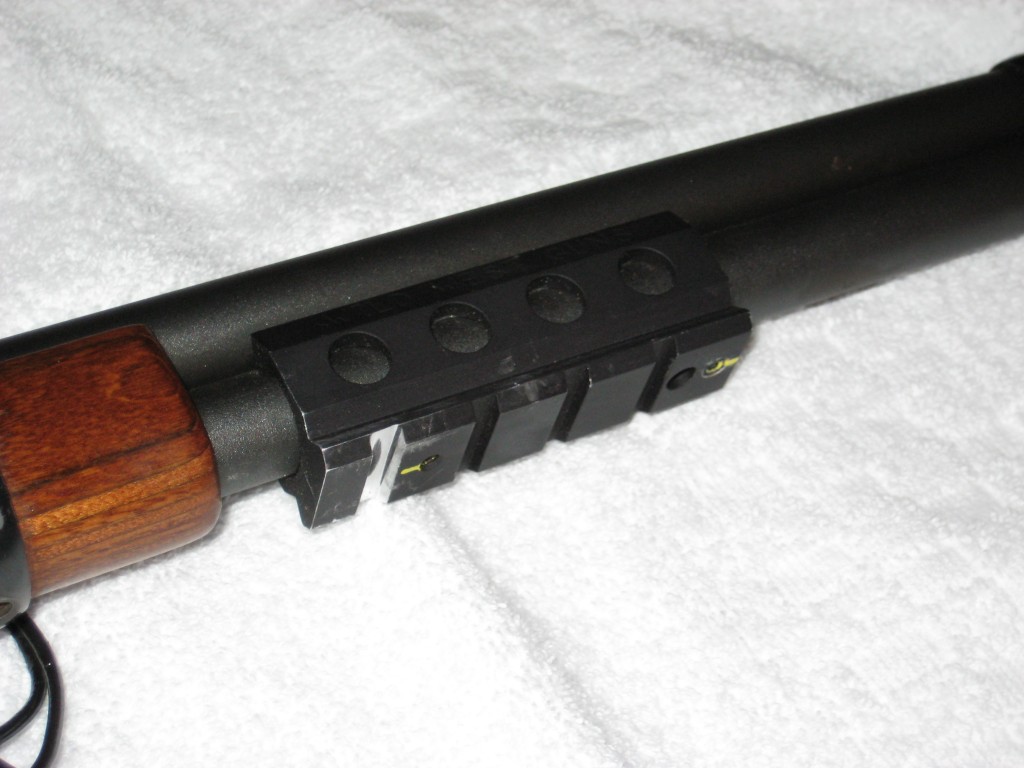
.
.
.
Many thanks to my friend Bing for his efforts to obtain this mount for me. I can only hope he enjoyed some booze given in return.
The light itself is a Surefire M600 Scout light mounted via an Larue offset mount.
The M600C is a two cell (CR123) LED emitter that throws approximately 200 lumens of light up to about 50m. Whilst it is really designed for illuminating targets at bad-breath and across-the-street distances, I’ve found it to be quite effective at up to 100m across a fairly open paddock.
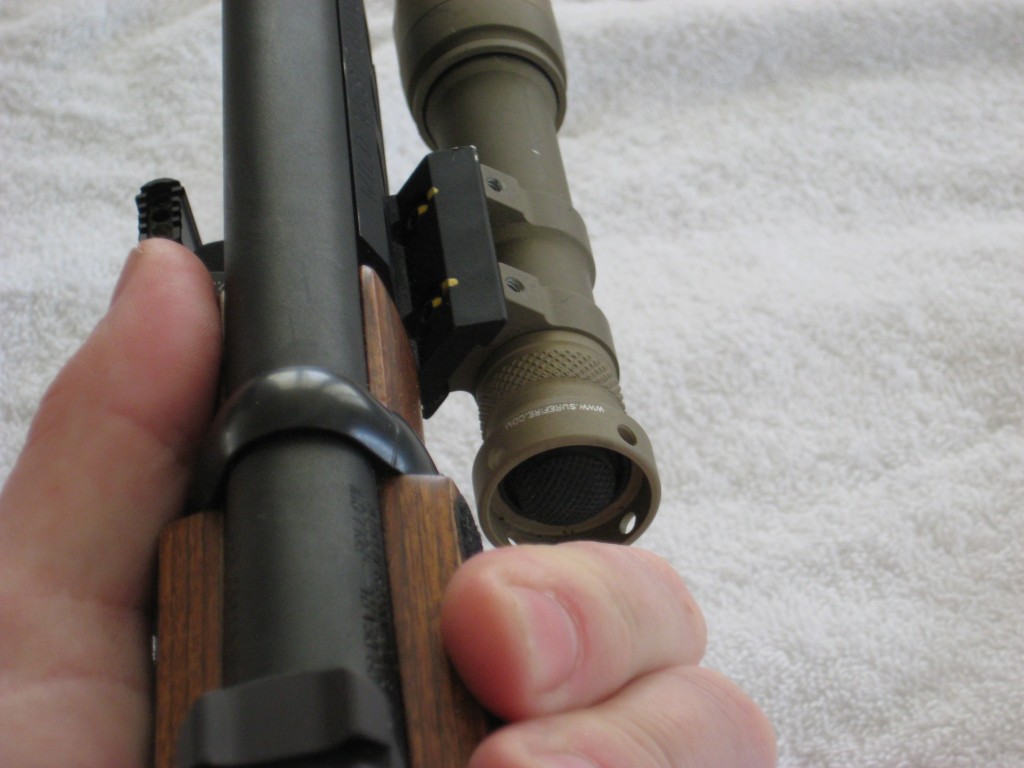
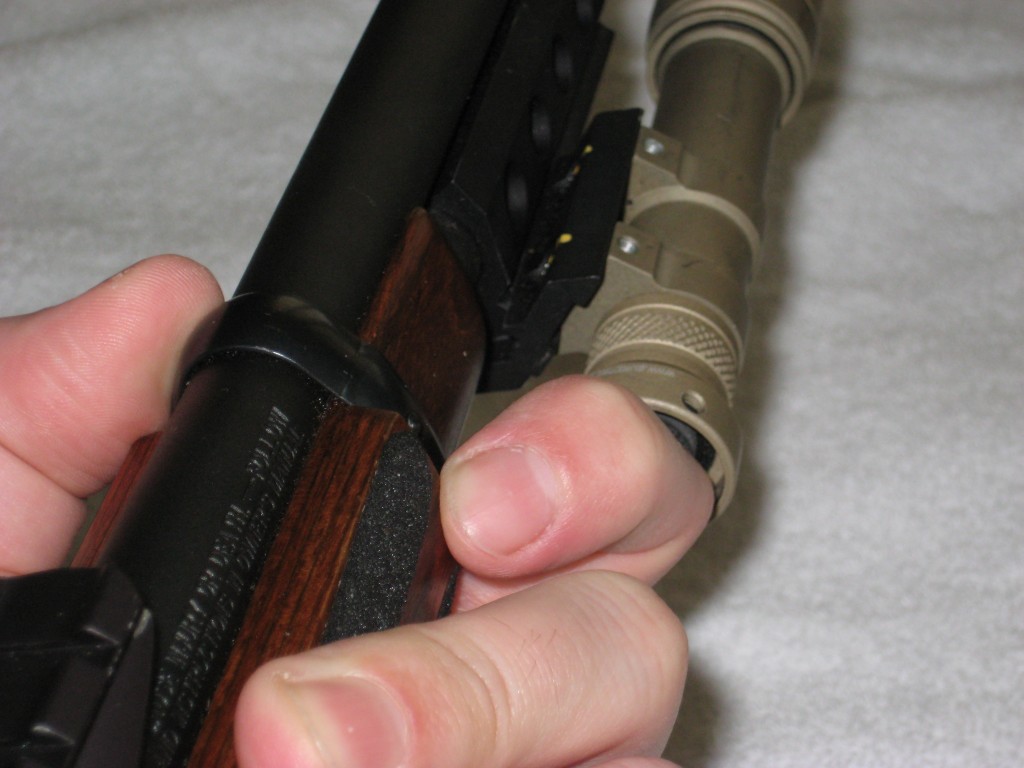
The Surefire is mounted on a Larue Tactical offset mount that puts the light into a decent (but not great) position for use. It’s not the most ideal position, but certainly good enough for my purposes. As can be seen in the following pictures, the light can be activated by the knuckle of index finger of my non-master hand.
.
.
INSTALLATION WORK –
Since I’m all thumbs and would be broke if I was a tradesman, I was very fortunate to find a really good gunsmith in the Brisbane area to do all the work I needed to set this rifle up. Lee from Trentech Engineering is a great bloke, and does some really good work.
He can be found here: http://trentech.com.au/
.
ACCESSORIES –
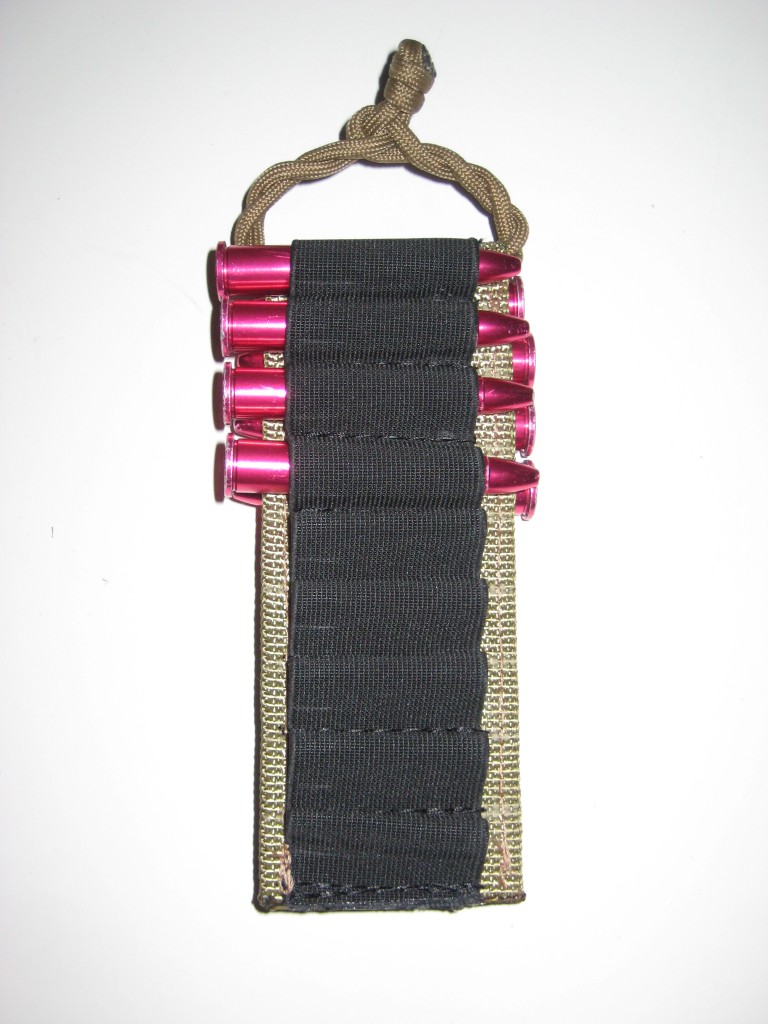
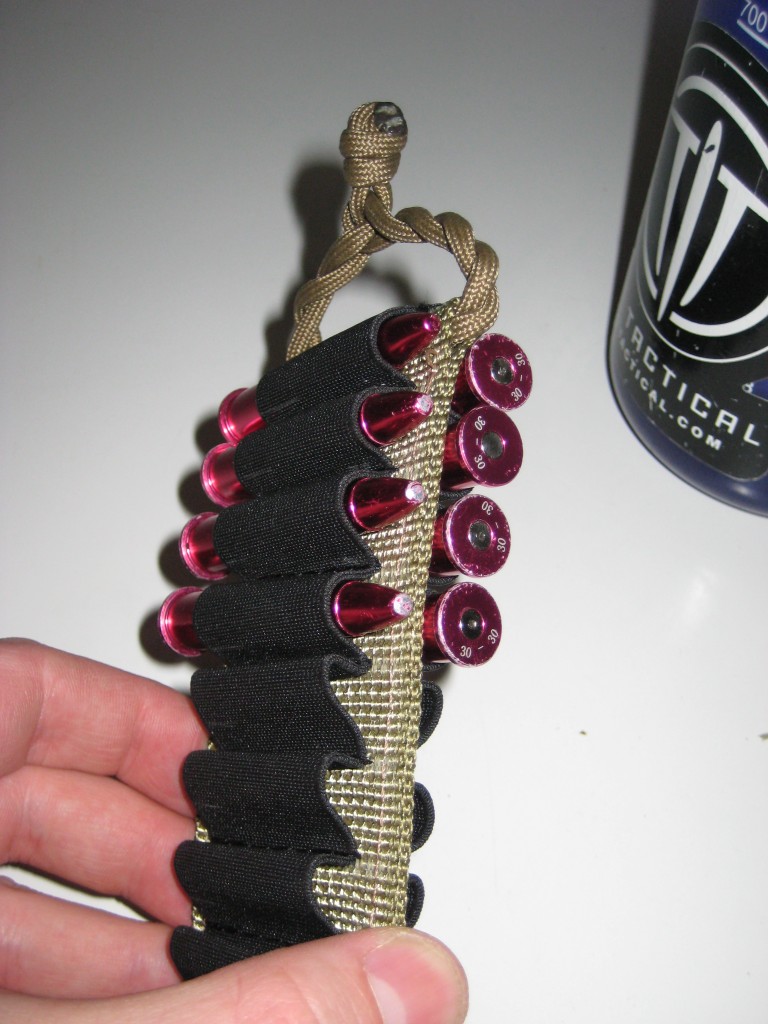
A method of carrying extra ammunition was needed. Some thought was made towards the problem of carrying loose rounds in the magazine pouches of my chest webbing. Following an investigation via everyone’s favourite project search tool (Google), I found there was a solution using elastic loops on a flat rectangle of cordura with a pull-loop.
.
.
I was fortunate to be able to reach out to a friend who is attempting to enter the sewing industry and become his first commissioned job, thereby gain some vital exposure for him. Check them out at High Range Outdoors: http://www.highrangeoutdoors.com.au/
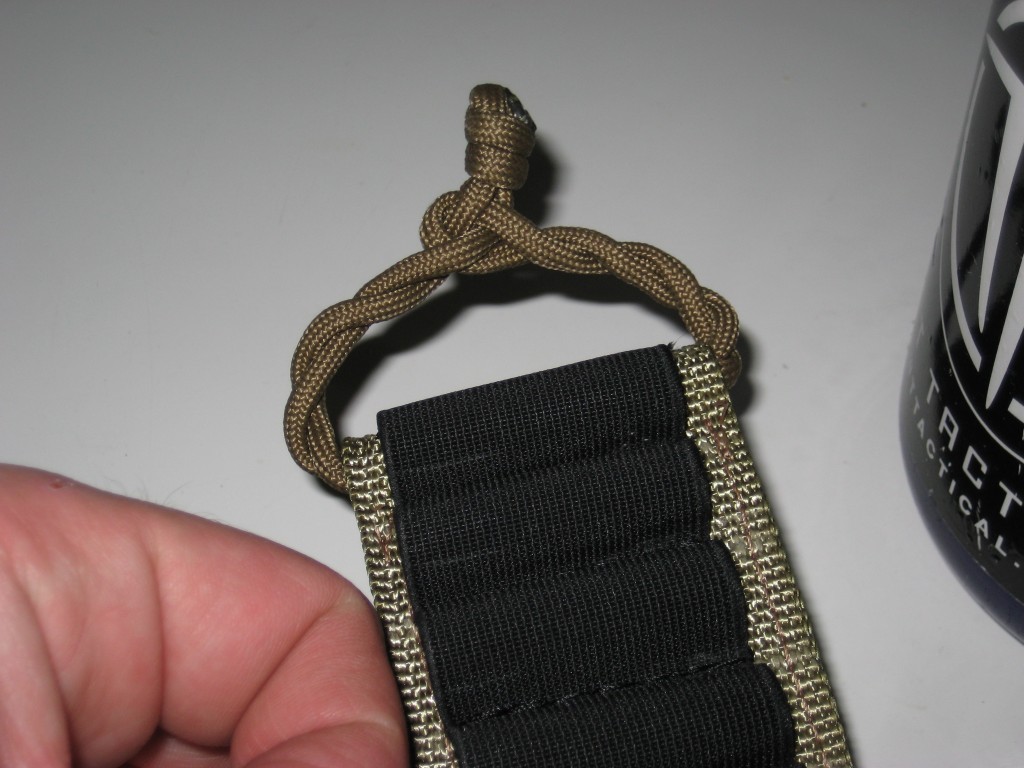
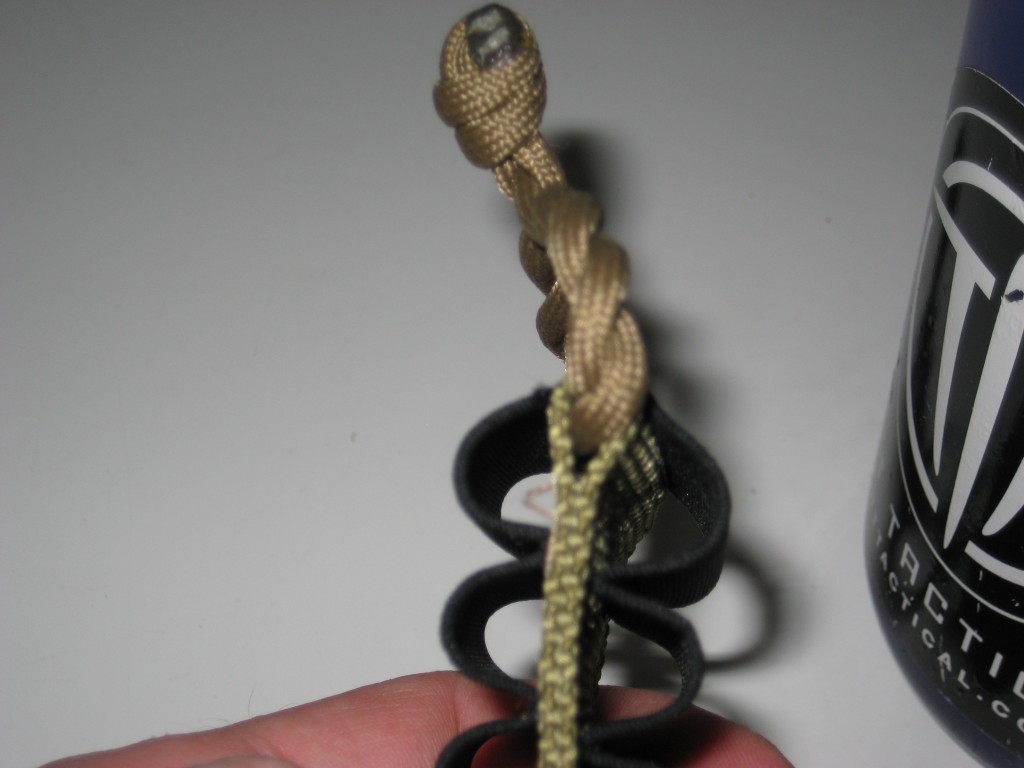
These ammunition cards are great, carrying 18 rounds each. With a plaited paracord pull-loop, they fit into magazine pouches quite easily and allow a slightly more rapid mode of reloading needed necessary in practical and field shooting matches.
 .
.
.
To transport “The Mistress”, I bought a bag. Not a gun bag like most people would buy, but something that doesn’t scream “gun” to my neighbours.
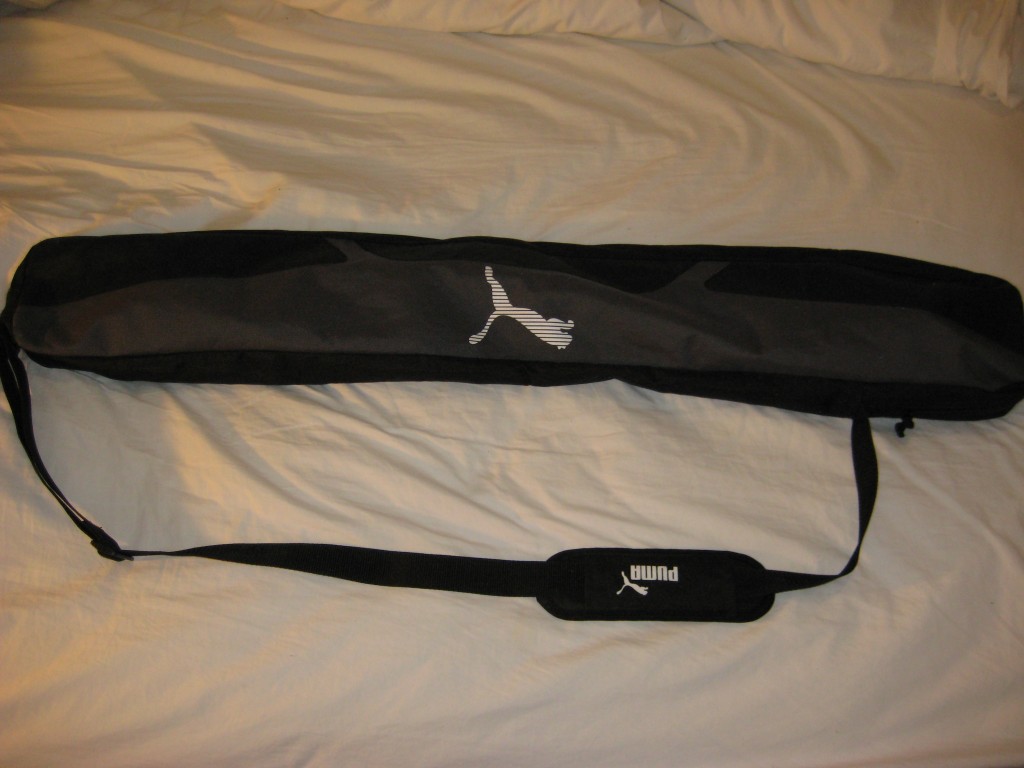
.
It’s not that I’m a rabid shooter, but given some of my neighbours receive many visits from the local plain clothes detectives about their retail sales of recreational pharmaceuticals, I don’t wish to advertise my hobbies to all the retail customers seeking their product.
I just don’t like alarming the sheep with gun-bag shaped luggage. This Puma cricket bat bag works pretty well.
.
WORK TO BE COMPLETED –
I’m still trying to formulate a method of carrying extra ammunition on-board the weapon.
The only other work I can foresee being done in the future is to obtain a Wild West Guns thumb screw for the finger lever, straighten and expand the finger loop slightly, and cerakote the entire rifle.
.
PERSONAL ASSESSMENT:
So, the most important question: how does “The Mistress” shoot?
Or more pointedly, how do I make shooting it less “inaccurate”, since I believe this rifle is more accurate than I am.
Zeroing was a bit unorthodox, and somewhat painful initially. I haven’t shot a conventionally laid out weapon seriously for many years. So it took me some time to get used to an “old fashioned” non-gas operated rifle that fired a round significantly larger than 5.56mm NATO. I was also concerned about quality issues with this rifle since it is a “Remlin” and manufactured after the Marlin factory moved from Connecticut. Rumour was suggesting that quality may not have been as high as it could be, so I was cautious about the reliability and accuracy of the rifle.
So far, I have only experienced two major problems.
First up was the dreaded “Marlin Jam” which comes about by a burr developing on the finger lever which can then seize and lock-up the mechanism. Thankfully, this was expected from my online research, and fairly easy to correct with the file from my multi-tool. Thankfully, this was found by a considerable amount of dry-firing to smooth out the mechanism.
The installation of the foresight is crooked, leading to a zero of the iron sights almost impossible.
The only other problems experienced have been user induced, whether by failing to properly seat rounds in the magazine when loading, or failure to use enough authoritative force (“babying the action”) for operating the bolt.
In order to check reliability and get myself used to a conventionally laid out rifle again, it took me some “warm-up” time over a few range sessions. To be quite honest, some of my initial attempts at grouping were far more reminiscent of patterning with a shotgun. There were times I would have been more accurate by throwing rocks.
Eventually however, I decided that I’d stopped sucking as much, and willing to show my zeroing efforts to the world.
I started at 50yds. Slightly unusual in my mind, most of the civilian ranges I have access to here in Australia are measured in yards, compared to military ranges which are measured in meters. An accident of history, as most ranges existed before Oz converted to the metric system.
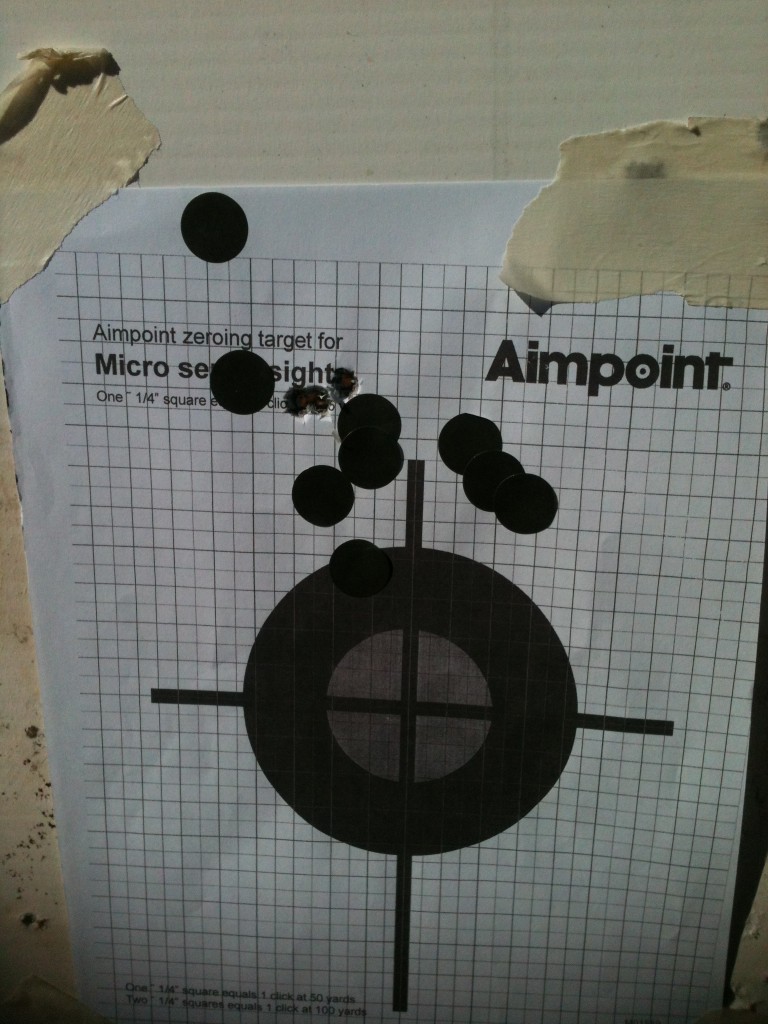
This was proved at one range session, at a distance of 50 yards, three rounds went into a group of less than an inch:
.
I then extended the range out to 100yards.
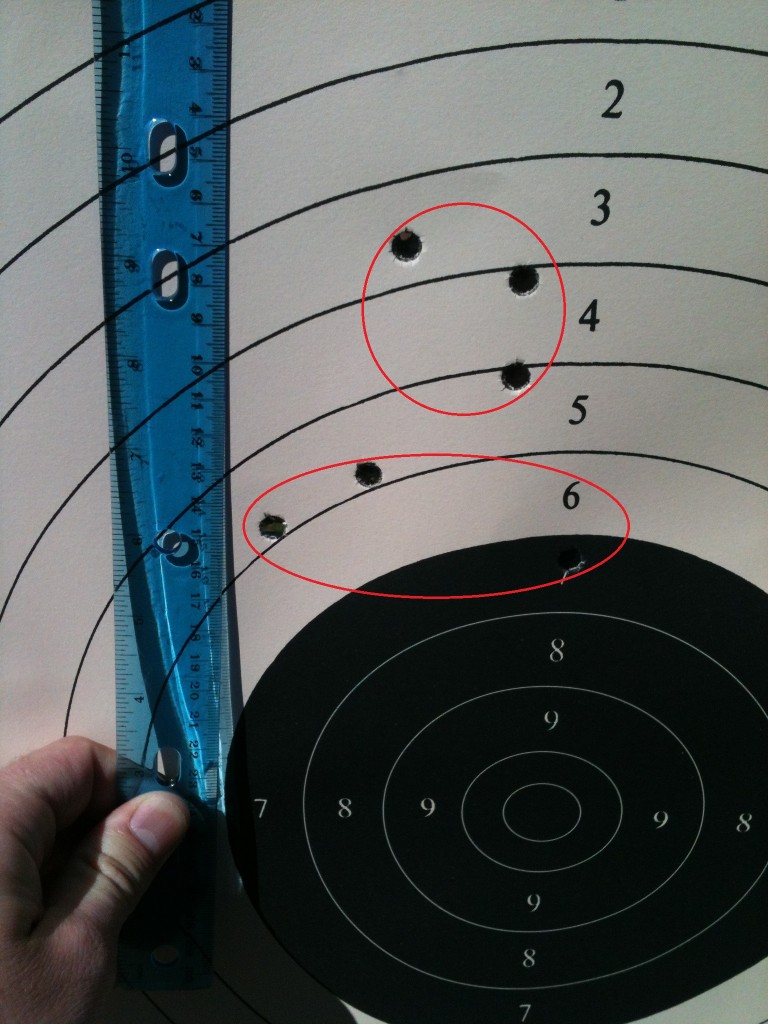
In this photo, six rounds were fired as two 3-round groups. Even allowing for that, the entire combined group is acceptable enough for my desired accuracy of 4-6 inch groups at 100m:
.
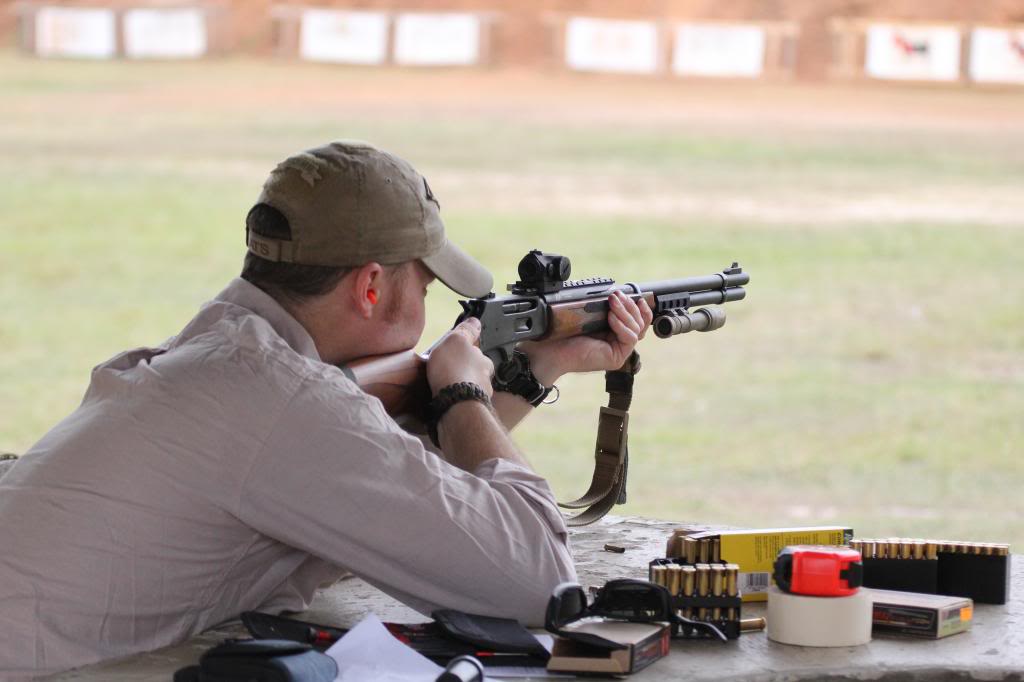
Please note, that these groups were shooting off a bench, weapon unsupported.
.
After I was happy with the adjustments necessary to get the T1 onto target, and adjusted for a 200m zero, I then stuck my Surefire Scout light onto the rail to see what, if any impact it had on the rifle. I’ll be completely honest, I was expecting an adverse effect with the Surefire on the rail. What happened was the complete opposite and quite surprising for me – my group tightened up with the Scout light mounted. It’s got me stuffed how though…
All my shooting is now done with the Surefire attached. I need every advantage I can get.
Now, I need far more practice in off-hand positions. But suffice to say, I’m more than happy with “The Mistress” now.
Improvement to “The Mistress” since original setup has occurred as instant experience has shown itself.
.
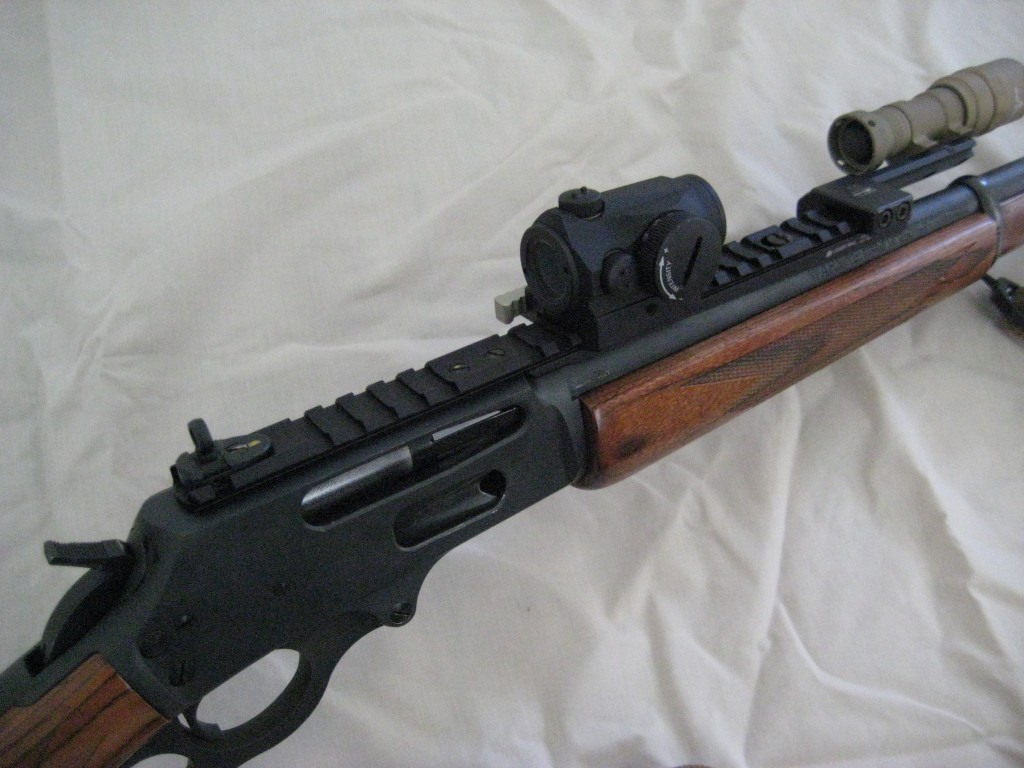
First up, I changed out the XS Scout Optics rail for the Long Rail by the same company.
.
The reason for this is that the Long Rail is Picatinny standard, meaning more accessories can be attached (like my light can be relocated). It also gives me more flexibility in optics selection: I’d like to be able to swap out the red dot for conventional (non-scout eye relief) magnified optics for range shoots with my brother-in-law, who’s as blind as a bat (he is actually legally blind).
The light has been relocated. Basic usage and rehearsal/dry firing has demonstrated that the Wild West Mount was not an optimal solution for my particular needs. It shifted under recoil, and even though the light was relatively accessible, it wasn’t a perfect location for me. It could have been remedied by a cable switch, but allied with the shifting mount, I thought it more prudent to move away from it.
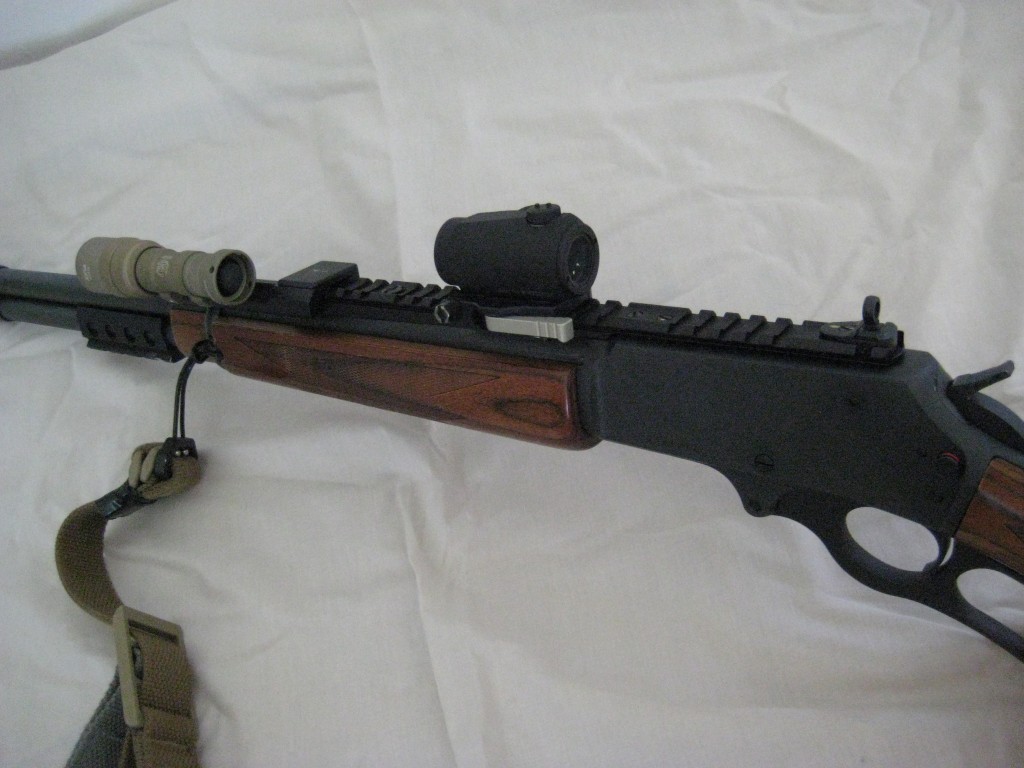
With the fitting of the XS Long Rail, an off-set Thorntail mount was obtained.
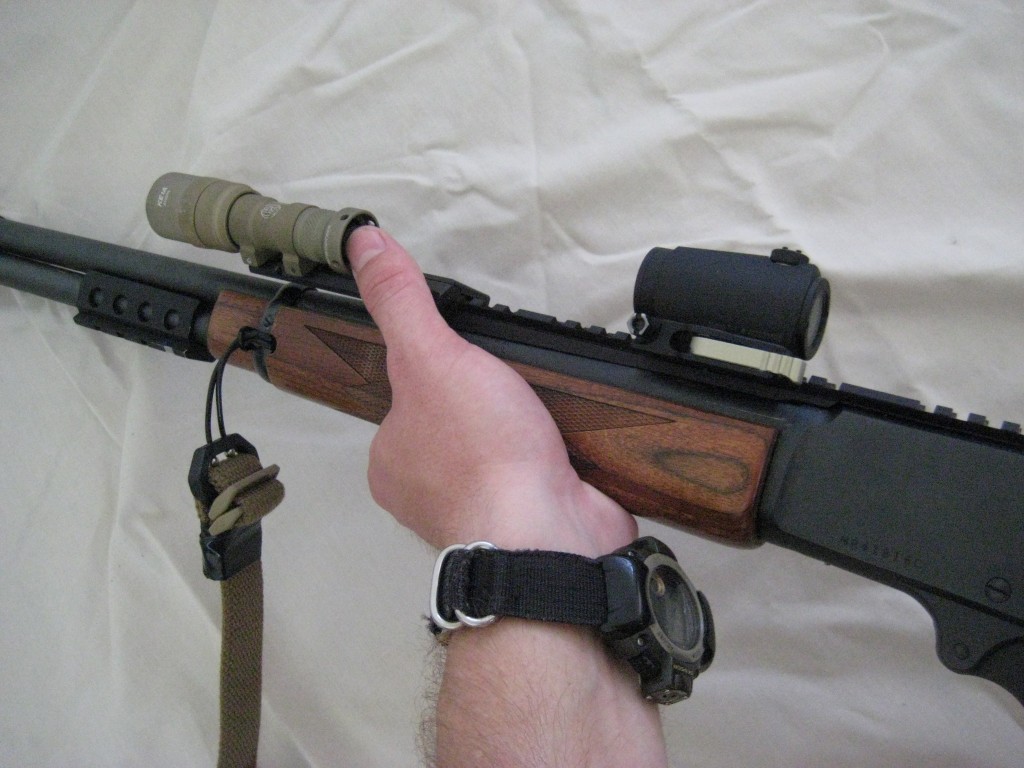
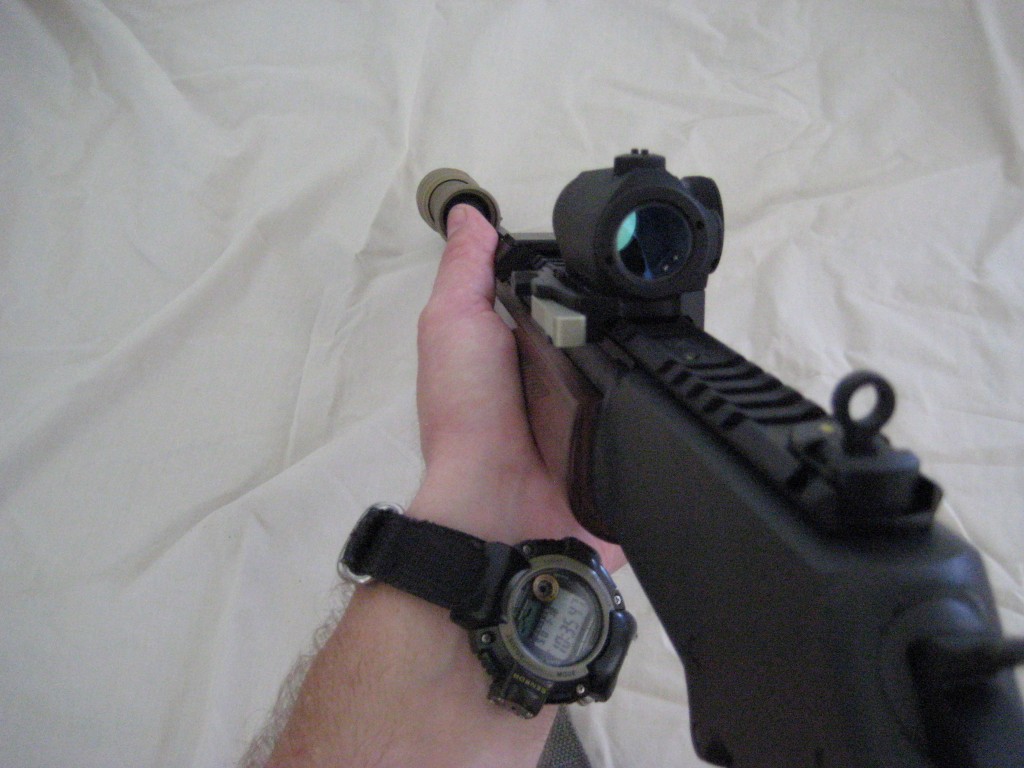
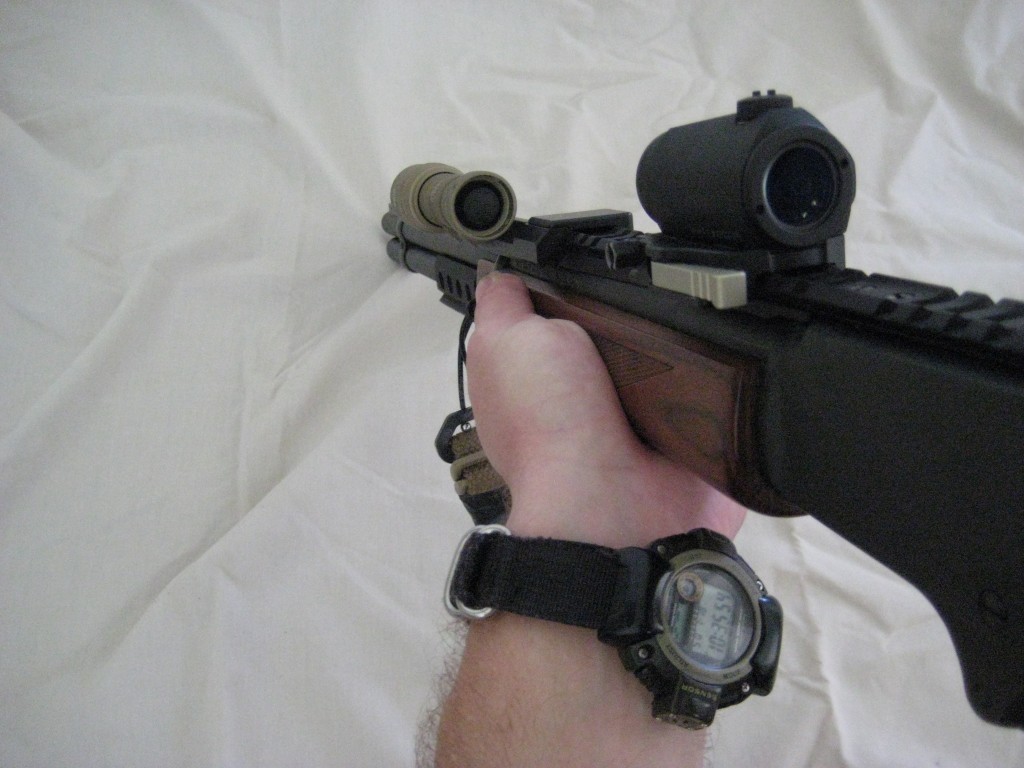
The Thorntail mount puts my Surefire light in a far better location now, at the 10-11 o’clock position, enabling the switch to be actuated by the thumb of the non-master hand, all without significantly changing my normal firing grip. Ergonomically, this is much better, and better suits my shooting style of using my left thumb as a rough aiming guide to get my sights onto target.
.
At the moment, my larger M600 Scout light is having some work done – I managed to strip out one of the mounting holes. So I have my M300 Mini-Scout taken from my .357 Magnum Marlin 1894c in its place. Thank you Lightfighter for introducing the concept of a back-up rifle! My primary is fully functional with similar spares and accessories across the fleet.
.
.
.
In addition, this now puts both of my lever action rifles the same in terms of manipulations of the bolt, reloading, sight picture and light activation. This has been noted by several mates on range shoots when they switch between platforms.
In the future, I will also be obtaining a rimfire lever action for even cheaper shooting and training.
Internally, there have been some changes. Wild West Guns do some really good parts, and I have used a number of their options as follows:
The OEM ejector has been swapped out for the Wild West Guns Bear-proof ejector. It really does inspire confidence to know that there is stuff-all chance of parts failure now, with the additional advantage of having the original as a spare if the Dark Gods take a disliking to me.
The factory trigger has been replaced with the WWG Happy trigger kit. From an extremely floppy, sloppy and heavy trigger, it is now much crisper and lighter (approximately half the pull weight) and ‘feels’ much better.
Grip tape on the forearm is an ongoing issue. The original sandpaper-like non-slip tread tape I used lost its non-slip surface far too quickly. I tried another product that had a more rubbery texture. But that was very susceptible to heat, leaving a very sticky and messy residue. The search continues for a decent non-slip product to use.
I’m now really happy with how The Mistress is setup.
The only things left to do is straighten the finger loop slightly, cerakote the weapon, and find some way of mounting a Magpul AFG onto the forearm.
Posted in Civilian, Weapons usage and accessories by 22F with 6 comments.
Leave a Reply